Azure Cloud Shell is an interactive, authenticated, browser-accessible shell for managing Azure resources. It provides the flexibility of choosing the shell experience that best suits the way you work, either Bash or PowerShell. Whereas it also provides the flexibility of choosing either working with Bash or PowerShell. You can directly navigate to the shell account from the Azure Portal by visiting this link https://shell.azure.com. Here you can work directly with the Shell, where you can choose either to work with PowerShell or Bash. kindly refer to some of my contents: How to configure and install ansible on Azure VM, how to Add or Remove Network Interface from a VM in Azure, how to use Azure key vault secrets in Azure pipelines and understanding the overview concept of Azure cloud shell.
In comparison to the Azure resource management, we either use the Azure portal or Azure PowerShell or the Azure CLI’s. In this article, we will explore another useful way of managing Azure resources, i.e. Azure Cloud Shell.
How to access Azure Cloud Shell
The Cloud Shell can be accessed in the following areas: Using the Azure Web Portal Azure portal:

Using the Cloud Shell https://shell.azure.com
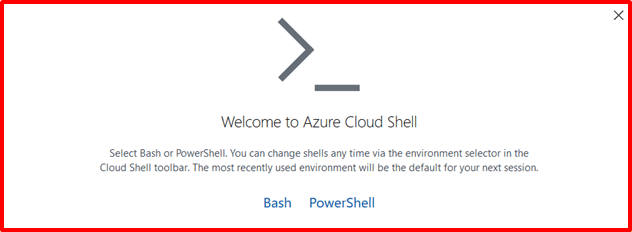
Once the Shell portal opens, Click on Create Storage. It creates the Azure resources and launches the default shell, as shown below.
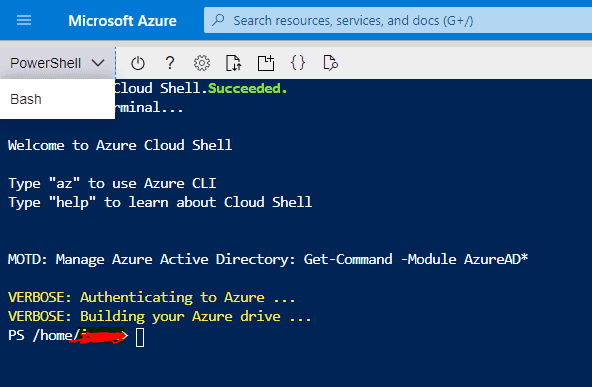
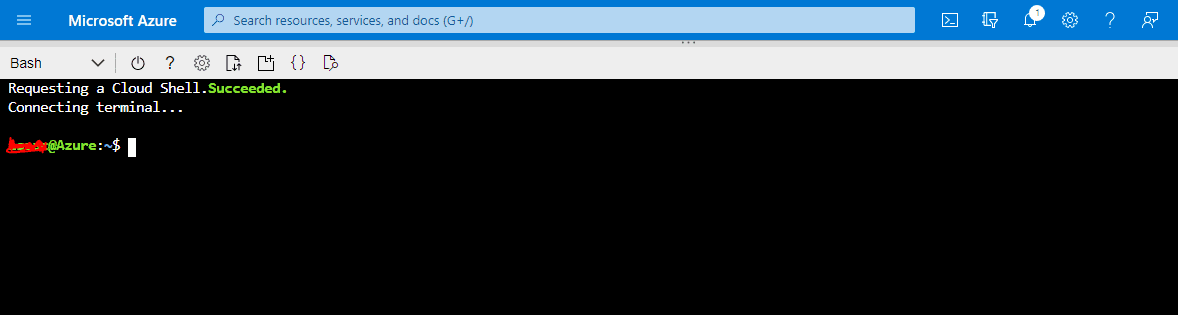
After the first launch, you can use the shell type drop-down control to switch between Bash and PowerShell:
Then choose Bash to switch from the default Azure Cloud Shell.
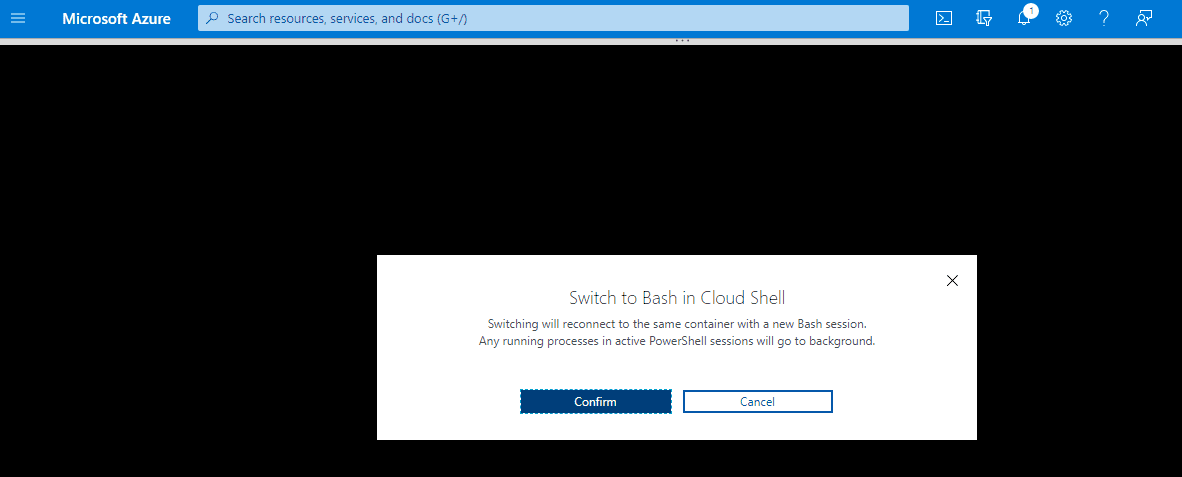
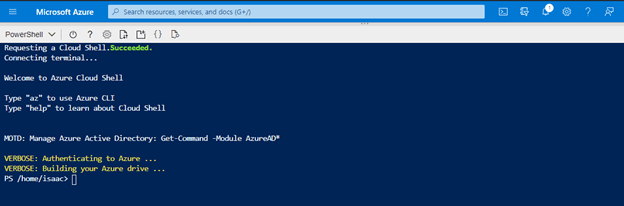
Click on Confirm, and it connects to the Bash session. It uses the containers and attaches an Azure file share for the container. It makes sure that data is persistent between different Azure Cloud Sessions,
The Azure Cloud Shell Configurations Details
You can use the following icon tabs to customize the cloud shell for both PowerShell and Bash terminals.
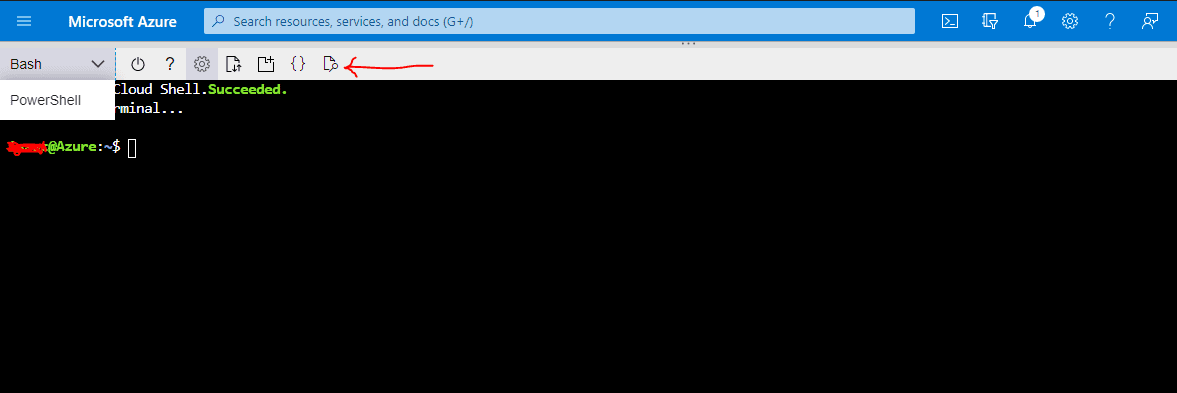
It has the following configurations:
- Restart Cloud Shell: You can restart the cloud Shell container. If you have any unsaved work, you don’t get it back
- Help: Hyperlinks for Cloud Shell overview, Azure CLI reference, How to copy-paste, Privacy & terms
- Settings: You can make some settings for the cloud shell.
- Upload and download files: You can upload a file from your local machine to the /home/user directory. Similarly, you can download a file available in the /home/user directory.
- Open new session: You can launch multiple concurrent sessions, and each session runs as a separate process
- Open editor: It opens an interactive file editor, and it is built upon open-source.
- Web Preview: It allows running web applications on the Cloud Shell container and preview them directly from here. You can configure port 1025-8079 and 8091-49151 for HTTP requests.
Upload, download, and manage files share using the Azure Cloud Shell from the Bash
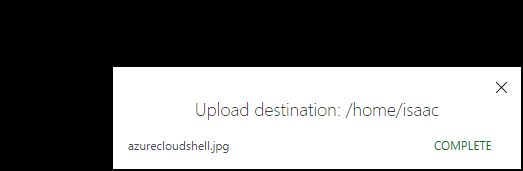
To upload a file, click on Upload and select the file name from your local system and click open.
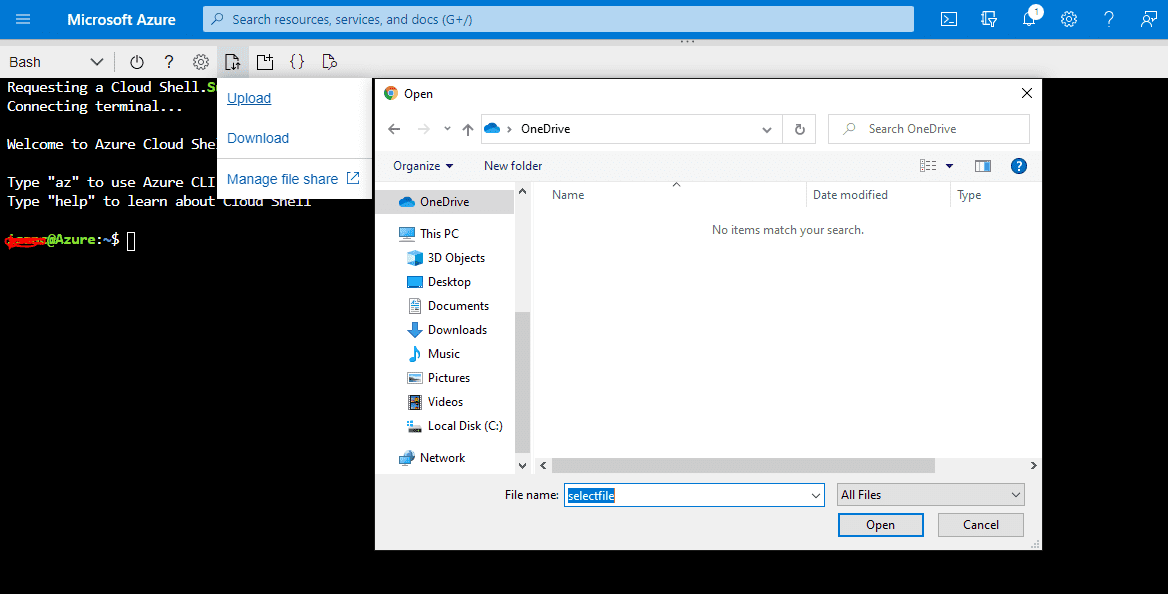
It then uploads the file selected in the $home directory and shows the status in a pop-up box at the bottom right hand corner of the window screen.
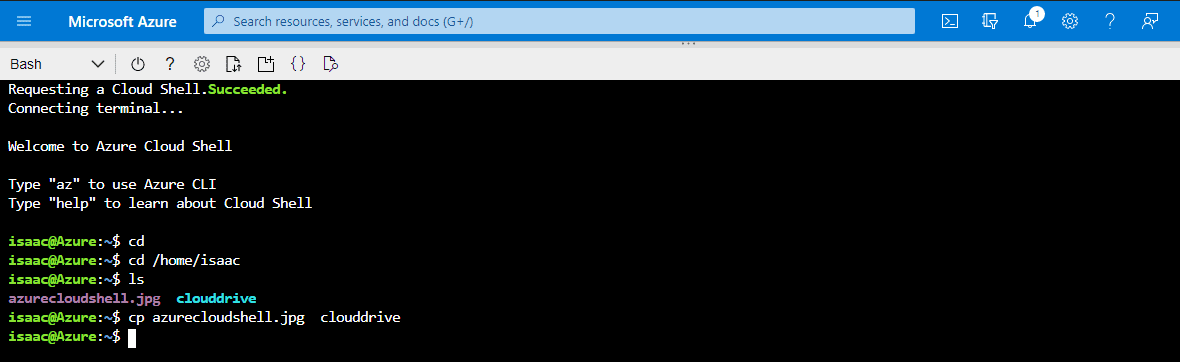
You can copy the file uploaded to the cloud drive using the cp command.
You can download the file uploaded from the $home directory or the cloud drive using the following path on the image below and clicking the Download button in the Cloud Shell.
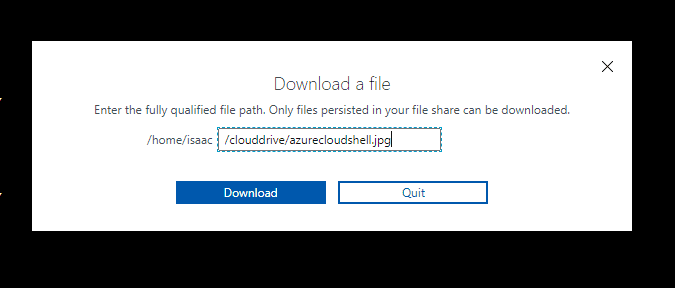
Click on Download, and you get the file in your downloads folder local computer.

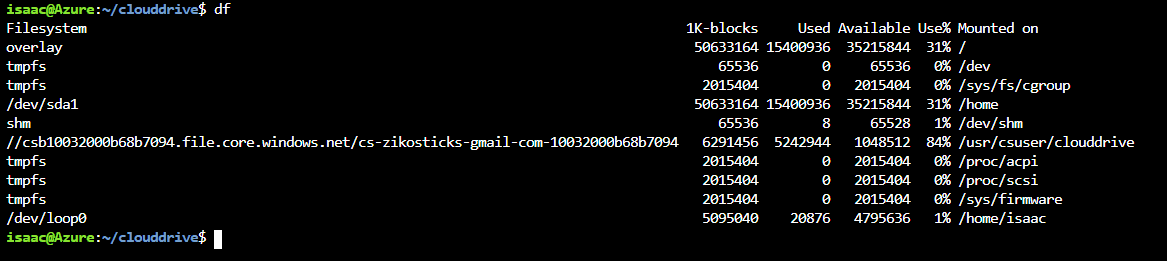
In the Azure cloud shell for PowerShell, you can also run the Linux commands directly. For example, use the df command to check the file shares, used space, available space and % use space for the drive mounted as the cloud drive.
You can use the cloud drive -h command, and it lists the available commands. It shows three(3) commands in the list:

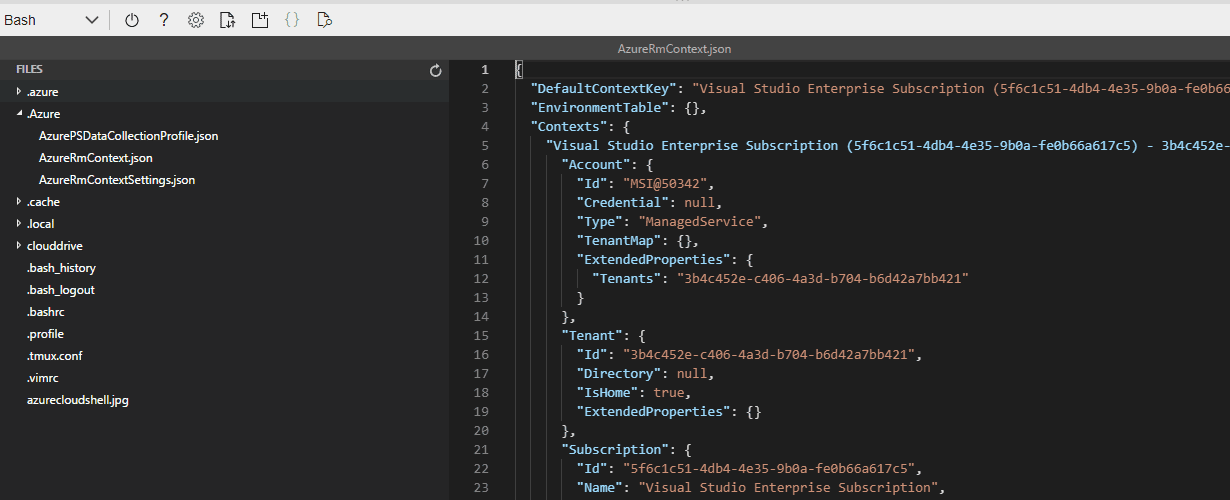
Using The Cloud Shell Integrated Editor
Azure Cloud Shell offers an integrated graphical user interface text editor based on the open-source Monaco Editor. You can simply create and edit configuration files by running code . for seamless deployment through Azure CLI or Azure PowerShell.
To Open the editor
For simple file creation and editing, launch the editor by running code . in the Cloud Shell terminal and this will opens the editor.

To directly open a file for quick editing, run code <filename> to open the editor without the file explorer.

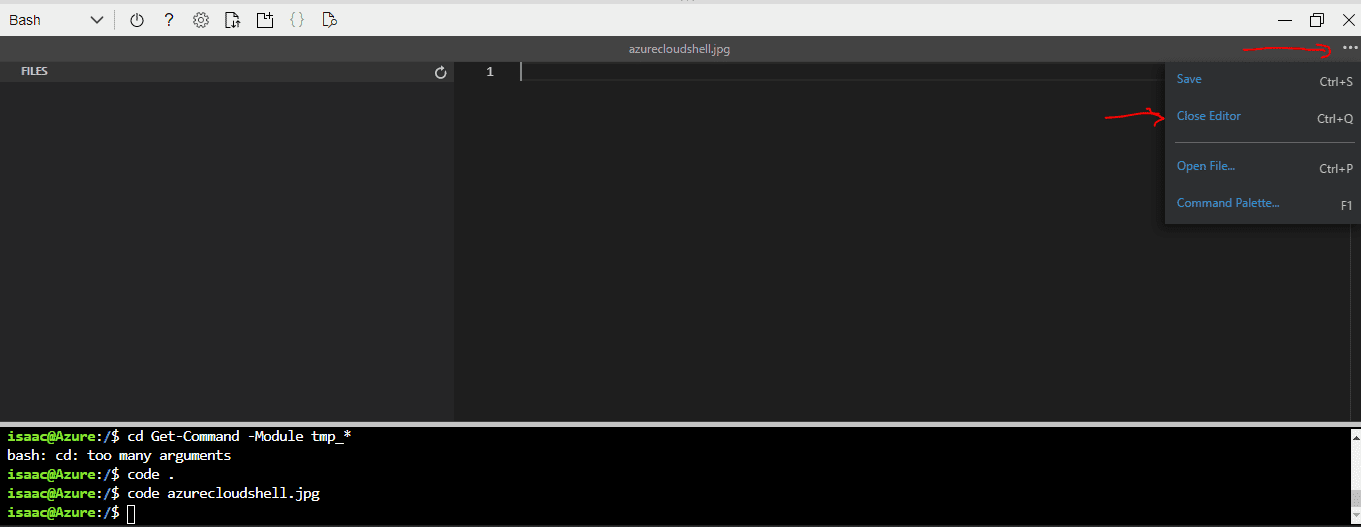
Closing the editor
To close the editor, open the . . . action panel in the top right corner of the editor and select close editor.
Command palette
To launch the command palette, use the F1 key when the focus is set on the editor. Opening the command palette can also be done through the action panel.
I hope you found this blog post helpful on The Overview of Azure Cloud Shell. If you have any questions, please let me know in the comment session.