The benefit of Amazon S3 Access Points is the ability to simplify the managing of data access at scale for shared datasets in S3. Access points are just network endpoints that are attached to your S3 buckets that you can use to perform S3 object operations. We also have the Access Point alias which provides the same functionality as an Access Point ARN and can be substituted for an S3 bucket name anywhere it is used for data access.
Another benefit of S3 Access Points is that you can easily create hundreds of access points per bucket, each with a designated name and permissions that is specially customized for the application. By default, you are free to create up to 1,000 access points per region for each of your AWS accounts but if you need more than that access points for a single account in a single Region then it is recommended that you request a service quota increase from AWS.
Exploring a Variety of AWS Service Guides
Nonetheless, For more guides on AWS services you can read these: How to enable Amazon S3 default bucket encryption using S3 Console, How to deploy a .NET application to AWS Elastic Beanstalk using AWS Tool Kit, How to Deploy MVC Application to AWS EC2 Using RDP Connection and Web Deploy, How to Deploy Dynamic Website to AWS EC2, Hosting Static Website and Versioning on AWS S3, how to create IAM Users, Adding MFA and Policies on AWS, and How to manage cost with AWS Budgets, How to deploy an Angular App to AWS S3
Consequently, We are going first to create an access point using the S3 console
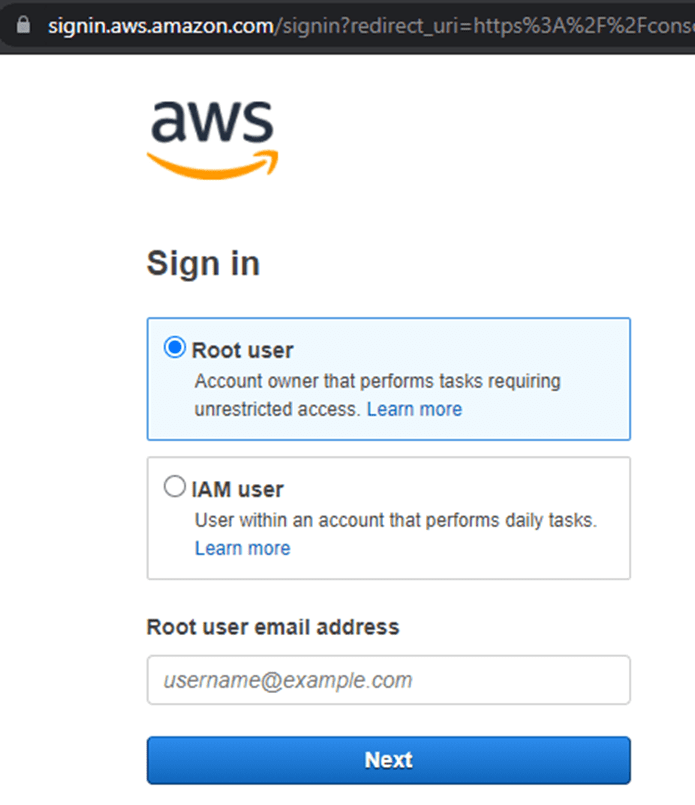
- Log in to the AWS Management Console and open the Amazon S3 console using https://console.aws.amazon.com/s3/
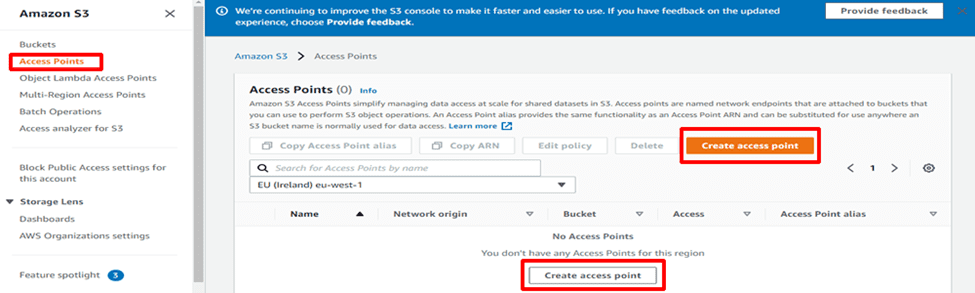
- On the left side of the console’s navigation pane, click Access Points.
- Similarly, On the Access Points page, Click on Create access point.
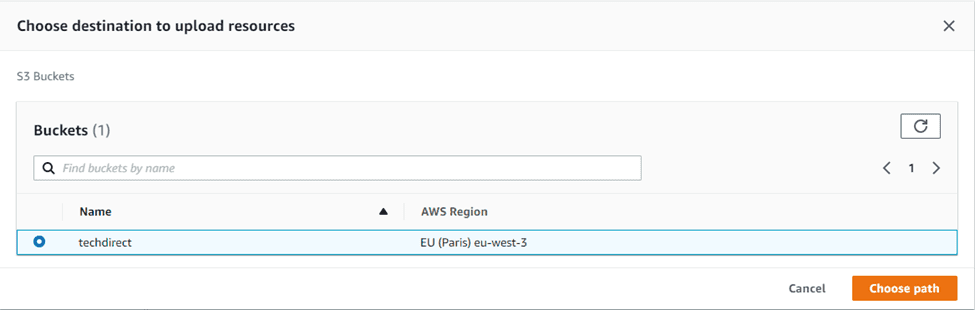
- Nevertheless, Enter your desired Access point name and also enter or browse the name of a bucket in your account to which you want to attach the access point.

- Browsing the bucket and clicking on Choose path
Choosing Network Origin for Access Point Configuration
Therefore, In the Network Origin section, select Virtual Private Cloud (VPC) and enter the VPC ID. Additionally, you want to use the access point, but in this guide, we will select the Internet option.
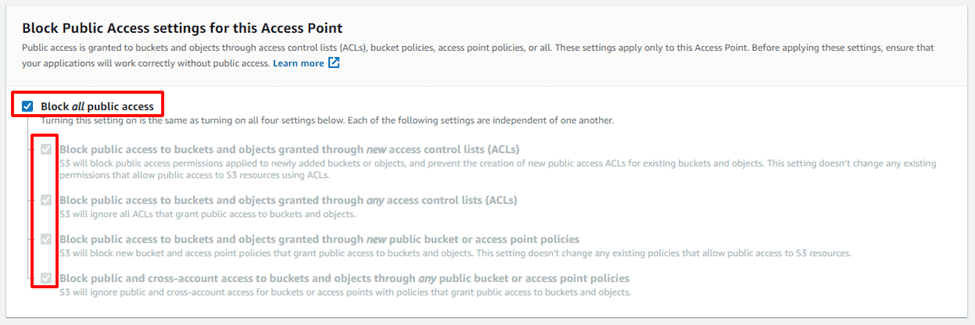
Furthermore, Under the Block Public Access settings for this Access Point section, the recommendation is to leave it enabled as the default setting unless you have a strong reason to disable it. However, note that Amazon S3 does not support changing an access point block public access settings after creating the access point.
- Click on Create access point.
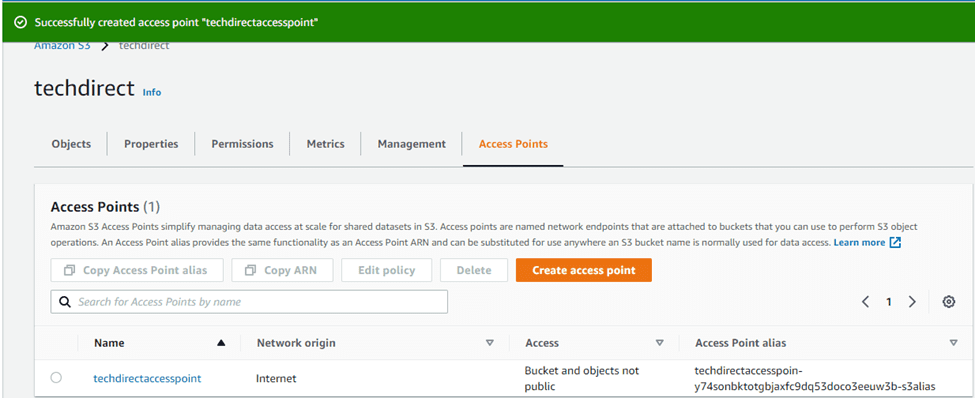
- You can open the access point and upload your objects
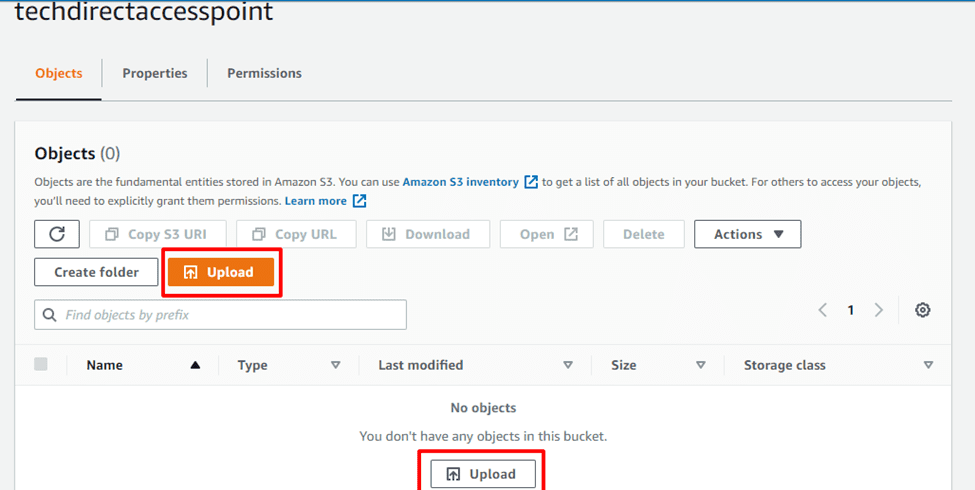
- Moreover, This redirects to where your files or folders are located, and you can start uploading.

Upload succeeded

Access Point Permissions and Object Operations
In addition, Note that while using the access point, you are only allowed to perform the object operations as stated in the access point permissions.
Note: Nonetheless, Once again, as a reminder, you cannot change the Block Public Access settings for an access point after the access point is created.
Below is our current Block Public Access settings
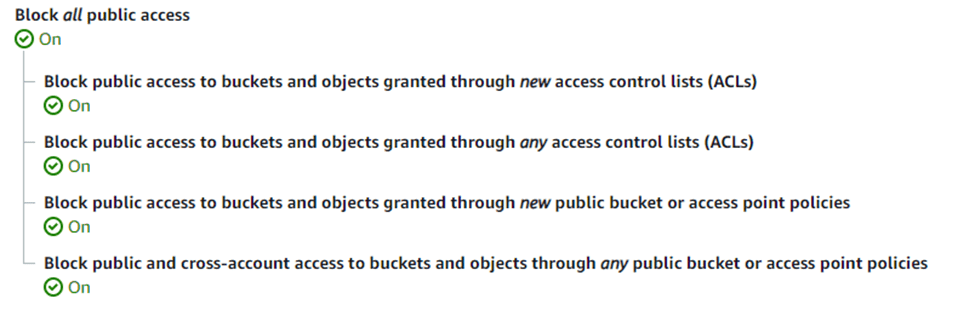
Consequently, Our current public access is OFF. Similarly, The only way we can have access is via the Access Point policy which is written in JSON and can provide access to the objects stored in the bucket from this Access Point.
But note that Access Point policies does not apply to objects owned by other accounts.
Let’s edit the access point policy
- Let us Navigate to the access point whose policy we want to edit.
- Select the Permissions tab.
- Under access point policy section, click Edit.

- Enter the access point policy in the text field below. Furthermore, The console automatically shows the Amazon Resource Name (ARN) for the access point, which you can use in the policy or you can edit it to suite your own policy.

- If you want to delete an access point, its just a matter of selecting the access point and clicking on the Delete button.

Using an Alias instead of a bucket name for data access
During the process of creating an access point, Amazon S3 automatically generates an Alias that you can use instead of using a bucket name. However, This Alias can be used instead of an Amazon Resource Name (ARN) for any access point operations
Moreover, The following is an example ARN and access point alias for an access point named techdirectaccesspoint.
- ARN – arn:aws:s3:eu-west-3:963016309182:accesspoint/techdirectaccesspoint
- Access Point Alias – techdirectaccesspoin-y74sonbktotgbjaxfc9dq53doco3eeuw3b-s3alias
Please note that an access point Alias name is created automatically within the same namespace as an Amazon S3 bucket and cannot be changed. It meets the same requirements of a valid Amazon S3 bucket name and consists of the following parts:
[Access point prefix]-[Metadata]-s3alias
Uploading an object through an access point alias using AWS CLI

Deleting an object through an access point alias using AWS CLI

Listing objects through an access point alias using AWS CLI

Grant access permissions through an access point using an ACL

I hope you found this blog post on How to manage and use Amazon S3 access points using the AWS Management Console exciting and helpful. In addition, If you have any questions do not hesitate to ask in the comment section.