Skip to content

TechDirectArchive

Hands-on IT, Cloud, Security, Veeam & DevOps

  • Home
  • About
  • Advertise With US
  • Reviews
  • Contact
  • Toggle search form

Configure GPS location “Google Map” on your Android Studio Emulator

Posted on 22/02/202212/10/2023 Temitope Odemo By Temitope Odemo 1 Comment on Configure GPS location “Google Map” on your Android Studio Emulator
  1. Home
  2. Windows
  3. Configure GPS location “Google Map” on your Android Studio Emulator
image-43

What is a GPS? Stands for “Global Positioning System.” GPS is a satellite navigation system used to determine the ground position of an object.  In this article, we shall discuss how to configure GPS location “Google Map” on your Android Studio Emulator. Please see how to Map a Network Drive: How to mount a Network Drive, and How to create a Mapped Drive via GPO Preferences. Android Studio Emulator is used to simulate Android devices on your computer for testing purposes without the need for a physical phone device with the emulator coming with predefined configurations for various Android phones and tablets.

Have you ever experienced the awkward moment when your Android Studio Emulator is capturing the wrong GPS location?

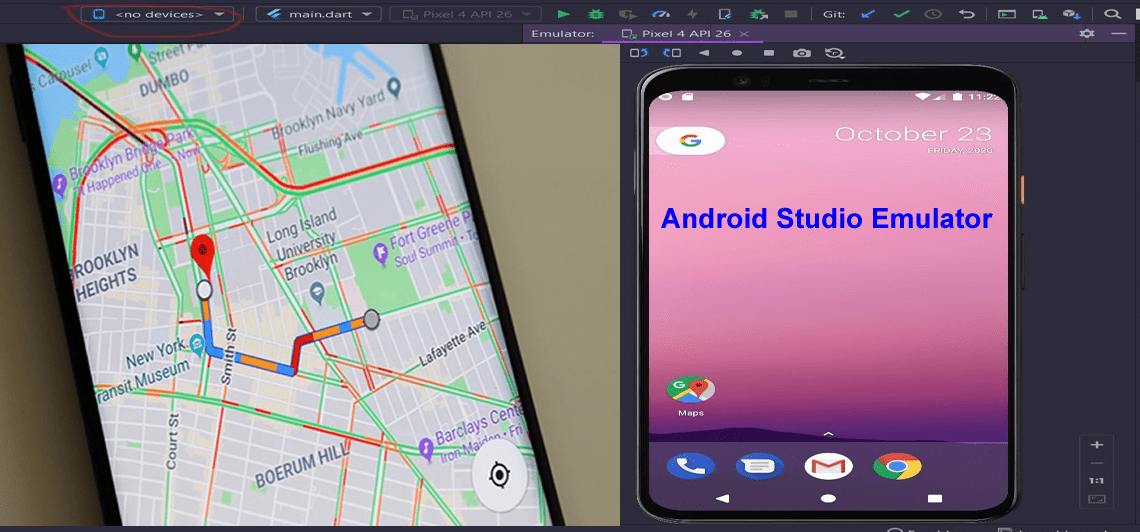
The image I am sharing below shows an Android Studio Emulator. Which is supposed to have a Lagos Nigeria address displaying a location outside of Nigeria.

Configure GPS location “Google Map”

First, run your Android Emulator and click on the three dots on the menus beside. If you want to read more guides on Android please read these: How to link your Android or iPhone to your Windows 10 PC, How to unlink your Android or iPhone from Windows 10

image-44
Android Studio Emulator

On the left pane, select Location and change the coordinates according to your location. Press the Send button, changes will immediately take effect.

You can use Google Maps to get your current coordinates both longitude and latitude and input them inside here.

image-45
Location coordinates

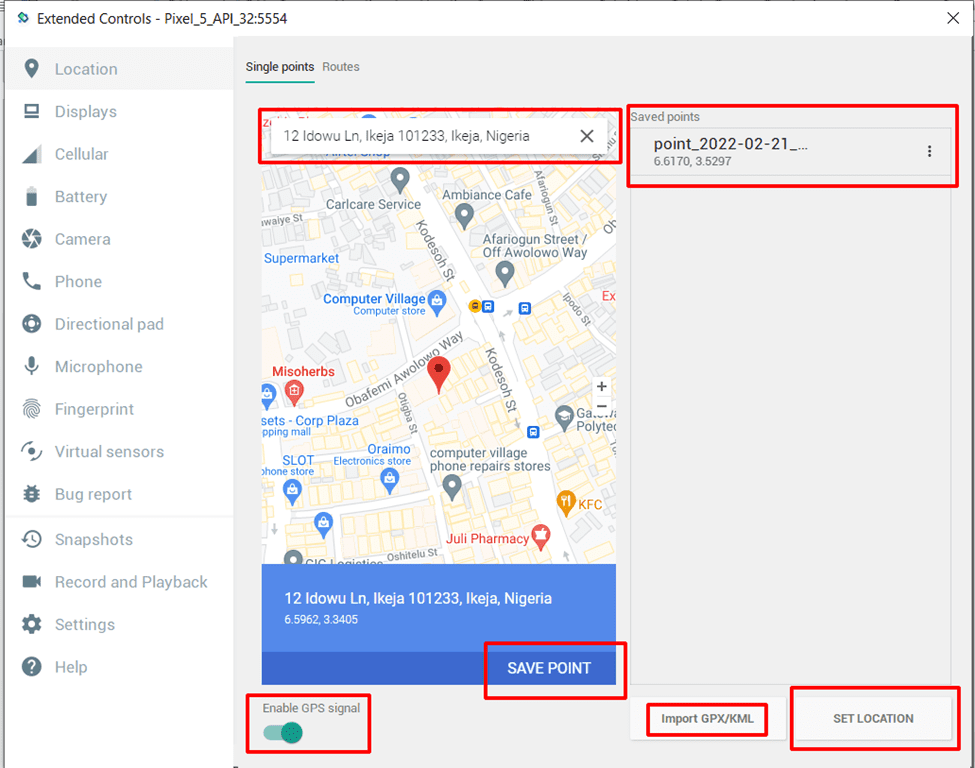
If the coordinates are not displaying like the image above. Then the image below applies. Make sure the Enable GPS signal button is ON and you can just input your current address into the box and hit Enter.

Also see Microsoft Phone Link: Connect Android to Windows 11, and Apache JMeter Load Testing: Test Mobile Apps on Windows.

Set the Location

When the Address is shown on the map. You can click on the SAVE POINT button. You can click the SET LOCATION button to set the location to your current position.

image-46
Location

If you do not want to use the above steps. You can use the GPX file to make different locations come to your application in real-time. This file is very easy to create by following the below steps:

  1. Go to Google Maps and enter your location and your destination.
  2. After the route is created. You can copy the link from the browser and go to https://mapstogpx.com and paste it there.
  3. Go ahead and click LET’S GO and the GPX file will be downloaded.
  4. Now use the Import GPX/KML button to import the file into your emulator and choose the speed. The locations will be sent to your emulator in real time.

I hope you found this blog post on how to configure GPS location ”Google Map” on your Android Studio Emulator very interesting and helpful. In case you have any questions do not hesitate to ask in the comment section.

Rate this post

Thank you for reading this post. Kindly share it with others.

  • Share on X (Opens in new window) X
  • Share on Reddit (Opens in new window) Reddit
  • Share on LinkedIn (Opens in new window) LinkedIn
  • Share on Facebook (Opens in new window) Facebook
  • Share on Pinterest (Opens in new window) Pinterest
  • Share on Tumblr (Opens in new window) Tumblr
  • Share on Telegram (Opens in new window) Telegram
  • Share on WhatsApp (Opens in new window) WhatsApp
  • Share on Mastodon (Opens in new window) Mastodon
  • Share on Bluesky (Opens in new window) Bluesky
  • Share on Threads (Opens in new window) Threads
  • Share on Nextdoor (Opens in new window) Nextdoor
Windows Tags:Google

Post navigation

Previous Post: INACCESSIBLE BOOT DEVICE: Fix Your PC ran into a problem and needs to restart
Next Post: Veeam Certified Architect: VMCA Training & Certification Review

Related Posts

  • vtpm 1
    Enable vTPM and BitLocker HyperV VM: Fix the device that cannot use a TPM module Virtualization
  • BitLocker beviour when MBAM Agent is removed   No uninstall options in control panel to remove app
    BitLocker behavior when MBAM agent is removed: No Uninstall Option in Control Panel Windows
  • SysInternals
    Use Active Directory Explorer from Sysinternals Windows
  • BitLocker
    Unable to find my BitLocker Recovery Key in AD Windows
  • Featured image Teams Whiteboard
    How to use Whiteboard in Microsoft Teams meetings Windows
  • Featured image new
    How to find out who restarted Windows Server Windows

More Related Articles

vtpm 1 Enable vTPM and BitLocker HyperV VM: Fix the device that cannot use a TPM module Virtualization
BitLocker beviour when MBAM Agent is removed   No uninstall options in control panel to remove app BitLocker behavior when MBAM agent is removed: No Uninstall Option in Control Panel Windows
SysInternals Use Active Directory Explorer from Sysinternals Windows
BitLocker Unable to find my BitLocker Recovery Key in AD Windows
Featured image Teams Whiteboard How to use Whiteboard in Microsoft Teams meetings Windows
Featured image new How to find out who restarted Windows Server Windows

Comment (1) on “Configure GPS location “Google Map” on your Android Studio Emulator”

  1. Avatar photo Stellar says:
    14/03/2022 at 8:05 AM

    You can download Google maps with any versions from Apkfun.com for your android phones easily.

    Log in to Reply

Leave a Reply Cancel reply

You must be logged in to post a comment.

Microsoft MVP

VEEAMLEGEND

vexpert-badge-stars-5

Virtual Background

GoogleNews

Categories

veeaam100

Veeam Vanguard

  • Featured image MSDT.
    How to restrict additional Microsoft Support Diagnostic Tool Downloads on Windows Windows
  • Screenshot 2020 05 14 at 17.46.59
    Linux System Update: Upgrade vs. Dist-upgrade Differences Linux
  • 1237968 3d79
    How to perform sysprep in Windows Windows
  • Simple Notification Service AWS SNS
    Create Simple Notification Service (SNS) Notification on AWS AWS/Azure/OpenShift
  • mailx
    [MAILX ERROR: STATUS=BOUNCED] Fixing Mailx error when sending emails from Command line Linux
  • s3versioning
    Hosting Static Website and Versioning on AWS S3 AWS/Azure/OpenShift
  • WonderFox Video Watermark
    Install and use WonderFox Video Watermark Windows
  • CI With GitLab 1
    Build Docker Images with GitLab CI Automation

Subscribe to Blog via Email

Enter your email address to subscribe to this blog and receive notifications of new posts by email.

Join 1,796 other subscribers
  • RSS - Posts
  • RSS - Comments
  • About
  • Authors
  • Write for us
  • Advertise with us
  • General Terms and Conditions
  • Privacy policy
  • Feedly
  • Telegram
  • Youtube
  • Facebook
  • Instagram
  • LinkedIn
  • Tumblr
  • Pinterest
  • Twitter
  • mastodon

Tags

Active Directory Azure Bitlocker Microsoft Windows PowerShell WDS Windows 10 Windows 11 Windows Deployment Services Windows Server 2016

Copyright © 2025 TechDirectArchive

Loading Comments...

You must be logged in to post a comment.