
Nagios is an open-source monitoring system that is widely used. What’s more, it maintains track of your servers and monitors them so you can be certain that your mission-critical services are up and functioning. In this article, we shall discuss ‘How to Install and Configure Nagios on Ubuntu”. Please see How to install free Hyper-V Server on a VMware Workstation, How to Configure Windows Server Core using SConfig, and “Docker Setup: Monitoring Synology with Prometheus and Grafana“.
Any production environment should employ a monitoring system like Nagios, since by monitoring uptime, CPU consumption, and disk space, you may prevent problems before they happen or before your users call you. Ever wondered how to install Nagios step by step? Here’s all you need to know about the installation process.
In this article, you’ll learn how to install and configure Nagios 4 on Ubuntu so you can use the web interface to monitor host resources. You’ll also install the Nagios Remote Plugin Executor (NRPE), an agent that runs on remote systems and allows you to monitor their resources.
Here are other interesting articles: How to Install and Configure Postfix as a Send-Only SMTP Server/, How to implement SAMBA (SMB) file shares for Servers and Clients/, also How to Configure Advanced PAM in Linux/ and How to Install LAMP Stack on Ubuntu 18.04 / and How to install MariaDB on Ubuntu
Requirements for Installing Nagios on Ubuntu
Make sure you’ve installed the following packages on your Ubuntu installation before continuing.
- Apache 2
- PHP
- GCC compiler and development libraries
- GD development libraries
You can use apt-get to install these packages by running the following commands:
sudo apt-get install apache2 libapache2-mod-php5 build-essential libgd-dev
Steps to Installing and Configuring Nagios on Ubuntu
The other steps required for the successful installation of Nagios are shown below
Step 1: Create a user account
To create a new account and a password, kindly use the command below.
/usr/sbin/useradd -m -s /bin/bash nagios
passwd nagios
Create a new nagcmd group for allowing external commands to be submitted through the web interface. Add both the Nagios user and the apache user to the group.
/usr/sbin/groupadd nagcmd
/usr/sbin/usermod -a -G nagcmd nagios
/usr/sbin/usermod -a -G nagcmd www-data
Step 2: Download Nagios together with its plugin
To this end, make a separate directory where the downloaded packages will be kept.
mkdir ~/downloads
cd ~/downloads
Download the source code tarballs of both Nagios Core and the Nagios plugins
wget http://prdownloads.sourceforge.net/sourceforge/nagios/nagios-4.2.1.tar.gz
wget https://nagios-plugins.org/download/nagios-plugins-2.3.3.tar.gz
The Plugin

Step 3: Compile and Install Nagios Core on Ubuntu
Meanwhile, extract the Nagios Core source code tarball.
cd ~/downloads
tar xzf nagios-4.2.1.tar.gz
cd nagios-4.2.1
Run the Nagios configure script as follows, using the name of the group you defined previously as a parameter:
./configure --with-command-group=nagcmd
Then, compile the Nagios Core source code.
make all
Consequently, set permissions on the external command directory and install binaries, an init script, and example config files.
make install
make install-init
make install-config
make install-commandmode
Here is how to fix “The module ping was not found in configured module paths, core modules are missing“, and how to “Harden your Veeam Backup Server with Microsoft AppLocker“.
Step 4: Customize Configuration
In addition, change the email address associated with the nagiosadmin contact definition to the address you’d want to use for receiving alerts in the /usr/local/nagios/etc/objects/contacts.cfg config file with your favorite editor.
vi /usr/local/nagios/etc/objects/contacts.cfg
Please see Monitor Windows Hosts via Nagios: A Guide, How to Backup and Restore your WordPress Files and Database and how to fix “The module ping was not found in configured module paths, core modules are missing“.
Step 5: Set up the Web User Interface
Moreover, install the Nagios Core web config file in the Apache conf.d directory.
make install-webconfPossible Error
/usr/bin/install: regular file cannot be created 'etc/apache2/sites-enabled/nagios.conf': File or directory doesn't exist
Makefile:298: failure in the instructions for objective 'install-webconf'
make: *** [install-webconf] Error 1
Resolved by running:
/usr/bin/install -c -m 644 sample-config/httpd.conf /etc/apache2/sites-enabled/nagios.conf
./configure --with-httpd-conf=/etc/apache2/sites-enabled
Furthermore, to use the Nagios Core web interface, create a nagiosadmin account. But, remember the password you choose for this account; you’ll need it in the future.
htpasswd -c /usr/local/nagios/etc/htpasswd.users nagiosadminRestart Apache to make the new settings take effect.
/etc/init.d/apache2 reloadStep 6: Compile and Install the Nagios Plugins
On the other hand, extract the Nagios plugins source code tarball.
cd ~/downloads
tar xzf nagios-plugins-2.3.3.tar.gz
cd nagios-plugins-2.3.3
Then, compile and install the plugins.
./configure --with-nagios-user=nagios --with-nagios-group=nagios
make
make install
Step7 : Start Nagios Core
Configure Nagios Core to automatically start when the system boots.
ln -s /etc/init.d/nagios /etc/rcS.d/S99nagiosVerify the sample Nagios Core configuration files.
/usr/local/nagios/bin/nagios -v /usr/local/nagios/etc/nagios.cfg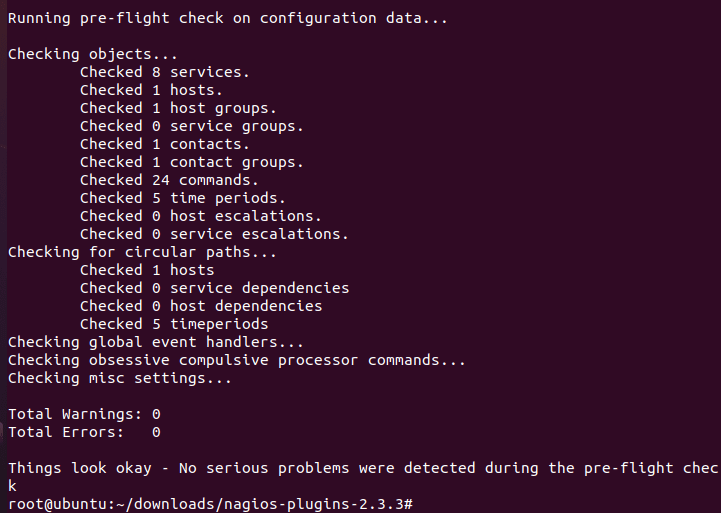
If there are no errors, start Nagios Core.
/etc/init.d/nagios start
Step 8: Login to the Web Interface
Type the command below in your VM or environment’s browser. You’ll be prompted for the username (nagiosadmin) and password you specified earlier
http://localhost/nagios/

Step 9: Additional Modifications:
If you want to receive email notifications for Nagios Core alerts, you need to install the mailx (Postfix) package.
sudo apt-get install mailx
sudo apt-get install postfix
sudo /etc/init.d/nagios restart
Summary
We installed Nagios by following the series of steps shown above. Rest assured, you will successfully install and configure Nagios on Ubuntu, following the aforementioned steps. Furthermore, you might want to refer to this guide on how to monitor Windows hosts via Nagios
I hope you found this blog post helpful. If you have any questions, please let me know in the comment session.


