
In our previous article, we took look at how to install Apache HTTP Web Server on Ubuntu 20.04 LTS In this guide we will learn how to configure Apache Virtual Host to host several domains. When using the Apache web server, you can use virtual hosts (referred to as server blocks in Nginx) to hold the configuration files and run more than one domain from a single server. We will set up a domain called techdirectarchive.com but you will have to replace this with your own domain name.
You also be interested in the following guides: How to Install Jenkins Automation Server on Ubuntu 20.04 LTS, how to fix critical Veeam Backup and Replication 9.5, 10, and 11 vulnerabilities, how to deploy a React Application to AWS S3, how to set up and configure Route 53 for your Domain in AWS, how to use Command-Line on Git Bash and GitHub Desktop to PUSH local code to GitHub, how to fix Sudo: unknown uid 1000: who are you? Error on Ubuntu, and how to create Multiple Users and Set Password for each User in Linux.
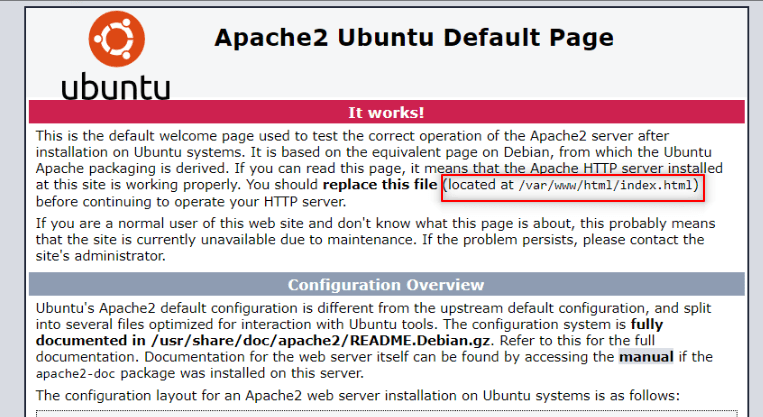
On Ubuntu 20.04, Apache has only one server block enabled by default, which is set to serve contents from the /var/www/html directory as highlighted in the screenshot below. While this works well for a single website, if you want to host many websites, things can become unmanageable.
From the above, we will not change anything in this directory /var/www/html, instead we will create a new directory structure within /var/www for techdirectarchive_com domain, leaving the /var/www/html intact as the default directory to be served if a client request doesn’t match any other sites.
Prerequisite to configure Virtual Host for Apache:
To have a hands-on experience and follow along in this session, you need to have Ubuntu 20.04 LTS installed on your system with a regular user or non-root user with Sudo privileges configured on your server. You will also need a registered domain name from an authorized domain name registrar. Registering a domain name isn’t mandatory, especially when setting up Apache Virtual Host for testing or demos. However, in a real-time or production environment, it becomes essential. You can purchase a domain from Namecheap, Godaddy or any other domain and hosting company known to you. Additionally, make sure to properly configure basic firewall rules on your server to block non-essential ports.
Once the above prerequisites are in place, sign in to your system to begin.
Step 1- Create New Directory
Let’s create the directory for techdirectarchive_com as follows:
sudo mkdir /var/www/techdirectarchive_comNext, you need to assign ownership of the directory with the $USER environment variable:
sudo chown -R $User:$User /var/www/techdirectarchive_comIf you haven’t changed your umask setting, which determines default file permissions, the permissions of your web roots should be correct. Run the command below to verify correct permissions. This ensures the owner can read, write, and execute files, while groups and others have read and execute permissions only:
sudo chmod 755 -R /var/www/techdirectarchive_comThe next thing is to create a sample index.html page. You can use nano or any of your favourite editors, you can run something similar to this:
sudo nano /var/www/techdirectarchive_com/index.html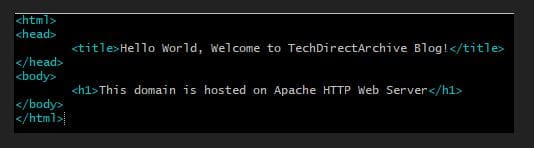
When finished, save and close the file.
For Apache to serve this content, it’s necessary to create a virtual host file with the correct directives. Instead of altering the default configuration file located at /etc/apache2/sites-available/000-default.conf directly, we will make a new one at /etc/apache2/sites-available/techda.com.conf with this command:
sudo nano /etc/apache2/sites-available/techdirectarchive_com.confAs shown in the screenshot below, create a configuration block, which is similar to the default Apache configuration block but adjusted for our new directory and domain name. Remember to use your own domain name instead of the generic one used here. When you’re done, save and close the file.

We’ve changed the DocumentRoot to our new directory and the ServerAdmin to an email address that the techdirectarchive_com site administrator can access. We’ve also added two directives: ServerName, which specifies the base domain that this virtual host definition should match, and ServerAlias, which specifies additional names that should match as if they were the base name.
When you’re finished, save and close the file
Next, let’s enable the file with the a2ensite tool, run this:
sudo a2ensite techdirectarchive_com.confAfter enabling the a2ensite utility for your domain, you need to restart Apache to activate the new configuration. Ignore the prompt until you’ve finished everything, then restart the server immediately.
Disable the default site defined in 000-default.conf:
sudo a2dissite 000-default.confIt’s time, to test for configuration errors by running:
sudo apache2ctl configtestTesting for configuration errors should return “Syntax Ok” as an output:

Restart Apache to implement your changes:
sudo systemctl restart apache2Apache should now be serving your domain name. You can test this by navigating to http://yourdomainname.com, where you should see something like this:

To add another domain name go ahead and repeat the steps by creating another directory in /var/www and configuring all others steps.
Congrats, you have successfully configure virtual host for Apache, you can now host several domains on the Apache Web Server instead of the usual one single directory /var/www/html provided for hosting a single domain by default.


hello, this worked on the local machine. but how to access the site from another computer on the network? How to tell apache which site to access?
thanks
Hi, @Pedro Thank you for your comment. You can access the site from another computer by using the device’s IP address within the LAN. With the unique IP of the device where the site is hosted, you can tell Apache which site to access. I hope this helps. Feel free to ask further questions if you need other clarifications. Cheer!