Skip to content

TechDirectArchive

Hands-on IT, Cloud, Security & DevOps Insights

  • Home
  • About
  • Advertise With US
  • Contact
  • Reviews
  • Toggle search form
Home » Windows » Restore Point Creation in Windows 10 and Windows 11
  • 5rgh65436
    New Windows 11 encryption features and security enhancements for Hybrid Work Security | Vulnerability Scans and Assessment
  • onedrived43
    How to share Files and Restore Previous versions of Files in Microsoft OneDrive Backup
  • How to Convert a Distribution Group to a Security Group
    How to convert distribution group to security group Windows Server
  • DNS
    DNS uses TCP and UDP Network | Monitoring
  • sdfdghjk
    How to fix “Job for Mattermost service failed” error Linux
  • screenshot 2020 02 08 at 15.53.31
    Auto Logon Error “Username and password specified is not valid” Windows
  • image 38
    How to Fix “Unknown hard error” on Windows Server and Windows 10 Windows
  • Clone a Virtual Machine via Export and Import
    Clone a VM via Export and Import: Copy Virtual Hard Disk on Hyper-V Virtualization

Restore Point Creation in Windows 10 and Windows 11

Posted on 27/05/202228/08/2024 Matthew By Matthew No Comments on Restore Point Creation in Windows 10 and Windows 11
Featured-Image

A Restore Point gathers crucial Windows files and settings at a specific time. You create it using Microsoft’s free tool, which takes “snapshots” to save Restore Points, aiding in system repair. Learn how to Restore Point Creation in Windows 10 and Windows 11. Please see Windows 10: Fixing Token Reference Error, How to manage and use Amazon S3 access points using the AWS Management Console, and How to Back Up and Restore the Windows Registry.

System files, updates, personalized settings, and Registry settings are all included in these Restore Points. In this article, we will go over the best methods for creating Restore Points on your PC. To create the feature, first enable the System Restore wizard by switching on System Protection.

You can read other interesting articles on fixing system issues: How to Create a Restore Point in Windows 11, and how to Reset a crash system and perform system state restore of Active Directory using Windows Server backup utility.

How to Enable the Feature in Windows 10 or 11

Before creating a restore point, you will have to enable the System Restore which can be enabled by turning on system protection. To enable system protection, open the Start menu and search for ‘create a restore point.’

System restore

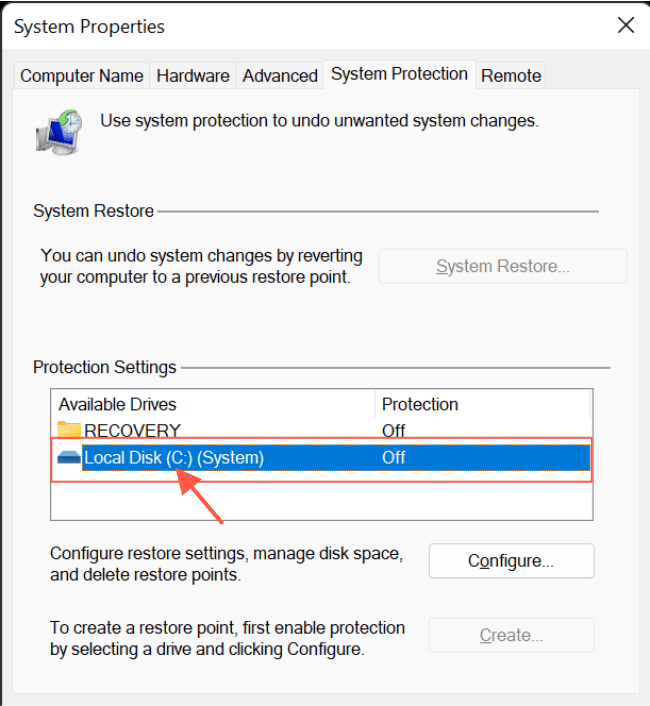
In the System Properties dialog box, navigate to the System Protection tab, select the drive containing your System portion (typically C:), and then click the Configure button.

Windows backup

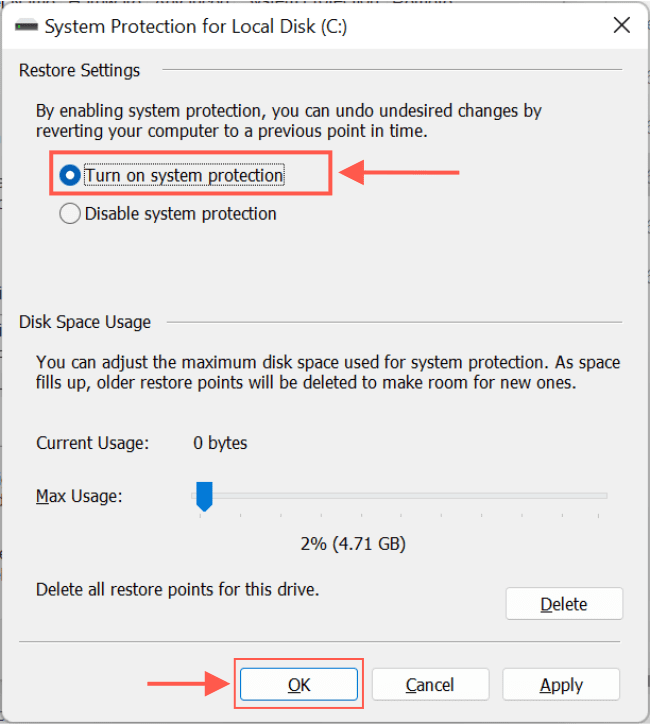
Turn on system protection in the System Protection for Windows dialog box. If your drive space is small, you may want to reduce the amount of space used for system protection.

Recovery point

Ways to create a Restore Point in Windows 10 or 11

Now that you’ve enabled system protection. Let’s look at two simple methods for creating a restore point: using the create restore point tool or using the command prompt.

Please see how to fix the issue of INACCESSIBLE BOOT DEVICE Your PC ran into a problem and needs to restart, and How to Share Files, Stop Sharing and Restore Previous Versions of Files on Microsoft OneDrive.

Using the Create the feature wizard in Windows 10 or 11

To create the feature, navigate to the System Protection tab in the System Properties dialog box and click Create.

PC restore

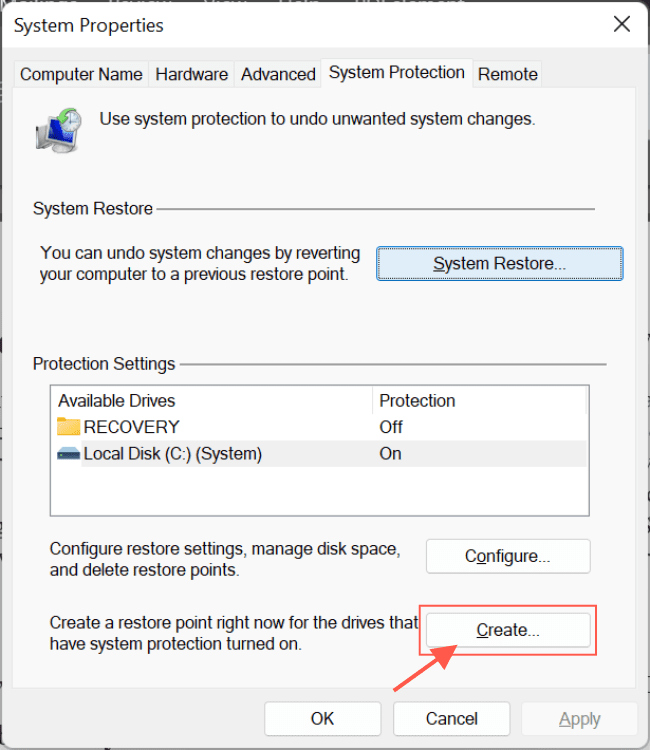
Type a description for your Restore Point and then click Create.

System restore

In a few minutes, the feature will be created. When the process is finished, you will be prompted to Close.

Windows backup

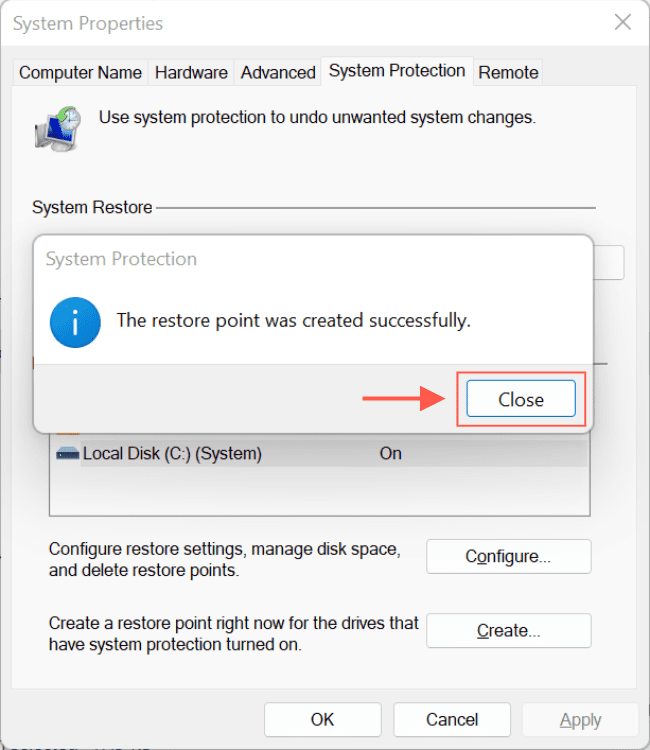
You have just created the feature.

Creation via the Command Prompt

To begin, launch the Command Prompt with administrative privileges. Then, in the Start menu search bar, type “command prompt.” From there, launch the Command Prompt as an administrator.

Recovery point

Enter the following command:

Wmic.exe /Namespace:\\root\default Path SystemRestore Call CreateRestorePoint "Restore Point", 100, 12

Replace the “Restore Point” in the command with your preferred description and press Enter. In a few seconds, a new feature will be created.

Image7-1

That’s all there is to creating the feature. If you ever accidentally lose data or settings on your computer, you’ll always have this Restore Point to fall back on.

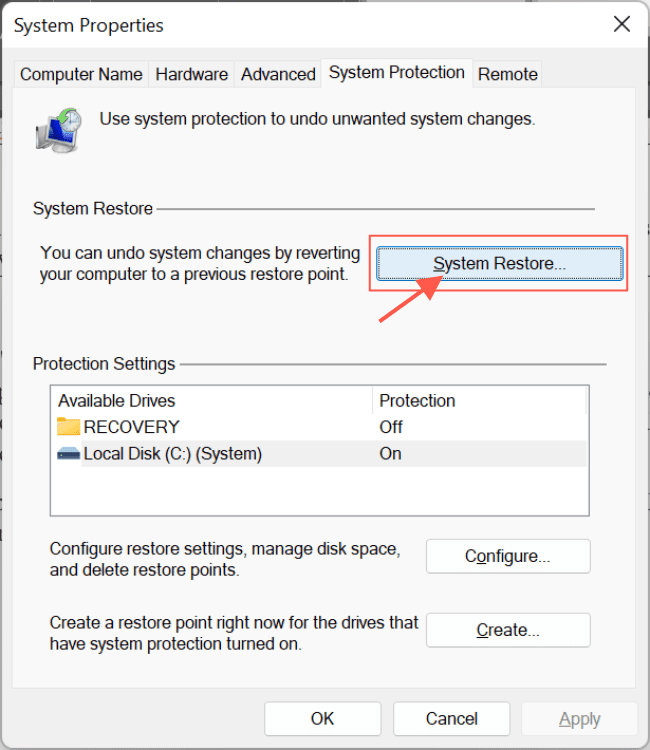
To perform a System Restore, navigate to System Properties and the System Protection tab. Click on the feature to launch the System Restore Wizard.

Image8-2

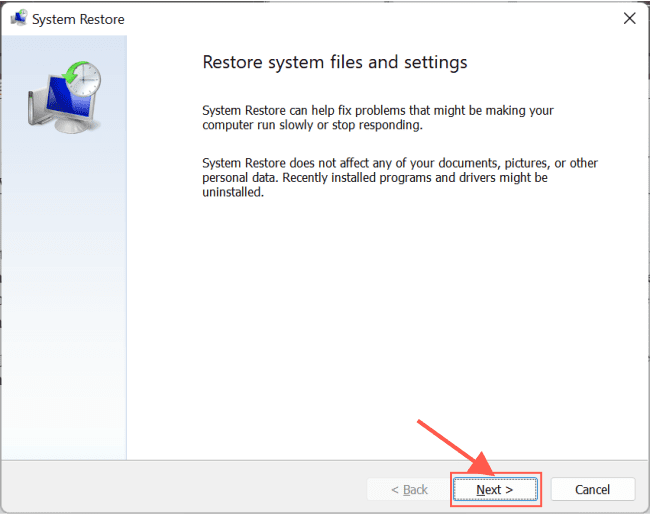
On this page, click Next.

Image9-2

Now, select the name of the feature you created and click Next.

Image10-1

Scan for affected programs

Finally, you can click on ‘scan for affected programs’ to see the apps that will be uninstalled by this restore and click on Finish.

Image11-1

I hope you found this blog post helpful on how to Restore Point Creation in Windows 10 and Windows 11. If you have any questions, please let me know in the comment session.

5/5 - (1 vote)

Thank you for reading this post. Kindly share it with others.

  • Share on X (Opens in new window) X
  • Share on Reddit (Opens in new window) Reddit
  • Share on LinkedIn (Opens in new window) LinkedIn
  • Share on Facebook (Opens in new window) Facebook
  • Share on Pinterest (Opens in new window) Pinterest
  • Share on Tumblr (Opens in new window) Tumblr
  • Share on Telegram (Opens in new window) Telegram
  • Share on WhatsApp (Opens in new window) WhatsApp
  • Share on Pocket (Opens in new window) Pocket
  • Share on Mastodon (Opens in new window) Mastodon
  • Share on Bluesky (Opens in new window) Bluesky
  • Share on Threads (Opens in new window) Threads
  • Share on Nextdoor (Opens in new window) Nextdoor
Windows Tags:Microsoft Windows, Restore, Restore Point, Windows 10, Windows 11

Post navigation

Previous Post: How to deploy WordPress on Azure App Service
Next Post: Configure AWS Command Line Interface

Related Posts

  • iCloud for Windows
    Use iCloud for Windows: How to install and uninstall iCloud for Windows Mac
  • How to Fix Scanning and Repairing Drive on Every Boot
    How to Fix Scanning and Repairing Drive on Every Boot Windows
  • UEFI vs BIOS What's the Difference
    What are the Differences between UEFI and BIOS Windows
  • How to Disable device encryption
    How to Disable device encryption on Windows Windows
  • WindowsCoreSecurity
    How to enable Smart App Control on Windows 11 Security | Vulnerability Scans and Assessment
  • Chocolatey Packages
    Create Chocolatey Package: Upgrade Software with Chocolatey Scripts

More Related Articles

iCloud for Windows Use iCloud for Windows: How to install and uninstall iCloud for Windows Mac
How to Fix Scanning and Repairing Drive on Every Boot How to Fix Scanning and Repairing Drive on Every Boot Windows
UEFI vs BIOS What's the Difference What are the Differences between UEFI and BIOS Windows
How to Disable device encryption How to Disable device encryption on Windows Windows
WindowsCoreSecurity How to enable Smart App Control on Windows 11 Security | Vulnerability Scans and Assessment
Chocolatey Packages Create Chocolatey Package: Upgrade Software with Chocolatey Scripts

Leave a Reply Cancel reply

You must be logged in to post a comment.

Microsoft MVP

VEEAMLEGEND

vexpert-badge-stars-5

Virtual Background

GoogleNews

Categories

veeaam100

sysadmin top30a

  • 5rgh65436
    New Windows 11 encryption features and security enhancements for Hybrid Work Security | Vulnerability Scans and Assessment
  • onedrived43
    How to share Files and Restore Previous versions of Files in Microsoft OneDrive Backup
  • How to Convert a Distribution Group to a Security Group
    How to convert distribution group to security group Windows Server
  • DNS
    DNS uses TCP and UDP Network | Monitoring
  • sdfdghjk
    How to fix “Job for Mattermost service failed” error Linux
  • screenshot 2020 02 08 at 15.53.31
    Auto Logon Error “Username and password specified is not valid” Windows
  • image 38
    How to Fix “Unknown hard error” on Windows Server and Windows 10 Windows
  • Clone a Virtual Machine via Export and Import
    Clone a VM via Export and Import: Copy Virtual Hard Disk on Hyper-V Virtualization

Subscribe to Blog via Email

Enter your email address to subscribe to this blog and receive notifications of new posts by email.

Join 1,834 other subscribers
  • RSS - Posts
  • RSS - Comments
  • About
  • Authors
  • Write for us
  • Advertise with us
  • General Terms and Conditions
  • Privacy policy
  • Feedly
  • Telegram
  • Youtube
  • Facebook
  • Instagram
  • LinkedIn
  • Tumblr
  • Pinterest
  • Twitter
  • mastodon

Tags

Active Directory AWS Azure Bitlocker Microsoft Windows PowerShell WDS Windows 10 Windows 11 Windows Server 2016

Copyright © 2025 TechDirectArchive


Loading Comments...
 

You must be logged in to post a comment.