How to Install Packages to Amazon VM using Terraform
In this blog post, I’ll show you how to create an Amazon EC2 instance and install packages into it using a cloud-agnostic infrastructure as a code tool known as Terraform. For better understanding, it is advised that you follow along in this hands-on demo. To get started, sign up for a free tier account from AWS. Please follow along to learn how to Install Packages to Amazon VM using Terraform. Please see how to deploy an Angular App to AWS S3, and how to deploy a Dynamic Website to AWS EC2.
Once you have the account, create a new user and grant it administrative privileges. Also, you will need to generate AWS_ACCESS_KEY_ID and AWS_SECRET_ACCESS_KEY for the new user and configure AWS CLI on your local machine.
You will also need to install Terraform on your local machine. Kindly refer to our related AWS guides: Creating IAM Users, Adding MFA and Policies on AWS, and How to manage cost with AWS Budgets.
Install Packages to Amazon VM using Terraform
Below are the steps to Deploy using Terraform. After completing the recommended installations above, continue with the following steps.
1: Create a directory named terraform-ec-2 and change it into the directory
mkdir ~/terraform-ec-2
cd ~/terraform-ec-2
2. Create two files main.tf and provider.tf
vim main.tf
vim provider.tf
3. In the the main.tf file, paste the following code block (Beware of the syntax);
resource "aws_vpc" "lifebit_vpc" {
  cidr_block 		= 	"172.16.0.0/16"
  enable_dns_hostnames	= 	true
  enable_dns_support	=	true
  tags = {
    Name = "lifebit-vpc"
  }
}
resource "aws_subnet" "lifebit_subnet" {
  vpc_id            	= aws_vpc.lifebit_vpc.id
  cidr_block        	= "${cidrsubnet(aws_vpc.lifebit_vpc.cidr_block, 3, 1)}"
  availability_zone 	= "eu-west-2a"
  tags = {
    Name 		= "lifebit-subnets"
  }
}
locals {
  ports_in		= [22,80,3000]
  ports_out		= [0]
}
resource "aws_security_group" "lifebit_SG" {
  name        		= "lifebit_SG"
  description 		= "Allow TLS inbound traffic"
  vpc_id      		= "${aws_vpc.lifebit_vpc.id}"
  dynamic "ingress" {
    for_each		= toset(local.ports_in)
    content {
      description      	= "TLS from VPC"
      from_port        	= ingress.value
      to_port          	= ingress.value
      protocol         	= "tcp"
      cidr_blocks      	= ["0.0.0.0/0"]
}
}
  dynamic "egress" {
    for_each		= toset(local.ports_out)
    content {
      description      	= "TLS from VPC"
      from_port        	= egress.value
      to_port          	= egress.value
      protocol         	= "-1"
      cidr_blocks      	= ["0.0.0.0/0"]
}
}
   tags = {
    Name 			= "allow_tls"
  }
}
resource "aws_instance" "lifebit" {
  ami           	= "ami-0de842d2477e3b337"
  instance_type 	= "t2.micro"
  key_name 		= aws_key_pair.lifebit.key_name
  security_groups	= ["${aws_security_group.lifebit_SG.id}"]


user_data	= <<EOF
	#!/bin/bash

	#Installing git and cloning the repository
	yum install git -y
	mkdir lifebit_test
	cd lifebit_test
	git clone https://github.com/nodejs/examples.git
	cd examples/servers/express/api-with-express-and-handlebars

	Installing Nodejs
	yum -y install curl
	curl -sL https://rpm.nodesource.com/setup_14.x | sudo bash -
	yum install -y nodejs
	npm install
	npm start &
EOF
  tags = {
    Name		= "LifeBitVM"

}
  subnet_id		= "${aws_subnet.lifebit_subnet.id}"
  }
resource "aws_key_pair" "lifebit" {
  key_name			= "lifebit"
  public_key		= "${file("${path.module}/lifebit.pub")}"
}
resource "aws_eip" "lifebit_eip" {
  instance		= "${aws_instance.lifebit.id}"
  vpc 			= true
}
resource "aws_internet_gateway" "lifebit_gw" {
  vpc_id 		= "${aws_vpc.lifebit_vpc.id}"

  tags = {
    Name 		= "LifeBit_gw"
  }
}
resource "aws_route_table" "lifebit_RTB" {
  vpc_id 		= "${aws_vpc.lifebit_vpc.id}"
  route {
    	cidr_block 	= "0.0.0.0/0"
    	gateway_id 	= "${aws_internet_gateway.lifebit_gw.id}"
  }
  tags = {
    Name = "lifebit_RTB"
  }
}
resource "aws_route_table_association" "lifebit_RTB_AS" {
  subnet_id 		= "${aws_subnet.lifebit_subnet.id}"
  route_table_id	= "${aws_route_table.lifebit_RTB.id}"

   }
4. In the the provider.tf file, paste the following code block;
provider "aws" {
region = "eu-west-2"
access_key = "xxxxxxAKIA63J"
secret_key = "xxxxxvt8a5yzNJyY"
}
Examine the main.tf and provider.tf files
The main.tf file contains scripts to deploy the following resources: VPC, Subnet, Route Table, Internet-Gateway, Security Group, Key-Pair, EC2 instance, User_Data, and Elastic IP. You can update the “ami” and the availability zone of your choice. The user_data contains a bash script that configures and deploys a nodejs application.
To understand the providers.tf file, refer to this link. Update it with the access key and secret key as obtained in the instructions referred to above.
For security reasons, it is more appropriate to input these values as environment variables, which external references can then use, rather than hardcoding them.
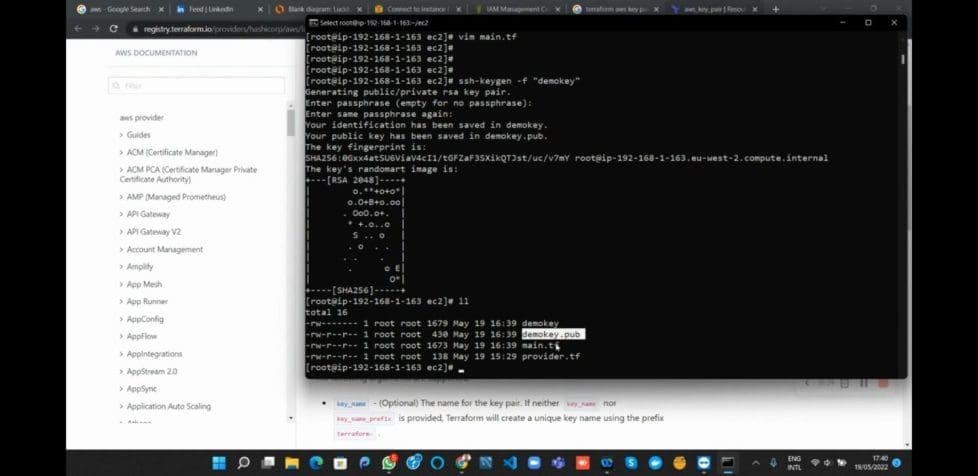
5. Generate an SSH key. In this example, it’s named ‘lifebit‘
ssh-keygen -f "lifebit"Accept all the defaults and use the command ll to confirm you now have a lifebit.pub file.
3. Run the following terraform commands in the appropriate directory
terraform initThe terraform init command initializes a working directory containing Terraform configuration files. Users should run this command first after writing a new Terraform configuration or cloning an existing one from version control. It is safe to run this command multiple times.
terraform planThe terraform plan the command creates an execution plan, which lets you preview the changes that Terraform plans to make to your infrastructure.
terraform apply The terraform apply the command executes the actions proposed in a Terraform plan. After successfully running the above commands, terraform deploys the required resources as specified in the main.tf file.
Verify if the Packages are deployed successfully
To verify the successful deployment of the installed packages, paste the public IP of the EC2 instance into a browser and add port 3000, as shown in the screenshot below.

4. To avoid accumulating huge bills from AWS, it’s advised to shut down created resources immediately. Use the command below.
terraform destroyI hope you found this blog post helpful on how to Install Packages to Amazon VM using Terraform. If you have any questions, please let me know in the comment session.