Skip to content

TechDirectArchive

Hands-on IT, Cloud, Security, Veeam & DevOps

  • Home
  • About
  • Advertise With US
  • Reviews
  • Contact
  • Toggle search form
  1. Home
  2. Breadcrumb-Yoast

[wpseo_breadcrumb]

How to automatically offload unused Apps on iPhone

Posted on 03/07/202211/12/2023 IT Expert By IT Expert No Comments on How to automatically offload unused Apps on iPhone
  1. Home
  2. Mac
  3. How to automatically offload unused Apps on iPhone
offloading apps

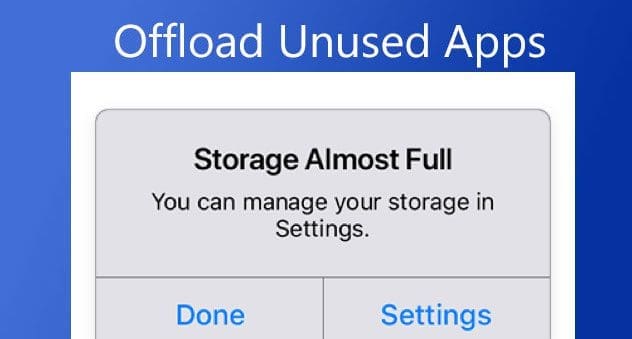
You must have been notified by the following alert “Storage Almost Full” on your iPhone. iOS monitors the storage on your device by analyzing how much space each App uses etc. As a result, when your storage space grows, you’ll receive an alert to buy additional cloud storage or offload unused apps to the Cloud. Opting for the latter option leads to offloading your apps. Kindly refer to these related guides: Turn off calls from iPhone: How to unlink FaceTime from Mac, and how to link your Android or iPhone to your Windows 10 PC.

As you can see in the image below, I have some rarely used apps offloaded in order to manage space. This can be done automatically or manually to free up local iPhone storage.

iPhone storage management

What is Offload App?

Before I proceed to discuss the steps to address this, I would like to discuss what an offload App is. Previously, you had the option to keep an app on your device (iPhone) or have it deleted.

If the app is kept, the app and its data will continue to occupy local storage. If the app is deleted, the app itself and all its local data are gone! You may want to see these related guides:

From iOS 11, Apple introduced the option to offload apps. This keeps in keeping your apps, by offloading to the cloud instead of deleting them. In theory, when an app is offloaded, the app itself is deleted, which clears local storage.

However, the app documents and data are still saved locally on your iPhone. Once you reinstall the offloaded app, you can keep using it like before as the app data is still saved.

One of the advantages of offloading unused apps is the ability to free up storage space. Apps can take up a lot of storage space on your iPhone. Therefore, offloading the apps you don’t use often is an easy way to free up more space on your iPhone.

Here are some related guides: Microsoft Phone Link: How to Link and Unlink an Android Phone to Windows 11, and how to configure GPS location “Google Map” on your Android Studio Emulator.

How to automatically offload unused apps on iPhone

Given the increasing app sizes, it is only reasonable to offload apps to keep local iPhone storage free. To do this, kindly Open Settings as shown below on your device.

automatic app offloading

Click on the App Store

optimizing iPhone storage

As you can see below, the Offload unused App is currently disabled by default as at the time of writing this guide.

offloading apps

To enable it, we will have to toggle the switch on as shown below. That is all you need to have some of your unused apps automatically offloaded to reduce space.

iPhone storage management

Method 2

Alternatively, you could also do this from the following “iPhone Storage” as discussed below. To do this, open settings as shown below

IMG_7115

Click on General

IMG_7120

Select on iPhone Storage as shown below.

IMG_7121

Click on Enable Offload Unused Apps.

IMG_7128

But you cannot disable it from this window. To disable the automatic offload of data, you will need to do this via the App Store.

Please see How to clear cookies, history, and cache in Safari, and How to restore accidentally deleted calendars, bookmarks, files, or contacts from iCloud.

Note: You can offload all third-party apps you downloaded from the App Store and several Apple apps like TV, Music, Mail, Files, Maps, etc. You cannot offload or delete Photos, Phones, Safari, Wallets, Messages, and Health apps.

I hope you found this blog post helpful. Please let me know in the comment session if you have any questions.
Rate this post

Thank you for reading this post. Kindly share it with others.

  • Share on X (Opens in new window) X
  • Share on Reddit (Opens in new window) Reddit
  • Share on LinkedIn (Opens in new window) LinkedIn
  • Share on Facebook (Opens in new window) Facebook
  • Share on Pinterest (Opens in new window) Pinterest
  • Share on Tumblr (Opens in new window) Tumblr
  • Share on Telegram (Opens in new window) Telegram
  • Share on WhatsApp (Opens in new window) WhatsApp
  • Share on Mastodon (Opens in new window) Mastodon
  • Share on Bluesky (Opens in new window) Bluesky
  • Share on Threads (Opens in new window) Threads
  • Share on Nextdoor (Opens in new window) Nextdoor
Mac

Post navigation

Previous Post: How to use Windows 11 PC Health Check App
Next Post: How to Add or Remove Sites from Favorites list in Microsoft Edge

Related Posts

  • zoom 2
    How to stop Zoom App from launching automatically at startup on Mac Mac
  • iCloud for Windows
    How to install and uninstall iCloud for Windows [Part 1] Mac
  • maxresdefault
    How to add one or more external displays with your Mac Mac
  • screenshot 2020 05 11 at 20.03.56
    How to remove printers from HP Utility Mac
  • tredfghgfde3456578
    How to install Java Runtime Environment on Mac OS Mac
  • Integrate Icloud With Windows
    Synchronize Apple Calendar on Windows with Outlook [Part 2] Mac

More Related Articles

zoom 2 How to stop Zoom App from launching automatically at startup on Mac Mac
iCloud for Windows How to install and uninstall iCloud for Windows [Part 1] Mac
maxresdefault How to add one or more external displays with your Mac Mac
screenshot 2020 05 11 at 20.03.56 How to remove printers from HP Utility Mac
tredfghgfde3456578 How to install Java Runtime Environment on Mac OS Mac
Integrate Icloud With Windows Synchronize Apple Calendar on Windows with Outlook [Part 2] Mac

Leave a Reply Cancel reply

You must be logged in to post a comment.

Microsoft MVP

VEEAMLEGEND

vexpert-badge-stars-5

Virtual Background

GoogleNews

Categories

veeaam100

Veeam Vanguard

  • SQL Loves Linux 2 Twitter 002 640x358 1
    Install Microsoft SQL Server 2019 and MSSQL Command line tools on Ubuntu Linux Oracle/MSSQL/MySQL
  • How to create blue screen using the Not my Fault tool from Sysinternals
    How to create blue screen using the Not my Fault tool from Sysinternals Windows
  • WSUS Analysis and Initial Assessment
    Preliminary Guide for WSUS Analysis and Initial Assessment Windows Server
  • Azure File Sync
    Azure File Sync : How to enable Self-Service restore AWS/Azure/OpenShift
  • ADBA for Windows
    Configure Active Directory-Based Activation (ADBA) for Windows Windows Server
  • SSL for Localhost on WAMP
    How to configure SSL for WAMP server Windows Server
  • SUID GUID Sticky Bit 1
    Set Special File Permissions with SUID or GUID and Sticky Bit Linux
  • creating the perfect grafana dashboard  main
    How to install Grafana on Ubuntu Linux Network | Monitoring

Subscribe to Blog via Email

Enter your email address to subscribe to this blog and receive notifications of new posts by email.

Join 1,803 other subscribers
  • RSS - Posts
  • RSS - Comments
  • About
  • Authors
  • Write for us
  • Advertise with us
  • General Terms and Conditions
  • Privacy policy
  • Feedly
  • Telegram
  • Youtube
  • Facebook
  • Instagram
  • LinkedIn
  • Tumblr
  • Pinterest
  • Twitter
  • mastodon

Tags

AWS Azure Bitlocker Microsoft Windows PowerShell WDS Windows 10 Windows 11 Windows Deployment Services Windows Server 2016

Copyright © 2025 TechDirectArchive

Loading Comments...

You must be logged in to post a comment.