Deploy Code from GitHub to Azure Apps Services via the Command line

In this guide, I’ll show you how to manually and automatically deploy code from GitHub to Azure Apps Services using Azure CLI. Azure Apps Services allows you to create and host web apps, mobile back ends, RESTful APIs and Functions App in your preferred programming language without having to manage infrastructure. It supports both Windows and Linux, and it allows for automated deployments from GitHub, Azure DevOps, or any Git repository. Please see how to Create and connect to Azure Kubernetes Service Cluster and how to deploy your Angular App to Azure from Visual Studio Code.
Microsoft offers several methods for deploying code to App Service, but one of the best is to deploy from a source code repository, such as GitHub, Bitbucket, or Azure Repos. This is useful if you only need to upload your code once or if you want to use continuous deployment in a DevOps environment.
GitHub on the hand has remain one the most widely used Version Control Systems globally with 83 million developer as of June 2022 developers and more than 200 million repositories, including at least 28 million public repositories according to Wikipedia. Microsoft Azure app service is designed for ease of integration with GitHub for code integration and deployment.
To learn how to create do this through the Azure Portal, see a guide on Create an App Service Plan with Continuous Deployment to deploy a .NET Application from GitHub. Although both can be done via the Azure Portal’s graphical user interface, I’m going to do the manual deployment via the command-line interface for a couple of reasons.
Learn about Azure Apps Services Plans
Azure Apps Services plans are containers for the apps that you deploy in App Service. App Service plans are offered in different tiers, with more functionality provided by higher, more expensive tiers. The following list highlights some of the distinctions between the available tiers:
- Free (Windows only): Run a small number of apps for free
- Shared (Windows only): Run more apps and provides support for custom domains
- Basic: Run unlimited apps and scale up to three instances with built-in load balancing
- Standard: The first tier recommended for production workloads. It scales up to ten (10) instances with Autoscaling support and VNet integration to access resources in your Azure virtual networks without exposing them to the internet
- Premium: Scale up to 20 instances and additional storage over the standard tier
- Isolated: Scale up to 100 instances, runs inside of an Azure Virtual Network isolated from other customers, and supports private access use cases

You may also be interested in the following guides: Deploy WordPress on Azure App Service: How to install MySQL Workbench on Local Computer to connect with Azure Database for MySQL Server, and how to Enable or Disable Location Services: How to allow apps and services to determine your location on Mac,
Creating the Azure Apps Services Resources
Of course, before you can achieve this task, some resources are required. I’ll walk you through creating these resources with a bash script using the appropriate CLI commands. First, I’ll create a resource group to house the resources.
Then, to host the app, I’ll create an Azure Apps Services Plan. In the plan, I’ll then create a web app. Finally, I will deploy a sample app from one of Microsoft’s GitHub repositories <=https://github.com/Azure-Samples/html-docs-hello-world> to the App Service web app. The "html-docs-hello-world" is the name of the sample app. Although it’s not a well developed app but it is suitable for this kind of demonstration.
Creating a bash script
To create a bash script, download install Git Bash on your Windows PC if you don’t already have one . Here I have it installed already. So I created a project directory within my Desktop Directory named create-webapp-project.
To create the script, create a file with the .sh extension (e.g. nano my-web-app.sh) using the Nano editor or any editor of your choice such as the Vim editor and then copy and paste the following commands within the editor screen:
#!/bin/bash
# Resources to create
RESOURCE_GROUP_NAME=my-webapp-rg
APPSERVICE_PLAN_NAME=my-plan$RANDOM
WEBAPP_NAME=my-web-app$RANDOM
DEPLOYMENT_SOURCE=https://github.com/Azure-Samples/html-docs-hello-world
# Create Resource Group
az group create --name $RESOURCE_GROUP_NAME --location  eastus
# Create an App Service Plan
az appservice plan create --name $APPSERVICE_PLAN_NAME --resource-group $RESOURCE_GROUP_NAME --location eastus --sku F1
# Create a Web App
az webapp create --name $WEBAPP_NAME --resource-group $RESOURCE_GROUP_NAME --plan $APPSERVICE_PLAN_NAME
# Deploy an app from GitHub to Azure App Service
az webapp deployment source config --repo-url $DEPLOYMENT_SOURCE --branch master --manual-integration --name $WEBAPP_NAME --resource-group $RESOURCE_GROUP_NAME
Press Ctrl + O to save the file and press Ctrl + X to exit the editor screen.
Execute the bash script to create Resources
Now, run the script with the command sh my-web-app.sh. After running the script it will create all the resources and also deploy the web app from the GitHub repository specified above as shown below:

Now, browse to the Azure Portal to check the resources:

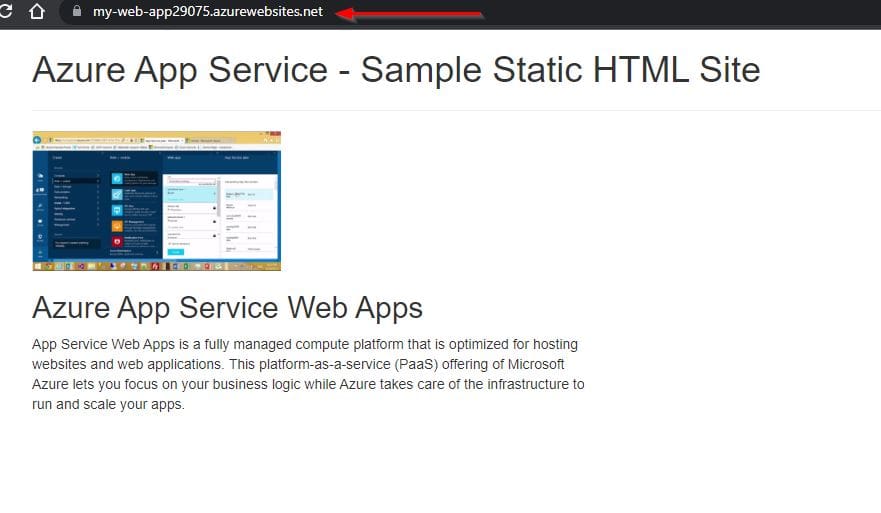
Next from the overview page of the web app blade, navigate to the URL of the web app that looks similar to https://<app_name>.azurewebsites.net domain name.

Congratulations! You have deployed your web app from GitHub Repository:
Configure Continuous Deployment to deploy code from GitHub to Azure Apps Services
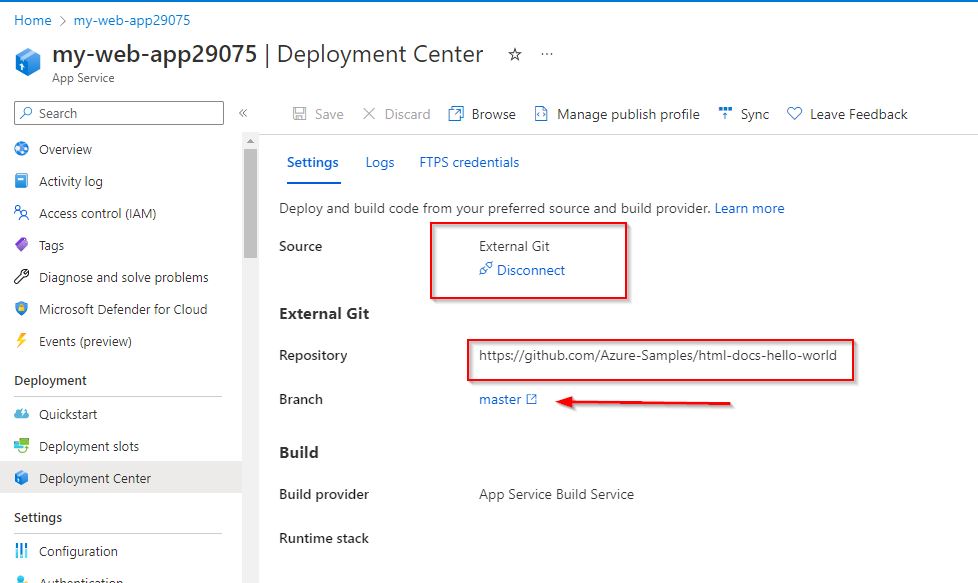
Now that we have manually deployed the web app, it time to set up the automated deployment. To do that, go to Azure Portal and locate the Web App you just deployed. while in the Web App overview page, locate and click on Deployment Center.
In the deployment center under the Setting tab, you will see the deployment source as External Git and connected. Since this was manually deployed and now we want to set up automated deployment, we need to first disconnect the external source .
So, go ahead and click on Disconnect to disconnect it. When prompted "Are you sure you want to disconnect your deployment?", click Ok.
After the disconnection, you will see a warning that you're now in the production slot which is not recommended for setting up CI/CD.

This is because if a new version of the app get deployed into the production slot, it would cause the app to be unavailable until the deployment is finished.
This will not go well for your users. So the best approach is to configure continuous deployment in a non-production deployment slot.
Since our Azure Apps Services Plan is using the Free tier, which doesn’t support deployment slots, we’ll need to upgrade the plan to the Standard tier.

To scale up the Azure Apps Services plan, we go to “Scale up”, select the "Production tab", and choose the S1 tier which stands for “Standard”, and click “Apply”.

Creating a Staging Deployment Slot
Now we need to create a deployment slot, so we select “Deployment slots” in the menu, and then click “Add Slot”. We’ll call it “staging” and set it to clone settings from the production slot and click “Add”.

Then we click on the slot, and now we can go back to the Deployment Center. If you observe, the warning is gone because now we’re in the staging slot, which is a non-production deployment slot.

When you get into the Deployment Center while in the staging slot, in the “Source” dropdown, it gives us the option to set up either continuous deployment or manual deployment. Let’s select “GitHub” in the continuous deployment section.

Before it can deploy the app, it needs to build it. By default, it uses GitHub Actions to do the build, but it’s usually easier to change this to “App Service Build Service”. This means that App Service will take care of building it.

Authorizing GitHub Access and Repository Selection
Now I need to authorize App Service to access my GitHub account. Then I must select an organization, a repository, and a branch. I don’t have privileged access to Microsoft’s sample repository, so I can’t select it here.
Instead, I have forked Microsoft’s repository to my own organization, where I have administrative privileges. Then I’ll click on the “Save” button.

After setting up the CI/CD source, whenever the code in the copy of the repository’s master branch changes, it will automatically build and deploy the app to the staging slot.
Then you could swap the staging slot for the production slot and upgrade the app’s production version.

Alternatively, you could set the staging slot to auto swap, which would swap the slot with production once the app was running.
Congratulations! You’ve successfully set up the continuous deployment strategy for your Web App.
Clean up resources used to deploy code from GitHub to Azure Apps Services
To avoid incurring charges, you must clear off all the resources you created if you would no longer require them.
To do that, run the command below to force the deletion of the resource group containing all the resources.
az group delete --resource-group <YourResourceGroupName> --no-wait --yesIn conclusion, Azure CLI commands can be used in automation scripts. Second, Microsoft frequently asks command-line questions in its AZ-204 Azure Developer certification exam, so knowing these commands is useful if you’re preparing to take that exam.
I hope you found this guide useful on how to deploy code from GitHub to Azure Apps Services using Azure CLI. Please feel free to leave a comment below.