How to create a dual-boot setup on Windows 11

To run two or more operating systems separately, you can set up a dual-boot configuration on Windows 11. You can use apps that are incompatible with the most recent release by using this approach to run previous editions (such as Windows 10, 8.1, or 7). You can install previews of later versions of Windows 11 to try out new features without having to change your system. Please see For more interesting guides on Windows, read:How to remove a Bluetooth device and connect a new Bluetooth device to Macbook, How to check graphics card temperature on Windows 11 and How to change the default start page for File Explorer on Windows 11 2022 Update.
Alternatively, you can install an operating system from a different platform, like Linux. Even if virtualization is an option, a dual-boot system will have full access to the hardware for improved performance and usability. In this guide, you will learn how to create a dual-boot setup on Windows 11.
In an ideal world, you could use a different computer with a different operating system. But a dual-boot system makes it possible to run Windows 11 along with Insider preview versions for the Dev, Beta, Release Preview Channels, or another version.
For more interesting guides on Windows, read: How to use the Widgets feature on Windows 11, How to Add a Device to your Microsoft account, and how Add Hardware and Peripherals: How to add a device to a Windows 10 Computer.
Steps on how to create to dual-boot setup on Windows 11
Any operating system (apart from macOS) can be used to set up a dual boot configuration, including older versions of Windows and Linux. In this guide, I’ll show you how to install a second copy of Windows 11 from the Dev Channel, which enables you to test new features without compromising your existing system and data.
Download the ISO file and Create a Bootable Media
To download the latest preview of Windows 11, use these steps:
Visit the Windows Insider Preview Downloads page and sign in with your Microsoft account. You need to be a Windows Insider Preview member to be able to download.
Select the edition of Windows 11 in the Dev Channel and click the Confirm button. Next, select the installation language and click the Confirm button.

Click the 64-bit Download button. Create a bootable media using a media creation tool like Rufus. Check out this detailed guide on how to create bootable media with Rufus.
Shrink partition for a new setup
It is not possible to set up a dual-boot system on the same partition as the current installation of Windows. To create space for another installation, you must shrink the size of your current hard disk.
However, if you have already partitioned your disk, you can maintain the partition layout and install it on the other drive.
To shrink the system partition on Windows 11, follow these steps: Press the Windows key + R to open Run utility, type “diskmgmt.msc” and press the OK button to open Disk Management.

Right-click the partition and select the Shrink Volume option.

Type the amount of space to shrink and click the Shrink button. Windows 11 requires at least 64GB of space.

After you complete the steps, the partition of the current setup will be reduced by the number of megabytes you specified.
Change boot order
Before installing the Windows 11 Insider Preview build on your computer using a dual-boot setup, you must make sure you can boot from the USB flash drive.
To change the boot order on Windows 11, use these steps:
To boot into Windows Recovery Environment (WinRE), select Start, Power, and then press and hold Shift key while clicking Restart.

Click on Troubleshoot.

Click on Advanced options.

Click the UEFI Firmware Settings option.

On the next screen, click the Restart button to boot into the UEFI Firmware Settings.
In the UEFI settings, click the boot settings page and select the option to start the computer from the USB bootable media.

Press F10 to save the changes. Once you complete the steps, the computer should be able to start from the Windows 11 USB boot media.
Clean install of Windows 11
To create a dual-boot system with another Windows installation, use these steps:
- Connect the bootable USB flash drive to the PC and power on the computer. Next, press any key to boot to the Windows Setup wizard.
- Select language and keyboard settings and click the Next button.

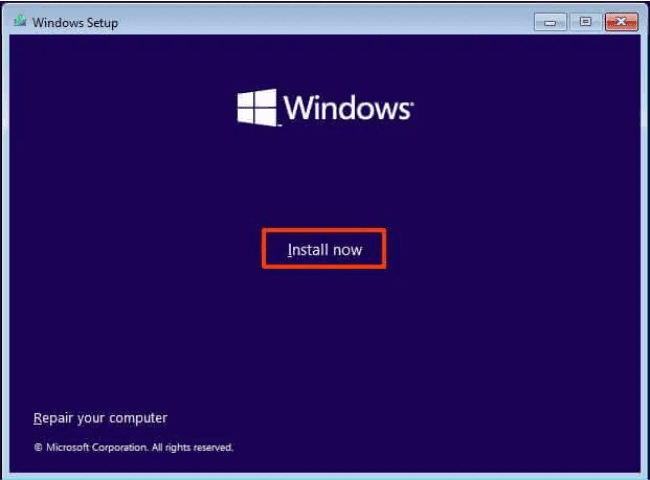
Click the Install Now button.
Confirm the product key that activates the version of Windows. Or click the “I don’t have a product key” to skip the activation temporarily.

Choose the edition of Windows to install that matches the product key activation and click the Next button.

Accept the licensing terms and click the Next button. Select the “Custom: Install Windows only (advanced)” option.

Choose the shrunk “Unallocated Space” on the drive and click the Next button.
Note: It's crucial to select the correct space. Otherwise, you could end up erasing the other installation or the storage you use for files.
After the first reboot, select the first instance of the operating system to continue the installation.

You can now proceed with the setup of the new Windows 11. You have learned how to create a dual-boot setup on Windows 11.
Conclusion
You can successfully setup up a dual boot on your system as long as you carefully follow the steps outlined above. I hope you find this guide helpful. If you have any questions, feel free to leave them in the comment section below.