
In this article, I will be showing you the steps on “How to install ESXi on a Beelink EQ12 Mini PC”. I have been looking for cost-effective home appliances to retire my old IT gear. Then I decided between the Intel NUC 13 which is very expensive and “Beelink EQ12 Mini PC. Please see IP Address blocked on Synology NAS due to forgotten Password, how to Install Azure DevOps Server 2022, and Upgrade Microsoft Office 2019 to 2021 on Mac.
Since I will be installing VMware ESXi Version 8 Update 2, it makes sense to discuss and refer you to the new capabilities available. This release includes not only the enterprise workload platform but also includes a new cloud service that will be available to users of vSphere+.
These updates will help enhance the operational efficiencies of IT admins, supercharge the performance of demanding workloads, and accelerate the pace of innovation for DevOps engineers, developers, and anyone else who can benefit from self-service access to infrastructure services.
Beelink EQ12
Beelink EQ12 mini PC has an Intel 12th Alder Lake-N100 processor with 4 Cores, 4 Threads and 6MB L3 cache. The processor’s Thermal Design Power (TDP) can reach 25W, and the Max Turbo Frequency is 3.4GHz.
The performance of the N100 is comparable to the 10th generation Core i3 series processors with TDP configured at 25W, and is more than 30% better than the previous generation Intel Jasper Lake Celeron N5105. Apart from excellent performance, EQ12 features two 2.5G Ethernet ports.
Furthermore, it has a 16G DDR5, 500G PCIe SSD Mini Computer W11 Pro, TDP/WiFi 6/BT5.2/Triple Display”. From my test as of now, I find the Beelink EQ12 very useful for my Lab needs. Below are the images of the Beelink Mini PCs.


Write the VMware ESXi v8 Update 2 ISO file to a USB with Rufus
Go to the Rufus download. page Click the latest release (first link) in the “Download” section and save the file
Here are some articles discussing how to burn an ISO image to a USB drive. How to create a Windows 11 Bootable USB drive, how to Mount an ISO image in Windows 10 and 11, how to create a dual-boot setup on Windows 11, and Create a Windows 10 or 11 bootable USB with UEFI support. Also, see Create a Bootable USB Drive Using dd Command on Linux, and USB Drive: Create a Multiboot with Multiple OS ISOs.
Run the Rufus.exe file to launch the tool. Under the “Device” section, select the ISO Image. I am fine with the default settings.

Select OK to confirm the warning to destroy all data on the drive.

Click Start and on the prompt, select “Write in ISO Image Mode (recommended). Click OK. When Ready, click on Close.

Install VMware ESXi
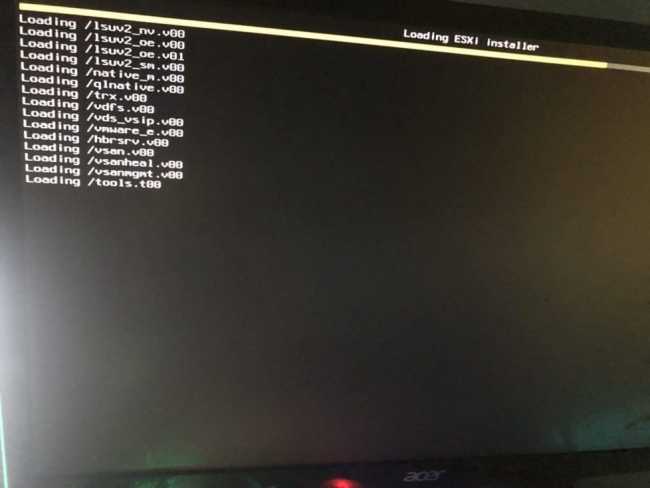
After the writing is finished, plug the USB Drive into the EQ12 host. Press the F7 key after booting and select the USB drive press the [Enter] button to enter the ESXi installer.

The loading process may be slow, please be patient.

After entering the installation page, press the Enter key to the next step.

Hit the F11 key to continue the installation

Scanning is performed

Additional Information is being gathered from the selected device. Exercise patience once more.

Select the local storage to overwrite. Press the Enter key

I am fine with the default keyboard layout. You can use the arrow key to select your favourite.

Here is how to Setup Windows server backup and create backup jobs with Bare metal backup, and how to install PSD Hydration Kit for remote bare-metal deployment or via PXE boot.
Set Root Password
Enter the root password in the field below and press the Enter key


Use the F11 key and wait for the installation process to complete

When the installation completes, unplug the USB drive, press the Enter key and wait for the PC to reboot.

Server is being rebooted.

After rebooting, the following page indicates that you have finished the installation of ESXi system

See How to install ESXi on VirtualBox, learn the Differences between vSphere and ESXi and Center, and how to remove Recent vSphere Client Connections.
Configure Networking: Set Static IP Address
Note: If you skip step the below steps, the default parameters will automatically apply
Press the F2 key to set a static IP address. You need to enter the password. The login name: root, and the password you have set during the system installation.

Use the down arrow keys to select [configure management network] and press the Enter key.


Locate the IPV4 configuration and press the Enter key.

Select the third item and press the spacebar to confirm the selection. Fill in the static IP address of the ESXi as you wish.

As you can see below, we have manually set the IP address. This means, it is static and will not change after a reboot etc.

Please select “yes” to save

You have successfully completed the ESXi installation and configuration. Enter the IP address that was automatically assigned to access the client. Enter the password to log in to the backend management.

Congratulations, that is all it takes to install VMware ESXi. Next, we shall install the Center Server.

I hope you found this article useful on “how to install ESXi on a Beelink EQ12 Mini PC”. Please feel free to leave a comment below.


