Skip to content

TechDirectArchive

Hands-on IT, Cloud, Security & DevOps Insights

  • Home
  • About
  • Advertise With US
  • Reviews
  • Contact
  • Toggle search form
Home » Windows » Enable Autologon and Autostart for user session
  • drivelock 1
    How to activate DriveLock License on Windows Server Windows Server
  • S3 Bucket
    Access AWS Management Console and Create Resources with AWS CLI on Windows AWS/Azure/OpenShift
  • Screenshot 2020 12 29 at 04.08.43
    Enable or disable BitLocker Drive Encryption on Windows Security | Vulnerability Scans and Assessment
  • maxresdefault
    How to extend a VM Hard Disk on VMware Workstation Virtualization
  • screenshot 2017 06 07 11.30.45
    How to Enable or Disable Touch Screen in Windows 10 Windows
  • How to download install and use Kitty SSH Client on Windows
    Video on how to Download and Use KiTTY SSH Client on Windows Network | Monitoring
  • TZ
    TFTP Image to Flash: Copying Guide for Cisco ASA Network | Monitoring
  • SSH Keys Generation
    How to Generate SSH keys in Windows 11 Windows

Enable Autologon and Autostart for user session

Posted on 30/09/202402/10/2024 Matthew By Matthew No Comments on Enable Autologon and Autostart for user session
Enable autologon and autostart for user session

Sometimes, you want your computer to automatically log in and launch specific applications as soon as it boots up maybe for a kiosk setup, a home server, or just to streamline your personal workflow. Windows allows you to configure automatic logon and start applications at login without requiring you to manually enter credentials or click through the startup processes. Here’s how you can enable autologon and autostart for user session in a clean, effective way. Please see how to Enable Automatic Logon via Windows Registry, and How to manage automatic login on Ubuntu Linux.

Also, see how to “View RDP Configuration Settings: Connect automatically on an RDP session“, “Program startup: How to launch an application automatically during startup on Windows“, and how to Enable Automatic Logon on Windows 10.

Why Enable Auto-Logon and Auto-Start?

Auto-logon can save time and effort, especially in environments where you don’t need high-level security, such as personal PCs or shared machines in controlled environments.

Combined with auto-start, this setup can ensure that critical apps and services are ready to go the moment your system starts up.

Here are other related guides How to Install Winget on Windows Server, Set Special File Permissions with SUID or GUID and Sticky Bit in Linux, and Prevent OS Reinstallation: Change from legacy BIOS to UEFI.

Step 1: Enable Auto-Logon

Let’s start by setting up automatic logon for a user account.

Method 1: Using the Registry Editor

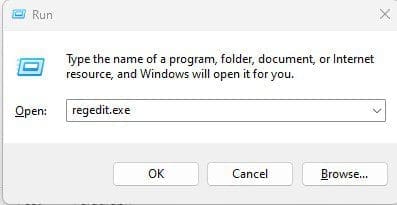
Press Win + R to open the Run dialog. Type regedit and press Enter. If prompted by User Account Control (UAC), click “Yes” to allow the app.

launch Windows Registry

In the Registry Editor, navigate to the following path:

HKEY_LOCAL_MACHINE\SOFTWARE\Microsoft\Windows NT\CurrentVersion\Winlogon

AutoAdminLogon: Double-click this value (if it doesn’t exist, right-click and create a new String Value with this name). Set its value to 1.

Set AutoAdminLogon value

DefaultUsername: This should already be present, showing the name of the user account you want to auto-logon.

If it’s not there, create a new String Value with the name DefaultUsername and enter the account name.

Set DefaultDomainName Value

DefaultPassword: If this value doesn’t exist, create a new String Value called DefaultPassword.

Create a new string value

Enter the user account’s password as the value. Note that this stores the password in plaintext, so only do this on systems where security isn’t a concern.

Enter DefaultPassword

DefaultDomainName: (Optional) If you’re logging into a domain, set this value to your domain name. For local accounts, this value can be left empty.

Set DefaultDomianName value

After you’ve made these changes, close the Registry Editor. The next time you reboot, Windows should automatically log in using the account you specified.

Please see Auto Logon Error “The username and password specified is not valid” and How to disable auto login in Windows.

Method 2: Using Netplwiz (Windows 10/11)

Press Win + R, type netplwiz, and press Enter. This opens the User Accounts settings.

Run netplwiz command

In the User Accounts window, uncheck the box that says “Users must enter a username and password to use this computer.”

Users account settings

After you uncheck the box click the Apply button, a prompt will appear asking for the username and password of the account you want to auto-logon. Enter the details and click “OK”.

Enter the user password

Restart your system. It should now automatically log in to the specified user account.

Step 2: Set Up Auto-Start for Applications

Once auto-logon is enabled, the next step is to configure which programs or scripts will automatically start when the user logs in.

Press Win + R, type shell:startup, and hit Enter. This opens the Startup folder for the current user.

Open startup folder
Open startup folder

You can drag and drop application shortcuts into this folder, and they will start automatically every time the user logs in.

Add program or services

You can also add scripts or batch files here if needed.

Option 2: Use Task Scheduler for More Control

If you need more control over when and how applications start (e.g., delay start or run with elevated privileges), use the Task Scheduler.

Press Win + S, search for “Task Scheduler,” and open it.

Open Task Scheduler
Open Task Scheduler

Click on “Create Task” from the right-hand panel.

Create a task
Create a task

In the General tab, give the task a name and select “Run whether user is logged on or not.”

Name the task
Name the task

In the Triggers tab, click “New”.

Click the New button

Set the trigger to “At logon” in the New Trigger.

Select when to run task

Click “New” in the Actions tab.

Create new action
Create new action

Enter the path to the program or script you want to run.

Enter program or service path to run

Optionally, configure any additional conditions (like delays) in the “Conditions” tab.

Click “OK” and provide administrative credentials if prompted. Your task will now run whenever the specified user logs in.

Once you’ve configured auto-logon and auto-start, restart your computer to test whether everything works as expected. The system should:

Automatically log into the user account without needing a password. Launch the apps or scripts you’ve added during startup.

Security Considerations

While auto-logon and auto-start are great for convenience, be cautious if you’re enabling these features on systems where security is important.

Auto-logon stores your credentials in plaintext in the registry, which makes the system vulnerable if unauthorized users gain access to it. Consider this setup only in environments where physical access to the machine is well controlled.

Conclusion

Setting up auto-logon and auto-start can significantly speed up workflows and simplify user interaction in certain environments.

Whether you’re building a kiosk, configuring a home server, or just want your PC to get to work faster, this method makes the process seamless. Always remember to balance convenience with security when implementing such configurations.

I hope you find this post helpful on how to Enable autologon and autostart for user session. If you have any questions, feel free to leave them in the comment section below.

5/5 - (1 vote)

Thank you for reading this post. Kindly share it with others.

  • Click to share on X (Opens in new window) X
  • Click to share on Reddit (Opens in new window) Reddit
  • Click to share on LinkedIn (Opens in new window) LinkedIn
  • Click to share on Facebook (Opens in new window) Facebook
  • Click to share on Pinterest (Opens in new window) Pinterest
  • Click to share on Tumblr (Opens in new window) Tumblr
  • Click to share on Telegram (Opens in new window) Telegram
  • Click to share on WhatsApp (Opens in new window) WhatsApp
  • Click to share on Pocket (Opens in new window) Pocket
  • Click to share on Mastodon (Opens in new window) Mastodon
  • Click to share on Bluesky (Opens in new window) Bluesky
  • Click to share on Threads (Opens in new window) Threads
  • Click to share on Nextdoor (Opens in new window) Nextdoor
Windows Tags:Auto Logon, Automatic login, Automatic Start, automaticstartup, Microsoft Windows, Windows 10, Windows 11, Windows Server 2016

Post navigation

Previous Post: How to Edit Windows Hosts File via PowerToy Editor Utility
Next Post: Cybersecurity Tips to Secure Synology NAS against Ransomware

Related Posts

  • winSEARCH
    Hide or Remove Search Button from Windows 10 Taskbar Windows
  • banner
    How to Check and Reset Network Data Usage in Windows 11 Network | Monitoring
  • banner2
    How to Use Google Chrome’s Enhanced Privacy Settings JIRA|Confluence|Apps
  • jhgfx
    How to make Cortana use your default web browser such as Google Chrome Windows
  • Fix this file came from another computer and might be blocked error
    File Came From Another Computer And Might be Blocked Error Windows
  • image 30
    How to Fix “Insufficient System Resources Exist to Complete the Requested Service” error Windows

More Related Articles

winSEARCH Hide or Remove Search Button from Windows 10 Taskbar Windows
banner How to Check and Reset Network Data Usage in Windows 11 Network | Monitoring
banner2 How to Use Google Chrome’s Enhanced Privacy Settings JIRA|Confluence|Apps
jhgfx How to make Cortana use your default web browser such as Google Chrome Windows
Fix this file came from another computer and might be blocked error File Came From Another Computer And Might be Blocked Error Windows
image 30 How to Fix “Insufficient System Resources Exist to Complete the Requested Service” error Windows

Leave a Reply Cancel reply

You must be logged in to post a comment.

Microsoft MVP

VEEAMLEGEND

vexpert-badge-stars-5

Virtual Background

GoogleNews

Categories

veeaam100

sysadmin top30a

  • drivelock 1
    How to activate DriveLock License on Windows Server Windows Server
  • S3 Bucket
    Access AWS Management Console and Create Resources with AWS CLI on Windows AWS/Azure/OpenShift
  • Screenshot 2020 12 29 at 04.08.43
    Enable or disable BitLocker Drive Encryption on Windows Security | Vulnerability Scans and Assessment
  • maxresdefault
    How to extend a VM Hard Disk on VMware Workstation Virtualization
  • screenshot 2017 06 07 11.30.45
    How to Enable or Disable Touch Screen in Windows 10 Windows
  • How to download install and use Kitty SSH Client on Windows
    Video on how to Download and Use KiTTY SSH Client on Windows Network | Monitoring
  • TZ
    TFTP Image to Flash: Copying Guide for Cisco ASA Network | Monitoring
  • SSH Keys Generation
    How to Generate SSH keys in Windows 11 Windows

Subscribe to Blog via Email

Enter your email address to subscribe to this blog and receive notifications of new posts by email.

Join 1,836 other subscribers
  • RSS - Posts
  • RSS - Comments
  • About
  • Authors
  • Write for us
  • Advertise with us
  • General Terms and Conditions
  • Privacy policy
  • Feedly
  • Telegram
  • Youtube
  • Facebook
  • Instagram
  • LinkedIn
  • Tumblr
  • Pinterest
  • Twitter
  • mastodon

Tags

Active Directory AWS Azure Bitlocker Microsoft Windows PowerShell WDS Windows 10 Windows 11 Windows Server 2016

Copyright © 2025 TechDirectArchive


Loading Comments...
 

You must be logged in to post a comment.