Import Virtual Machines to AWS as AMI
An Amazon Machine Image (AMI) is a template that contains a software configuration (for example, an operating system, an application server, and applications). From an AMI, you launch an instance, which is a copy of the AMI running as a virtual server in the cloud. You can launch multiple instances of an AMI. You can launch different types of instances from a single AMI. In this guide, we shall discuss how to import virtual Machines to AWS as AMI. Please see How to create an AMI using AWS console, Commandline: How to create an AMI from the CLI, and how to launch an EC2 instance.
An instance type essentially determines the hardware of the host computer used for your instance. Each instance type offers different computing and memory capabilities. Select an instance type based on the amount of memory and computing power that you need for the application or software that you plan to run on the instance.
Amazon Web Services (AWS) publishes many Amazon Machine Images (AMIs) that contain standard software configurations for public use. In addition, members of the AWS developer community have published their own custom AMIs. You can also create your own custom AMI or AMIs; doing so enables you to quickly and easily start new instances that have everything you need.
Import Virtual Machines to AWS
All AMIs are categorized as either backed by Amazon EBS, which means that the root device for an instance launched from the AMI is an Amazon EBS volume, or backed by instance store, which means that the root device for an example launched from the AMI is an instance store volume created from a template stored in Amazon S3.
Note: You can perform these via the CLI but in our case, we used the AWS Web Console
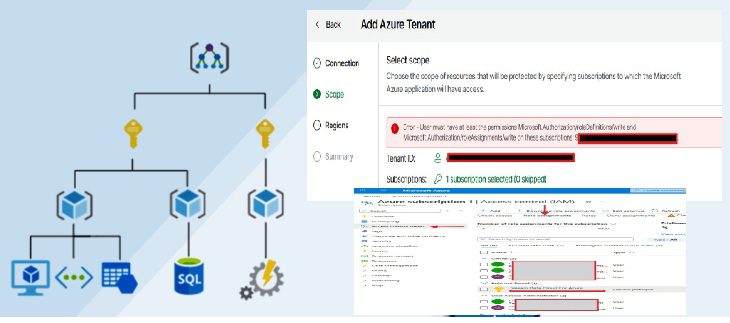
Verify if the VMIMPORT Role is currently created on your AWS roles … If not you must have to create this role. [For us it has been created].
Navigate to Roles
- Create Roles
- Search for the VMIMPORT Role and follow the steps: Very straightforward!
- Steps 3: Click on the
VMIMPORT ROLEcreated - Navigate to the Trust relationship and
- Click on the
edit trust relationship

Ensure you have your Trust relationship this way
"Version": "2012-10-17",
"Statement": [
{
"Effect": "Allow",
"Principal": {
"Service": "vmie.amazonaws.com"
},
"Action": "sts:AssumeRole",
"Condition": {
"StringEquals": {
"sts:ExternalId": "vmimport"
                           }
                   }
               }
           ]
}
Now from the CLI, run the following command below. Please see Implement N2WS Veeam: Cloud Protection with CPM 2.3.0d, and Advantage of using a 3rd party software for Backup (N2WS by Veeam) over AMI.
Note: The right permission policy must be attached to the VMIMPORT role or it will fail and complain of insufficient permission to continue.
Modify the syntax below and replace it with your ova file and your s3 bucket name shown below.
aws ec2 import-image --cli-input-json "{ "Description": "Dxxxx.ova", "DiskContainers": [ { "Description": "Dxxxxxx.ova", "UserBucket": { "S3Bucket": "cx-texa-eu-central-1", "S3Key" : "Dxxxxova" } } ]}"When successfully imported, ‘ success’ is displayed.
I hope you found this blog post helpful on how to import virtual Machines to AWS as AMI. If you have any questions, please let me know in the comment session.