
Load balancing is a key and Major part of IT infrastructure and this is because the High availability and efficient performance of webservers are very important. The purpose of load balancing is to prevent a server from being overloaded and maintain healthy servers by balancing incoming requests. Please see Setup Public Load Balancer in Azure, How to create a load balancer for Azure Stack Hub, and How to Configure Network Load Balancing In Windows Server
A Load Balancer is available, reliable, and highly scalable web application. Furthermore, In this tutorial, I will deploy one Haproxy server and 2 backend servers in a Lab environment. However, in a subsequent post, I will show how to configure, deploy and troubleshoot an ELB on cloud platforms.
NOTE: All deployments are done on CentOS 8.Also, see Installing and configuring SimpleSAMLphp [Part 2], and How to create an EC2 Instance.
Installing and configuring HAproxy
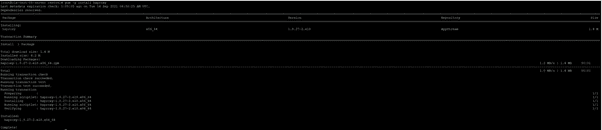
Yum -y install Haproxy
NOTE: Back up the default config file, should anything go wrong, we can revert.
mv /etc/haproxy/haproxy.cfg /etc/haproxy/haproxy.cfg-bakcreate a new haproxy config file and paste the following
vim /etc/haproxy/haproxy.cfg#———————————————————————
global
log 127.0.0.1 local2
chroot /var/lib/haproxy
pidfile /var/run/haproxy.pid
maxconn 4000
user haproxy
group haproxy
daemon
# turn on stats unix socket
stats socket /var/lib/haproxy/stats
# utilize system-wide crypto-policies
ssl-default-bind-ciphers PROFILE=SYSTEM
ssl-default-server-ciphers PROFILE=SYSTEM
#———————————————————————
defaults
mode http
log global
option httplog
option dontlognull
option http-server-close
option forwardfor except 127.0.0.0/8
option redispatch
retries 3
timeout http-request 10s
timeout queue 1m
timeout connect 10s
timeout client 1m
timeout server 1m
timeout http-keep-alive 10s
timeout check 10s
maxconn 3000
# main frontend which proxys to the backends
frontend haproxy_balancer # define the name of the frontend.
bind 192.168.0.10:80 # IP address of HAProxy server
option http-server-close
option forwardfor
stats uri /haproxy?stats # Specify the HAProxy status page.
default_backend webservers
# round robin balancing between the various backends
backend webservers # Specify a name for identifying an application
mode http
balance roundrobin # defines the roundrobin load balancer scheduling algorithm
option httpchk HEAD / HTTP/1.1\r\nHost:\ localhost
server nginx-web1 192.168.0.11:80 check # IP address of the first backend server
server nginx-web2 192.168.0.12:80 check # IP address of the second backend serverNOTE: Kindly change the Mode and the server IPs as specified based on your configurations
Test the configuration for errors
haproxy -c -f /etc/haproxy/haproxy.cfg
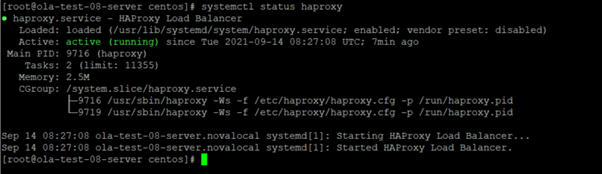
Start and Enable the Haproxy service

Checking the HAproxy status
Open the Web Url of your front end server

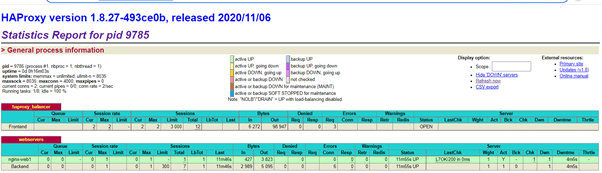
Check Statistics and status of Haproxy
Now you can keep adding backend servers.
NOTE: When deploying a load balancer from scratch, ensure that backend servers have Nginx installed. Additionally, confirm the availability and firewall permissions for the backend port.
I hope you found this blog post on Deploying a load balancer from scratch and adding backend servers helpful. Please let me know in the comment session if you have any questions.


