
Azure Stack Hub has built-in Azure Monitor capabilities; however, they are limited. Therefore, if you are looking for a more feature-rich solution, you should use public Azure Monitor. Azure Monitor is a platform service that provides a single source for monitoring Azure resources. With Azure Monitor, you can visualize, query, route, archive, and otherwise take action on the metrics and logs coming from resources in Azure. You can as well refer to some of the related guides: How to configure azure monitor for VMs on azure stack hub, and how to create a load balancer for Azure stack hub. In this article, we will discuss How To Configure VM Update Management on Azure Stack Hub.
Step to setup VM Update Management on Azure Stack Hub
To complete the steps in this article, you must have appropriate access to a subscription in the Azure and Azure Stack Hub portals. Please see how to deploy Azure vmware solution private cloud, how to install Ansible on Windows with Cygwin, how to automate infrastructure deployments in the cloud with ansible and azure pipelines, how to install Kerberos packages in Windows via Cygwin, how to configure a remote server (windows) to Support Ansible, and how to install and configure Ansible on Ubuntu.
Enabling VM Update and Management
A Log Analytics Workspace is an Azure resource and a container where data is collected, aggregated, and serves as an administrative boundary.
Creating an Azure Monitor Log Analytics workspace has some specific considerations you need to account for before choosing to create a new workspace.
- Log in to the Azure portal.
- Create a Log Analytics workspace in your Azure subscription:
- Click Create a resource
- In the search bar, search for log analytics

Then Click Log Analytics, Click Create, and Provide the following:
- A name for the Log Analytics Workspace. Example: DefaultLAWorkspace
- A Subscription to link the workspace to
- A Resource group to host the workspace in
- A Location to host the workspace in
- A Pricing tier to use

Click Review + Create, and Click OK once finished. Understand that, The Log Analytics workspace will now begin deploying. A notification will appear in the top right of the portal.
- Once deployment is complete, navigate to the resource group you placed the Log Analytics workspace in.
- Click the newly created workspace. On the new blade, under Settings, select Agent Management.
- Note down the Workspace ID and Primary Key values.
3. Create and configure an Automation Account:
3. Create and Configure an Automation Account
An Automation Account is a container for your Azure Automation resources. It provides a way to separate your environments or further organize your Automation workflows and resources. Azure Automation allows you to automate the creation, deployment, monitoring, and maintenance of resources in your Azure environment and across external systems.
Azure uses a highly scalable and reliable workflow execution engine to simplify cloud management. Orchestrate time-consuming and frequently repeated tasks across Azure and third-party systems.
- Click Create a resource
- Search for automation
- Select Automation and then click Create

Then Choose a Name, Subscription, Resource group, Location and ensure Create Azure Run As account is set to Yes. Click Create

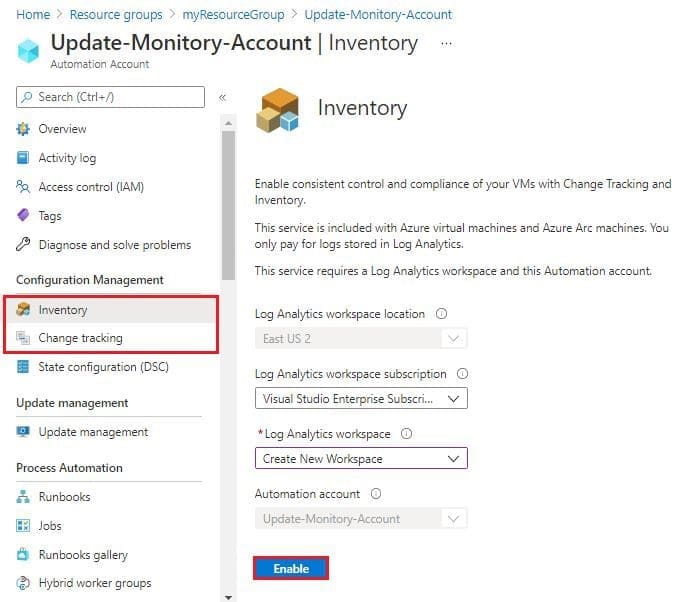
Enable Log Analytics workspace
4. Once deployed, navigate to the Automation Account. In the new blade, under Configuration Management, select the solution to enable (Inventory or Change Tracking).
- Select the Log Analytics workspace to link the automation account to
- Click Enable
- Wait for the deployment to complete
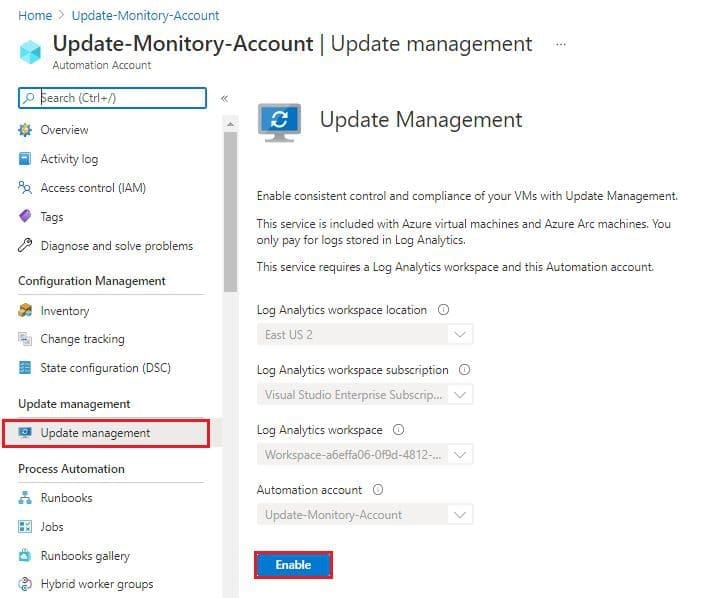
- Repeat step 4 for Update Management under Update Management
Log in to the Azure portal. Navigate to the VM that you want to enable Azure Monitor on and under Settings, select the Extensions blade.
Note: For any monitoring to work correctly, the VM must have HTTPS (Port 443) enabled in the Network Security Group rules.
7. Click Add at the top, select the extension Azure Monitor Dependency Agent, click Create, and then OK.
Repeat this step for the Azure Monitor, Update and Configuration Management extension. Providing the extension with the Workspace ID and Primary Key values (noted down previously) when prompted.

8. Once the deployment is finished, head back to the public Azure portal and navigate to the Log Analytics workspace -> Advanced settings -> VM Type Servers.
Then Change the time range to the Last 30 minutes.9. Navigate to the Automation Account. In the new blade, under Update Management, select Update Management.
- You will see the following prompt:
- Select Click to manage machines.
- Select Enable on all available and future machines.
Click Enable. Repeat step 10 for Inventory.
Everything is now enabled. The API is called every 15 minutes to query for the last update time to determine whether the status has changed. If the status has changed, a compliance scan is initiated.
View Azure Monitor for VMs
NOTE: It can take between 30 minutes and 6 hours for the dashboard to display updated data from managed VMs.
- Within the Automation Account, the blades Inventory, Change Tracking and Update Management will provide useful analytics.
- In public Azure, on the top left, click the hamburger icon and select Monitor.

In the new blade under Insights, click Virtual Machines. You will see three usage analytics tabs (Get Started, Performance and Map) for the VMs you have enabled Azure Monitor for VMs on.
The Get Started tab does not show Azure Stack Hub VMs.

At the top, click the Performance tab, then on the right, move the switch from Azure to Hybrid. A prompt will appear to upgrade the workspace, click Upgrade. In the new blade, click Upgrade again.
Upon refreshing the page, the prompt will disappear and the workspace will begin showing usage analytics for the VMs you have enabled Azure Monitor for VMs on.

This article provided an overview steps by steps on How To Configure VM Update Management on Azure Stack Hub. Also, understand how to enable VM update and management. I hope you found this article useful for your project.


