Skip to content

TechDirectArchive

Hands-on IT, Cloud, Security, Veeam & DevOps

  • Home
  • About
  • Advertise With US
  • Reviews
  • Contact
  • Toggle search form

How to install Microsoft Teams on a macOS

Posted on 11/07/202216/08/2026 Christian By Christian No Comments on How to install Microsoft Teams on a macOS
  1. Home
  2. Mac
  3. How to install Microsoft Teams on a macOS
How to install Microsoft Teams on a macOS

Microsoft Teams is the hub for teamwork in Microsoft 365. The Teams service enables instant messaging, audio and video calling, rich online meetings, mobile experiences, and extensive web conferencing capabilities. Kindly refer to these related guides: How to install and activate Office 2019 on your Mac PC, How to Cancel Office 365 Family Subscription, and how to complete Microsoft Office 365 Family Subscription

In addition, Teams provides file and data collaboration and extensibility features and integrates with Microsoft 365 and other Microsoft and partner apps. You can sign up for it standalone, or use it as part of the larger Office 365 suite of applications.

Before proceeding with the installation of install Microsoft Teams on a macOS, kindly use Spotlight search to make sure Teams isn’t already installed on your Mac. If Teams is already installed, you’re all set! Otherwise, follow the steps below.

Here are some other guides you may want to take a look at How to Enable or Prevent Reopen Windows when logging back in after Restart or Shutdown on Mac, how to hide or stop Apps such as OneDrive from opening automatically upon login on Macbook Pro, and how to download a shared ZOOM recording.

What is Microsoft Teams?

Teams is built using Microsoft 365 groups, Microsoft Graph, and incorporates the same enterprise-level security, compliance, and manageability found throughout Microsoft 365 and Office 365. It leverage identities stored in Azure Active Directory (Azure AD). Teams keep working even when you’re offline or experiencing spotty network conditions.

Installing Microsoft Teams on MacOS

Please, see , how to Hide or Remove the Search Button from Windows 11 Taskbar, how do you change the account that Office says it belongs to on a Mac, and how to remove Microsoft Outlook, Teams, Words PowerPoint, and Excel apps from Mac.

Step 1: Download Teams

Microsoft provides an installer for Teams in the .PKG format, which walks you through the installation via a wizard. Download Microsoft Teams using the following Microsoft official link. Clicking on the ‘Download for Desktop’ link below will redirect you to the download page.

Clicking on the ‘Download for Desktop’

Once in the download by region page, click on download Teams as shown below.

click on download Teams

This will download the Teams_osx.pkg file as shown below.

Step 2: Install Downloaded package

Navigate to your Downloads folder and double-click on Teams_osx.pkg
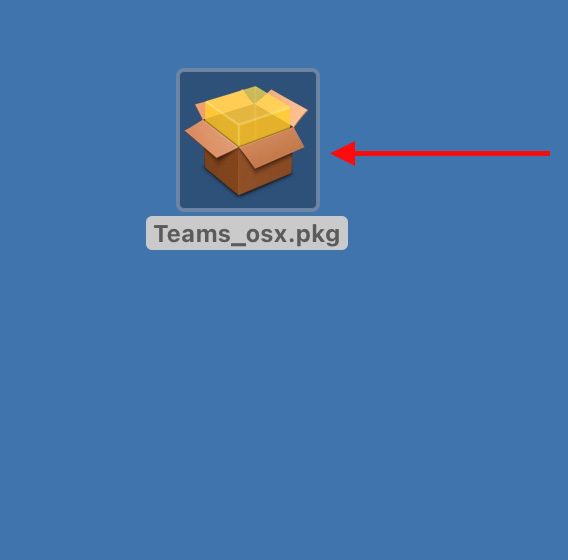
double-click on Teams_osx.pkg

On the welcome to the Microsoft teams Installer, click on continue to proceed.
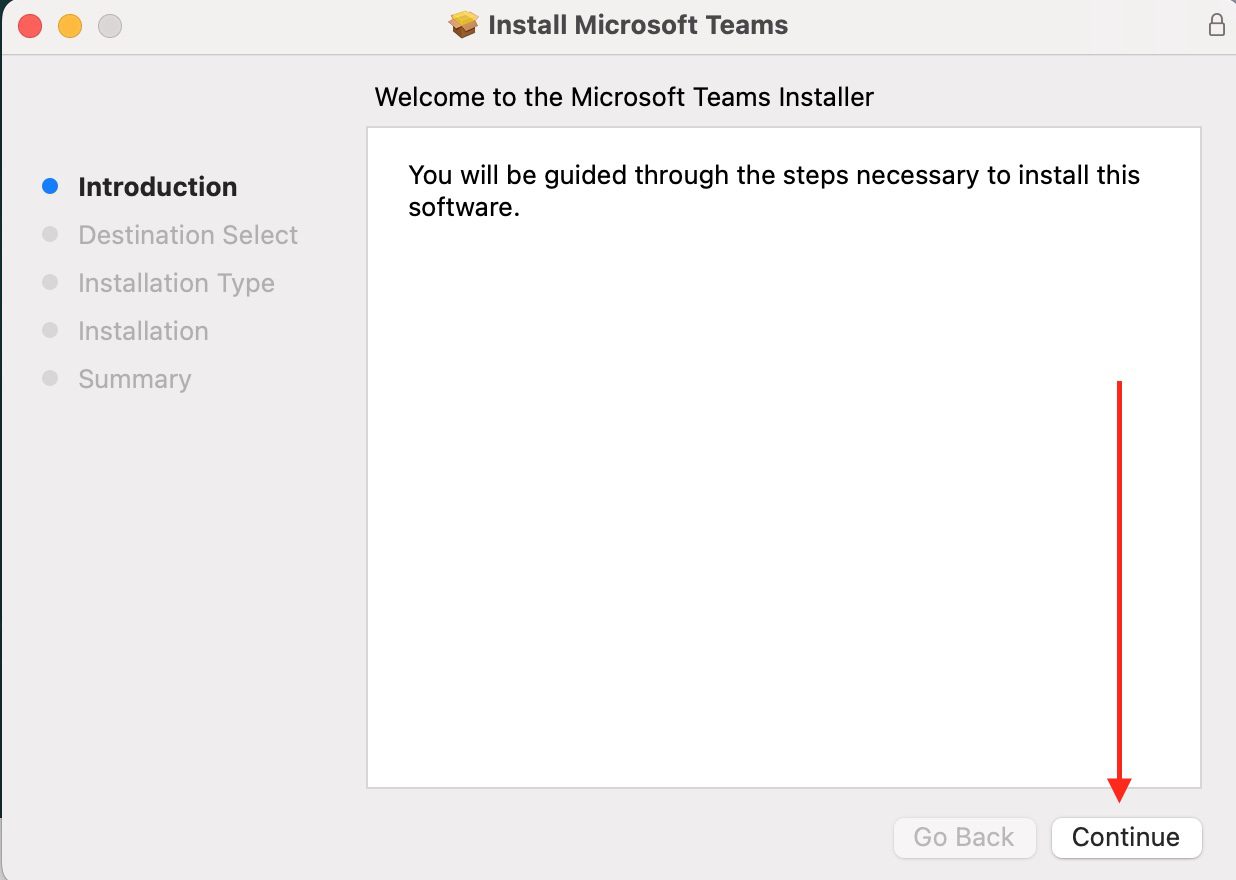
click on continue to proceed.

Choose how you want to install Teams and click Continue. For me, I will be selecting the first option “Install for all users of this computer”.
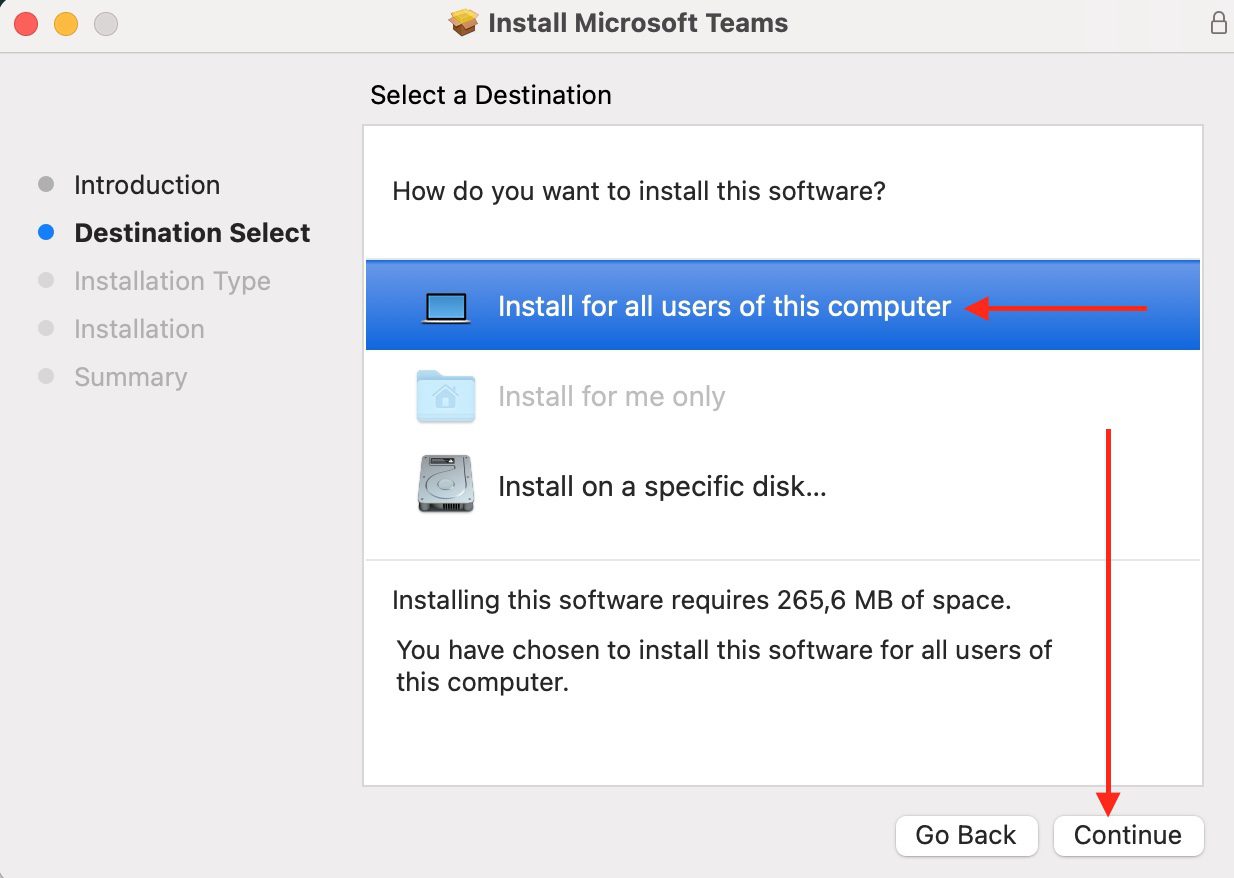
Team installation to install for all PC

Kindly follow the prompts. The next screen lets you know how much disk space it will use, and asks for confirmation on where to install it.  On the installation type, please select Install as shown below.
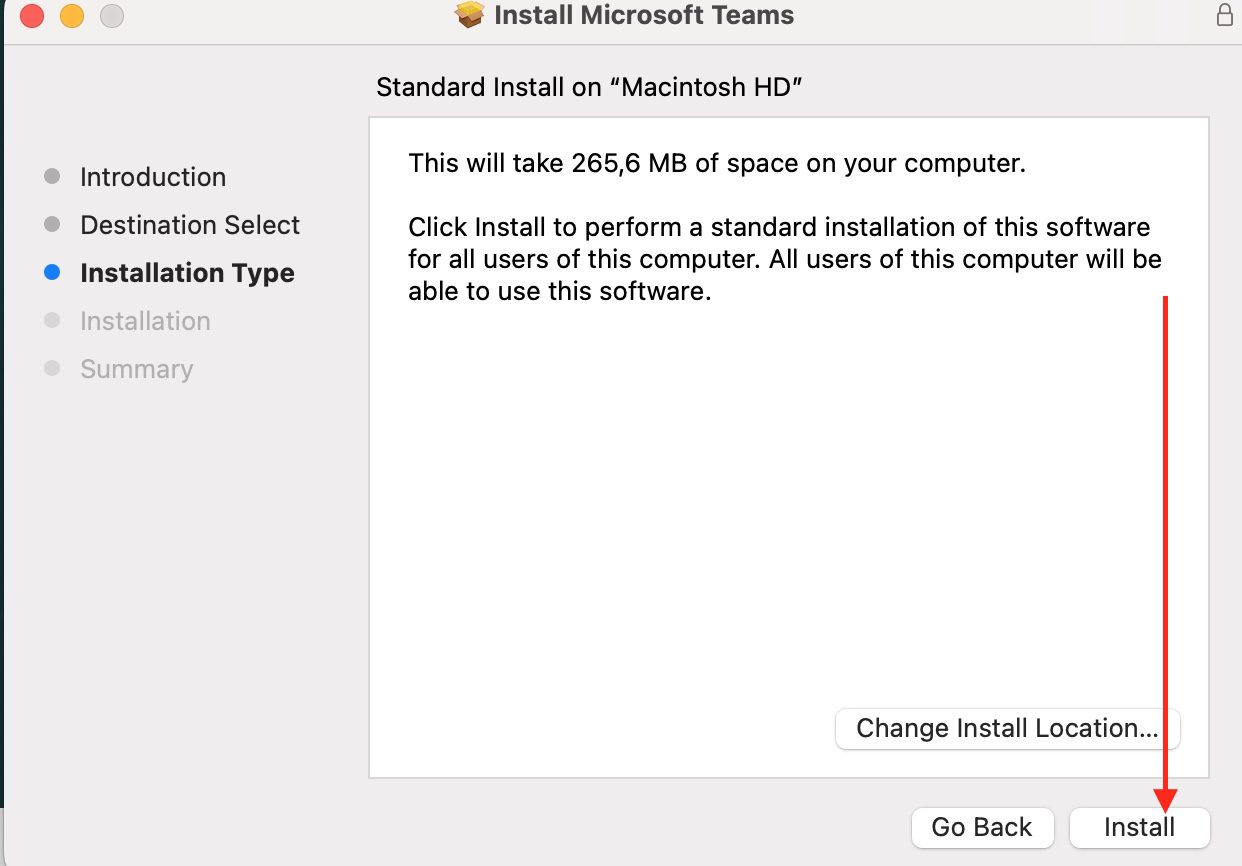
Install Teams

You will need administrative rights to complete the installation. Enter your password and hit the Install Software.

The installer will start copying files at this point, and show you its progress.
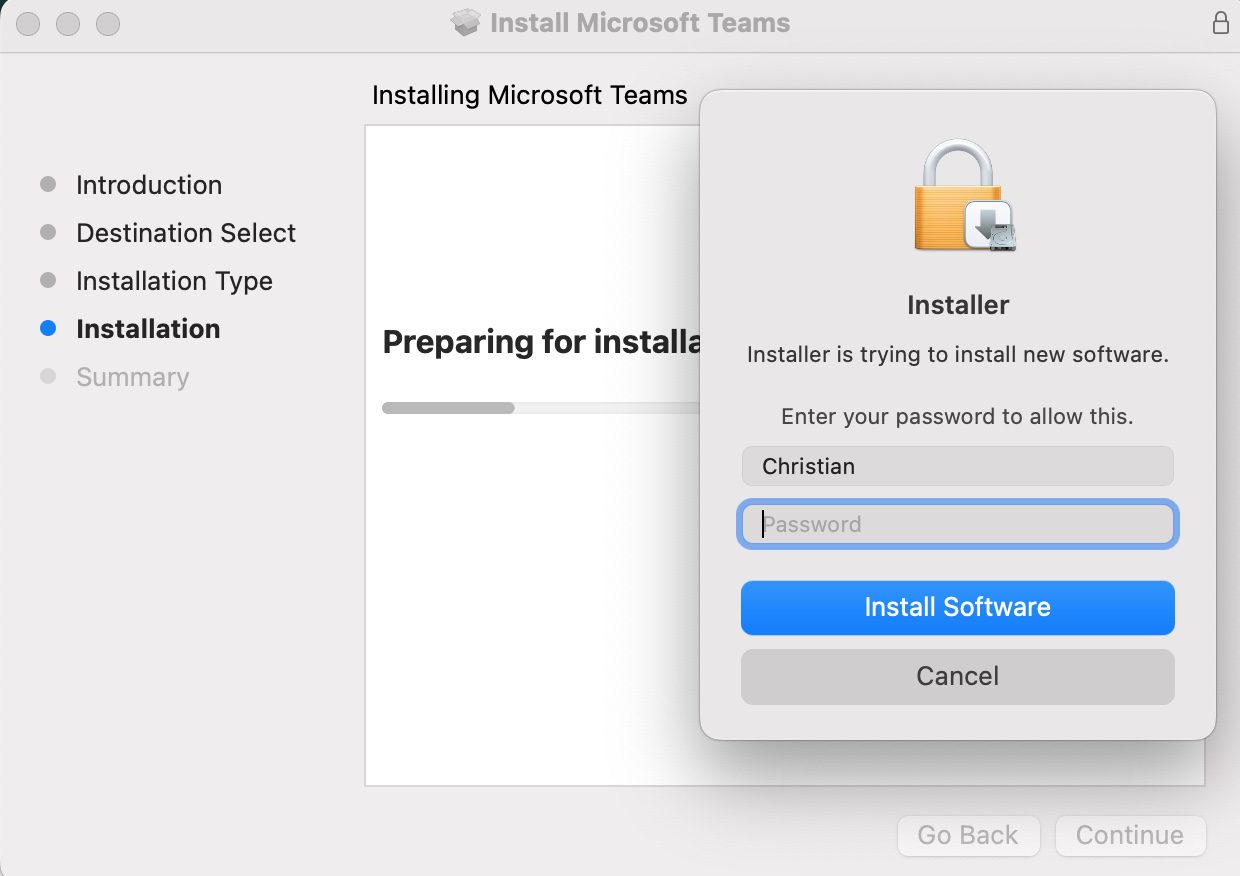
Enter your password to install office

As you can see, we have successfully installed teams. You can click Close to quit the Teams installer.
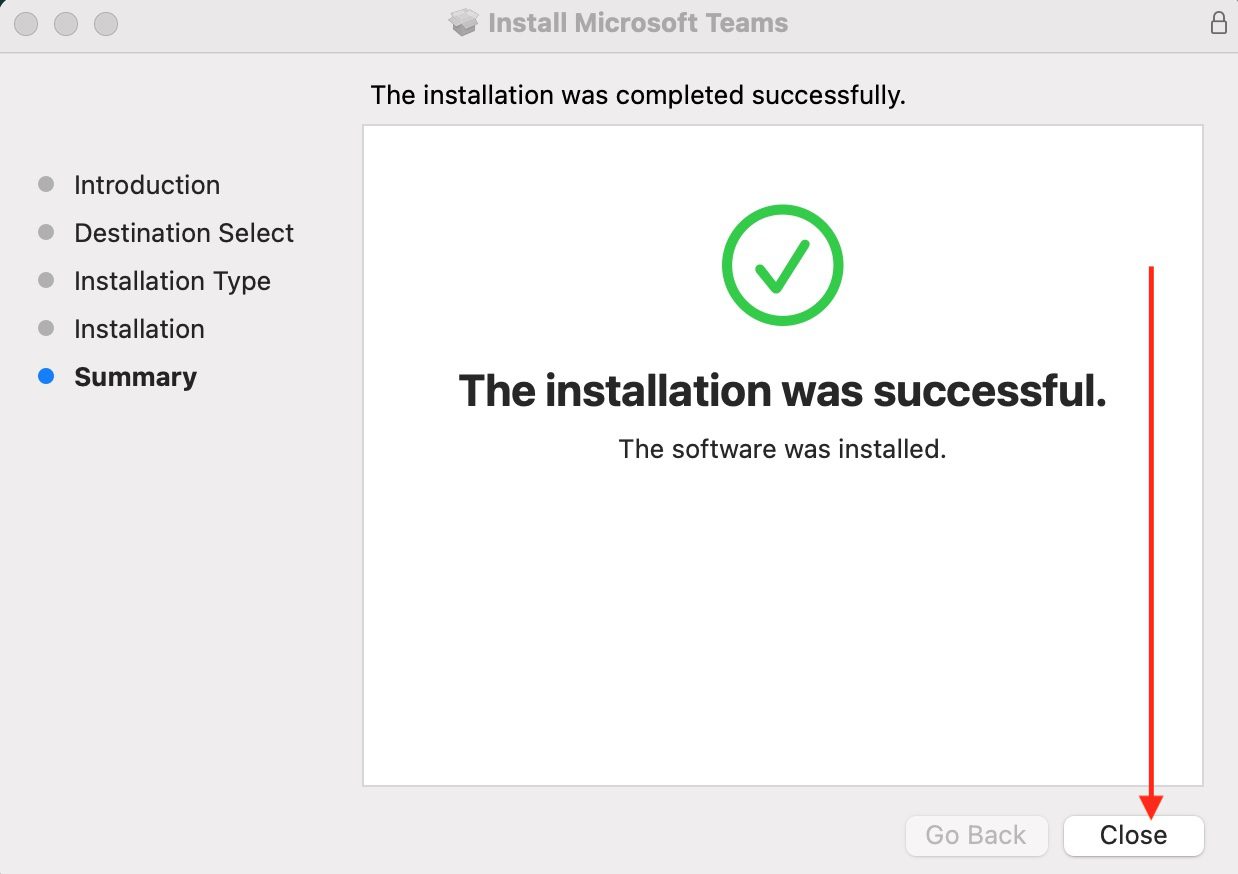
Office installation is complete

Step 3: Complete Setup

Once the installation process is completed, proceed to open Teams. Teams will eventually recognise your account immediately. If this is not the case, enter your Microsoft 365 email.
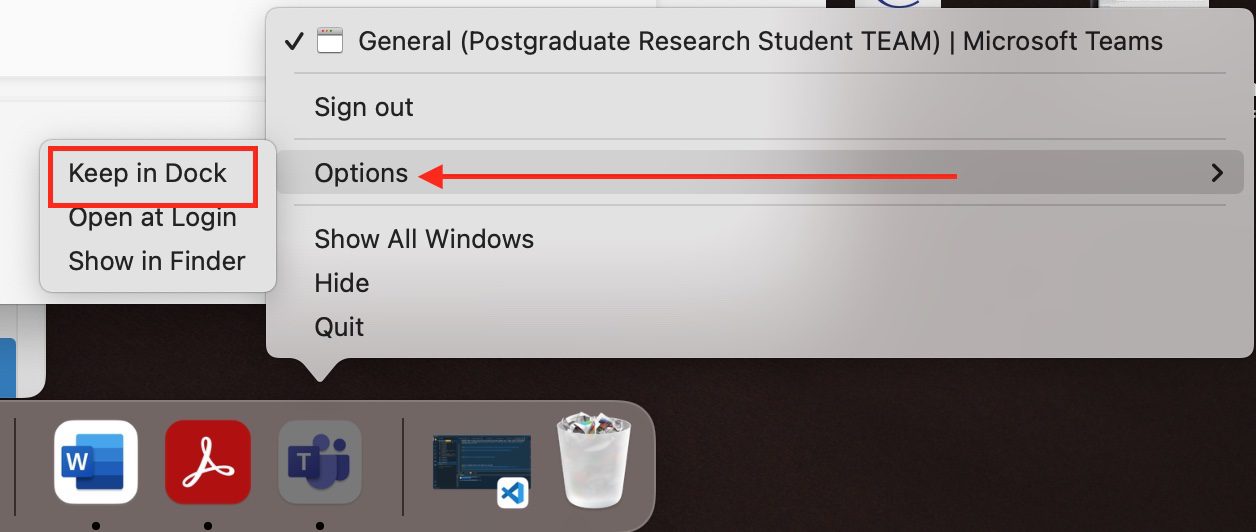
Keep office in dock

You can locate the Teams installer from the download folder (in my case Desktop) and trash it (move it to the Bin). It is create to clean up in order to save storage space.
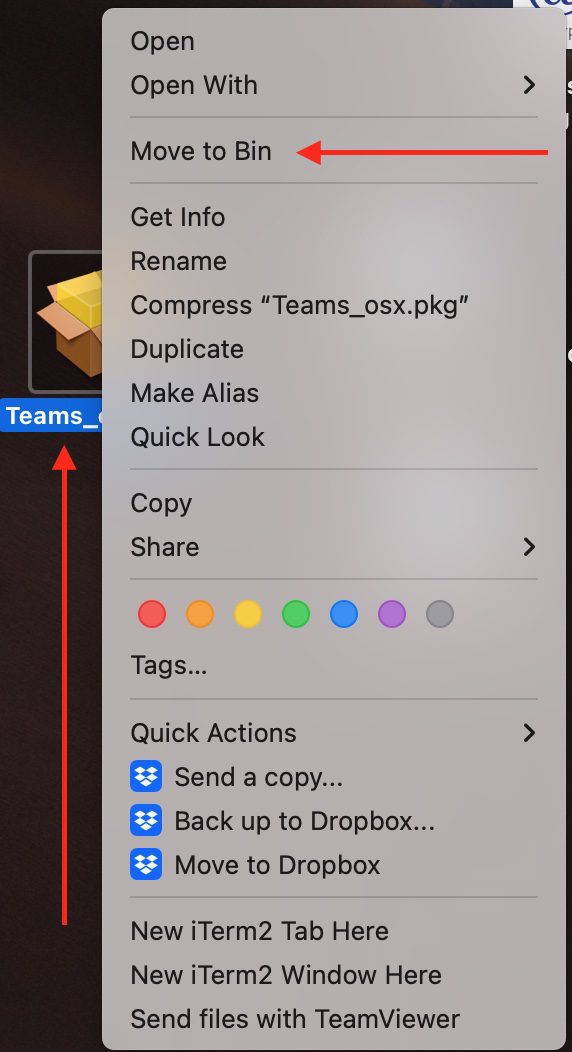
Delete the office installation pkg file

Note: In some versions of MacOs X, you will have to allow Teams to access your microphone and camera. If the program does not request it, you will have to turn on access in your device settings. You may want to see how to control access to Camera on Mac or control access to your microphone on Mac.

I hope you found this blog post on How to install Microsoft Teams on a macOS helpful. If you have any questions, please let me know in the comment session.

Thank you for reading this post. Kindly share it with others.

  • Share on X (Opens in new window) X
  • Share on Reddit (Opens in new window) Reddit
  • Share on LinkedIn (Opens in new window) LinkedIn
  • Share on Facebook (Opens in new window) Facebook
  • Share on Pinterest (Opens in new window) Pinterest
  • Share on Tumblr (Opens in new window) Tumblr
  • Share on Telegram (Opens in new window) Telegram
  • Share on WhatsApp (Opens in new window) WhatsApp
  • Share on Mastodon (Opens in new window) Mastodon
  • Share on Bluesky (Opens in new window) Bluesky
Mac Tags:Download and Install Teams, macOS Monterey, Microsoft Office, Microsoft Office 365, Microsoft Teams, MS Teams, MS Teams for Mac, Teams

Post navigation

Previous Post: How to install and activate Office 2019 on your Mac PC
Next Post: Fix Git is not recognised as an internal or external command

Related Posts

  • Ping commands
    Ping from Source IP Address from all environments Mac
  • screenshot 2020 03 20 at 00.44.47
    How to check if homebrew is installed on macOS Mac
  • fkeys
    Unable to change screen brightness and volume: Disable standard function keys on Mac Mac
  • VLC Media Player pcgh b2article artwork
    How to Set Quicktime or VLC as a default player on macOS Mac
  • Bluetooth
    Cannot open Bluetooth preference pane because it is not available Mac
  • convert HEIC image format to JPEG format
    Convert HEIC images to JPEG format on Mac with Quick Actions Mac

More Related Articles

Ping commands Ping from Source IP Address from all environments Mac
screenshot 2020 03 20 at 00.44.47 How to check if homebrew is installed on macOS Mac
fkeys Unable to change screen brightness and volume: Disable standard function keys on Mac Mac
VLC Media Player pcgh b2article artwork How to Set Quicktime or VLC as a default player on macOS Mac
Bluetooth Cannot open Bluetooth preference pane because it is not available Mac
convert HEIC image format to JPEG format Convert HEIC images to JPEG format on Mac with Quick Actions Mac

Leave a Reply Cancel reply

You must be logged in to post a comment.

Microsoft MVP

vexpert-badge-stars-5

Virtual Background

VEEAMLEGEND

Categories

veeaam100

Veeam Vanguard

  • Windows Image Converation from Evaluation to retail Edition
    Convert Windows Server Essentials or Evaluation to Retail Edition Windows
  • How to Disable Automatic Opening of Previous files in Notepad on Windows 11
    How to Disable Automatic Opening of Previous Files in Notepad on Windows 11 Windows
  • Ec2 Instance
    How to create an EC2 Instance AWS/Azure/OpenShift
  • Gfeature
    How to install Googler on a Linux System Linux
  • taskbar1
    Hide or Remove Search Button from Windows 11 Taskbar Windows
  • How to Fix 0xc000007b Error banner
    Fix 0xc000007b Error on Windows 11 While Launching a Game Windows
  • cloudqueryfeature
    How to Manage Cloud Assets in AWS with CloudQuery AWS/Azure/OpenShift
  • Raise or Downgrade AD Domain and Forest Functional Level
    Raise or Downgrade AD Domain and Forest Functional Level Windows Server

Subscribe to Blog via Email

Enter your email address to subscribe to this blog and receive notifications of new posts by email.

Join 1,759 other subscribers
  • RSS - Posts
  • RSS - Comments
  • About
  • Authors
  • Write for us
  • Contact
  • Advertise with us
  • General Terms and Conditions
  • Privacy policy
  • Feedly
  • Telegram
  • Youtube
  • Facebook
  • Instagram
  • LinkedIn
  • Tumblr
  • Pinterest
  • Twitter
  • mastodon
  • Bsky

Tags

Active Directory Azure Bitlocker Microsoft Windows PowerShell WDS Windows 10 Windows 11 Windows Deployment Services Windows Server 2016

Copyright © 2026 TechDirectArchive

Loading Comments...

You must be logged in to post a comment.