Skip to content

TechDirectArchive

Hands-on IT, Cloud, Security & DevOps Insights

  • Home
  • About
  • Advertise With US
  • Reviews
  • Contact
  • Toggle search form
Home » Windows » Prevent your PC from sending Diagnostics Feedback off via Windows Settings and Group Policy

Prevent your PC from sending Diagnostics Feedback off via Windows Settings and Group Policy

Posted on 01/09/202215/12/2023 Matthew By Matthew No Comments on Prevent your PC from sending Diagnostics Feedback off via Windows Settings and Group Policy
Featured-image_Microsoft-diagnostic-feedback-disabled
Microsoft Diagnostic & Feedback

In this article, we shall discuss how to prevent your PC from sending Diagnostics Feedback off via Windows Settings and Group Policy. Gathering insights into your system usage, program activity, and visited sites, Microsoft employs its Diagnostics & feedback mechanism. This system also acquires usage data for Windows 11. Please see How to run Windows Memory Diagnostics Tool on Windows, and how to use the voice input instead of typing on Windows.

The Microsoft Diagnostic and Feedback System is an automated process that collects data from a remote source (your computer) and sends it back to Microsoft. The company uses the obtained data to monitor and enhance the operating system. Furthermore, Microsoft uses the data to improve security and the overall user experience.

While transmitting usage statistics to Microsoft sounds excellent, it opens the door for sharing anonymized data with third parties. If you are worried about Windows automatically transmitting feedback and other diagnostic data to Microsoft, follow the instructions below to disable it.

For more on Windows Diagnostics & feedback and how they can be beneficial to you, see the following guides: How to Enable and Use Diagnostic Data Viewer in Windows, How to restrict additional Microsoft Support Diagnostic Tool download, and How to Delete Diagnostic Data in Windows 10 and Windows 11.

Disable Diagnostics & feedback Collection via Settings on Windows 11

You can disable the amount of Diagnostics & feedback data collection by Windows 11 via the Settings menu by following the steps below.

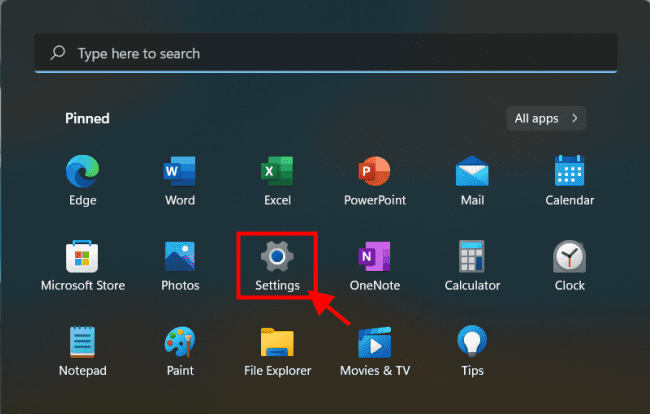
Open the Start menu and select Settings.

Diagnostic Data & Input
Launch Settings in Start menu

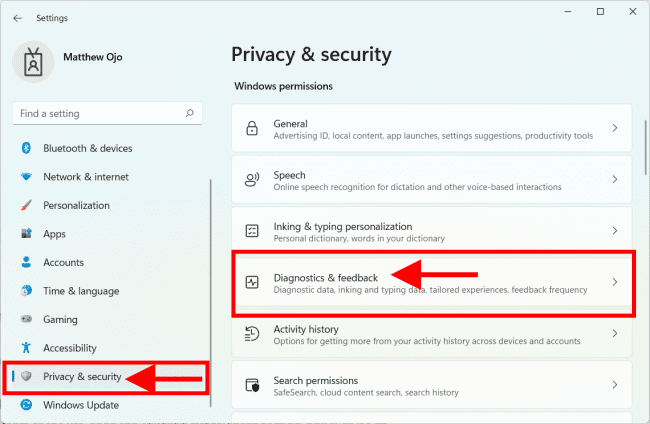
Next, select Privacy & security. On the right pane scroll down and select Diagnostics & feedback under Windows permission.

System Analysis & Response
Privacy and Security

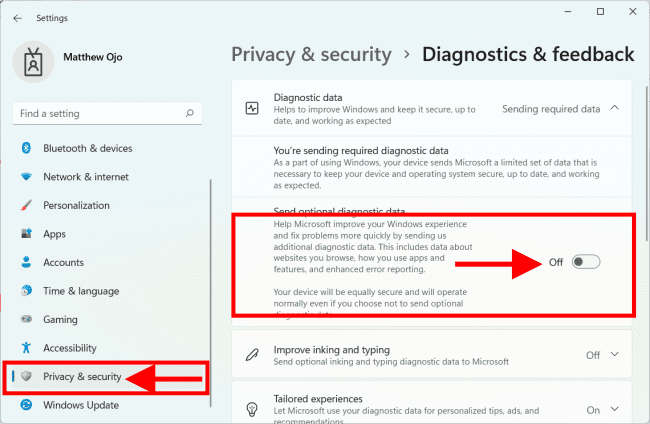
Expand Diagnostics & feedback data and turn Off the Send optional diagnostic data option.

Performance Evaluation & Input
Turn Off Send optional diagnostic data

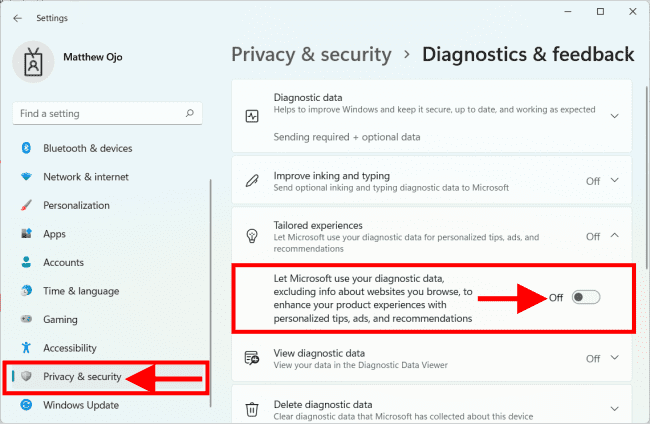
Disabling Diagnostics and feedback minimizes Microsoft’s data gathering, but it does not stop everything. Scroll to the bottom of the list, open the Tailored experiences section, and turn it Off.

System Health Assessment & Input
Turn Off Tailored experiences

It’s also worth noting that if you’re a member of the Windows Insider Program, you’ll no longer receive updates unless you reactivate it. Being a member of the Insider program entails sending diagnostic data to Microsoft.

See this detailed guide on how to protect your system against Windows Diagnostic vulnerabilities: Workaround for Microsoft Support Diagnostic Tool Vulnerability.

How to Disable Diagnostics & feedback Collection via Group Policy

If you’re running Windows 11 Pro or higher, you can disable diagnostic data collection by using Group Policy.

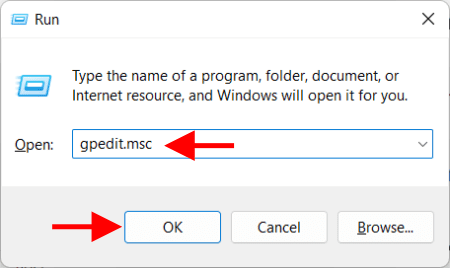
To open the Run dialog, press Windows key + R on your keyboard. Enter gpedit.msc and press OK.

Diagnostic Data & Input
Opening the Group Policy Editor

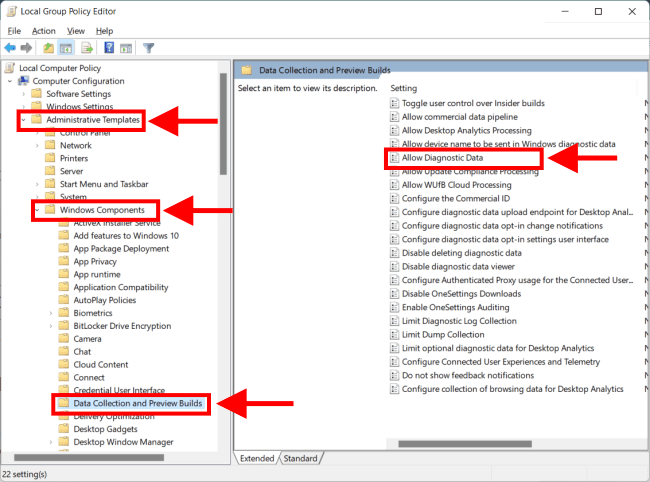
When the Group Policy Editor window opens, go to the following path: 

Computer Configuration > Administrative Templates > Windows Components > Data Collection and Preview Builds

Double-click Allow Diagnostic Data to open it.

System Analysis & Response
Opening Allow Diagnostic Data in Group policy

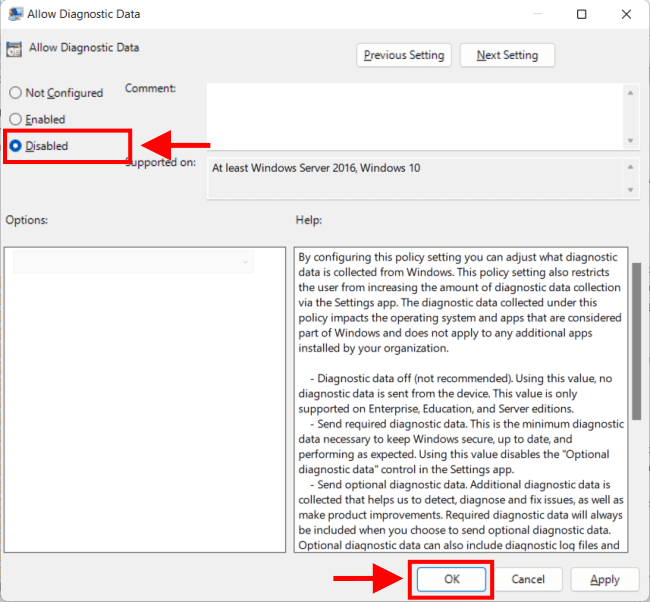
Set the policy to Disabled and click OK, then close the Group Policy Editor.

Performance Evaluation & Input
Setting allow diagnostic data to disabled

See Performance and Diagnostics in Microsoft Cloud with Azure Monitor, and how to import your Chrome or Firefox passwords into your iCloud Keychain.

How to Disable Other Diagnostics & feedback Data on Windows 11

Windows 11 captures more than just usage statistics. In Windows 11, for example, you might want to disable a few extra Diagnostics & feedback data gathering.

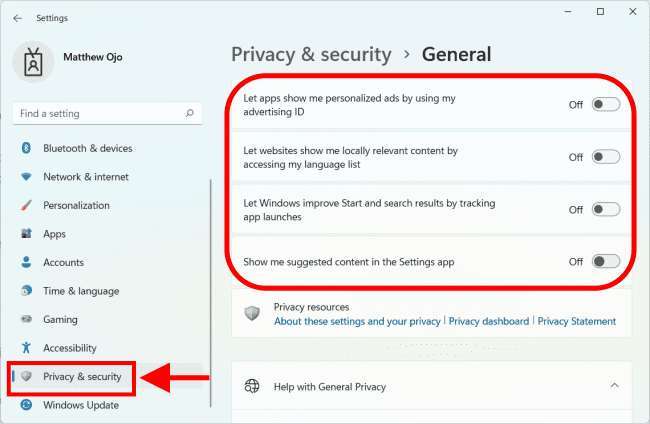
Go to Settings > Privacy & security > General.  Toggle Off all four top settings. Deactivating these settings disable personalized adverts, website tracking, Windows and search tracking, and suggested content.

Picture8
Privacy & security settings

Go to Start > Settings and select Privacy & security. In the Windows permissions section, choose Speech and deactivate Online speech recognition.

Picture9
Turn off online speech recognition

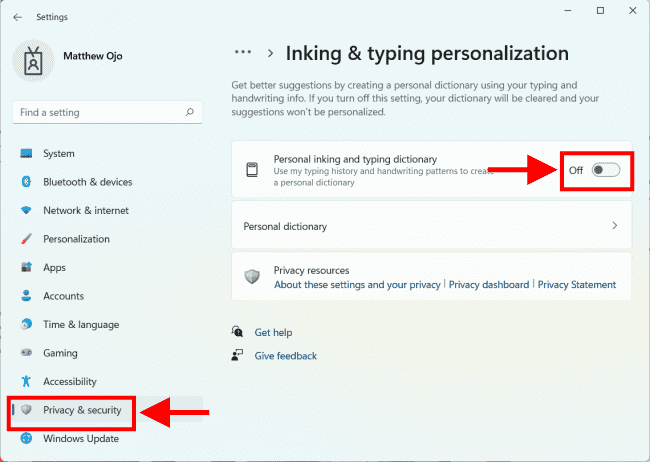
Next, in the Privacy & security area, turn off Inking & typing personalization.

Picture10
Turn off ink & typing personalization

Finally, select Activity History and click the Clear history button to clear your data, and then toggle it Off.

Picture11-1
Clear activity history

Conclusion

You may limit or prevent Diagnostics & feedback data gathering on Windows 11 by following the abovementioned methods.

The input data submitted to Microsoft is anonymous, and the company uses it to enhance Windows. However, if you are concerned about the amount of data transmitted by Windows 11, you can disable it. 

I hope you found this article useful on how to Prevent your PC from sending Diagnostics Feedback off via Windows Settings and Group Policy. Please feel free to leave a comment below.

Rate this post

Thank you for reading this post. Kindly share it with others.

  • Share on X (Opens in new window) X
  • Share on Reddit (Opens in new window) Reddit
  • Share on LinkedIn (Opens in new window) LinkedIn
  • Share on Facebook (Opens in new window) Facebook
  • Share on Pinterest (Opens in new window) Pinterest
  • Share on Tumblr (Opens in new window) Tumblr
  • Share on Telegram (Opens in new window) Telegram
  • Share on WhatsApp (Opens in new window) WhatsApp
  • Share on Mastodon (Opens in new window) Mastodon
  • Share on Bluesky (Opens in new window) Bluesky
  • Share on Threads (Opens in new window) Threads
  • Share on Nextdoor (Opens in new window) Nextdoor
Windows Tags:group policy, Grouppolicy, Microsoft Windows, Windows 10, Windows 11, Windows Settings

Post navigation

Previous Post: How to restrict additional Microsoft Support Diagnostic Tool Downloads on Windows
Next Post: How to enable or disable Windows Defender Antivirus Scanning periodically on Windows via Windows Settings

Related Posts

  • WindowsCoreSecurity
    How to enable Smart App Control on Windows 11 Security | Vulnerability Scans and Assessment
  • Windows 11 taskbar features remove 1
    How to modify Windows 11 Taskbar via Intune and GPO Windows
  • Prevent Local Administrators from turning off BitLocker 1
    Prevent Local Administrators from managing BitLocker with the manage-bde command Windows
  • web application architecture main
    Request timed out and Destination Host Unreachable, Transit Failed, General Failure Windows
  • scroll
    How to Take a Scrolling Screenshot on Windows 11 Windows
  • msinfo32 thumbnail
    How to use MSINFO32 to view System Information Windows

More Related Articles

WindowsCoreSecurity How to enable Smart App Control on Windows 11 Security | Vulnerability Scans and Assessment
Windows 11 taskbar features remove 1 How to modify Windows 11 Taskbar via Intune and GPO Windows
Prevent Local Administrators from turning off BitLocker 1 Prevent Local Administrators from managing BitLocker with the manage-bde command Windows
web application architecture main Request timed out and Destination Host Unreachable, Transit Failed, General Failure Windows
scroll How to Take a Scrolling Screenshot on Windows 11 Windows
msinfo32 thumbnail How to use MSINFO32 to view System Information Windows

Leave a Reply Cancel reply

You must be logged in to post a comment.

Microsoft MVP

VEEAMLEGEND

vexpert-badge-stars-5

Virtual Background

GoogleNews

Categories

veeaam100

Veeam Vanguard

  • how to install software packages from source files
    How to install a software package from source file in Linux Linux
  • Route53AWS
    Set up and configure Route 53 for your Domain in AWS AWS/Azure/OpenShift
  • Migrate from SQL Database
    Migrate Veeam One Database from SQL Server 2017 to 2025 Backup
  • backupvssnapshot
    Virtual Machine Snapshot vs Backup Version Control System
  • Configure Data Deduplication on Windows Server
    Video on how to Configure Data Deduplication on Windows Server Windows Server
  • Feature image Audio settings
    Master Your Sound Experience: How to Manage Audio Settings on Windows 11 Windows
  • change keyboard layout windows 10 thumb800
    Prevent on-screen keyboard from starting automatically and from appearing at login Windows
  • drivelock 1280x720 1
    The server could not be reached or validated: Timeout expired. The Time out expired prior to obtaining a connection from the pool Security | Vulnerability Scans and Assessment

Subscribe to Blog via Email

Enter your email address to subscribe to this blog and receive notifications of new posts by email.

Join 1,817 other subscribers
  • RSS - Posts
  • RSS - Comments
  • About
  • Authors
  • Write for us
  • Advertise with us
  • General Terms and Conditions
  • Privacy policy
  • Feedly
  • Telegram
  • Youtube
  • Facebook
  • Instagram
  • LinkedIn
  • Tumblr
  • Pinterest
  • Twitter
  • mastodon

Tags

Active Directory Azure Bitlocker Microsoft Windows PowerShell WDS Windows 10 Windows 11 Windows Deployment Services Windows Server 2016

Copyright © 2025 TechDirectArchive


Loading Comments...
 

You must be logged in to post a comment.