Windows 10 come loaded with a screen recording utility called Xbox Game Bar. This recording utility can help you to record any actions taken place on your screen. Whether you are using an app you just installed on your Windows 10 or you are creating a tutorial video then this Xbox Game bar is the real deal for you. In this article, we shall discuss how to Capture and Record Screen in Windows 10 with Xbox Game Bar. Please see how to record the screen of macOS and how to make a screenshot of Windows 10 Screen / Login Screen.
This recording utility will help you capture the whole action without breaking. This screen recording utility tool is part of the Xbox app that comes pre-installed by default in Windows 10. Please see how to Capture and Record your Screen in Windows 10 with Xbox Game Bar. Below is a YouTube video on how to capture and record your screen in Windows 10 with Xbox Game Bar.
Recently there have been more updates to the Xbox Game Bar. Thereby making it more useful in terms of taking screenshots and even making memes. In this guide, I will be showing you how to use this guide to record your screen in Windows 10. If you need to read more on capturing screens then you can read this: Make Snapshot: 5 ways to take screenshots on Windows 11, and how to record your screen with PowerPoint and make slide shows
Capture and Record your Screen on Windows 10
Follow these few steps to capture your screen action. Open the app or the exact thing you want to record on your screen.
Note: This screen recorder tool does not have the ability to capture some programs like the File Manager, but can capture regular desktop apps.
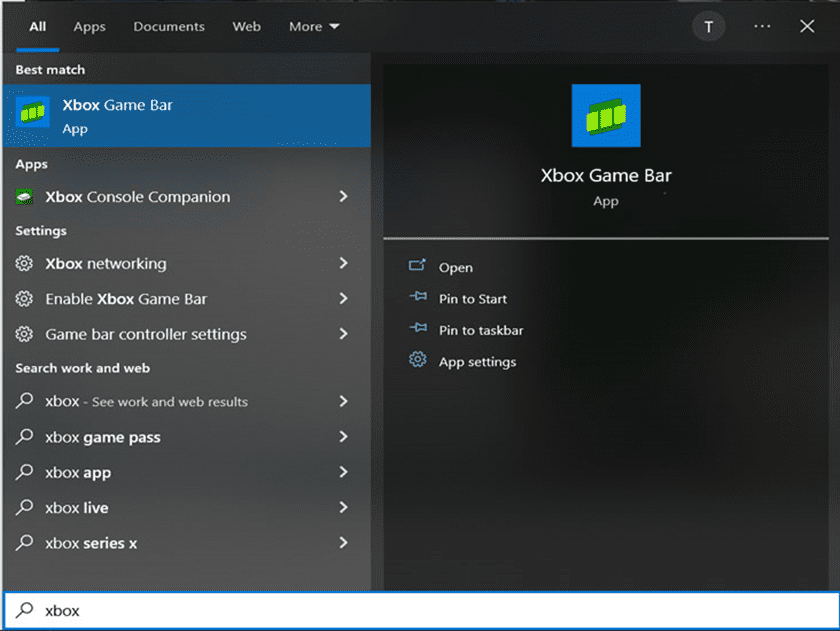
Press the Windows key + G at the same time to open the Xbox Game Bar dialog. Or you can type Xbox in the search box and click the Xbox Game Bar
The below shows the Xbox Game Bar

Please see how to Remove Xbox from automatic startup: How to enable and disable automatic startup in Windows 11, How to create a captured image on Windows Deployment Services, How to create a Windows Server reference image using WDS, and What are the differences between Capture image, Discover image, Install and Boot images (Windows PE).
Record on Windows with the Xbox Game Bar
3. Now click on the Start Recording button or use this key combination Win + Alt + R to begin capturing video.
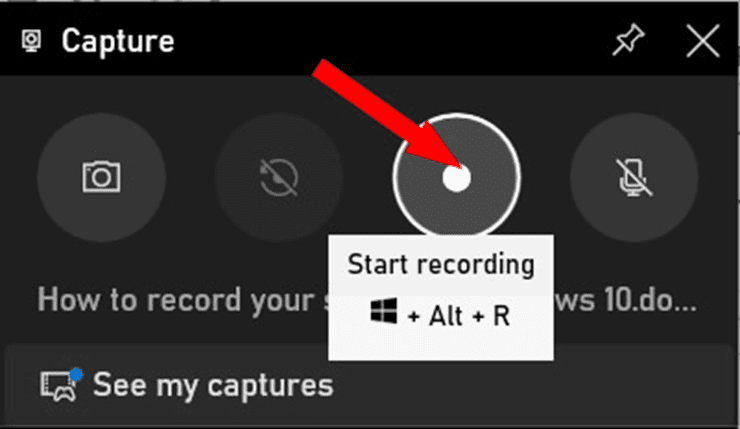
Immediately the recording button is clicked or the combination keys are pressed this time counter pops up. If you want to stop the recording click on the stop button and if you want to add voice click on the voice button.

Please see how to make a screenshot of Windows 10 Screen / Login Screen, and how to Set up Veeam Backup for Microsoft Azure.
Where to find my recorded files?
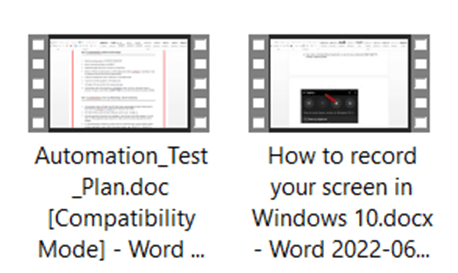
The recording files get saved in MP4 format and can be found in the subfolder called Captures under the Videos folder. You can also use the See My Captures button to navigate to where the files are located.
You will also observe that the file is saved with the name of the file currently opened on the screen. For example, if you open a Word document and you recorded your screen the record file will be saved with the Word document name. See the image below:
4. Another thing you can use in the Xbox Game Bar is to take a snapshot or to capture what is currently going on the screen. Click the camera icon or press the Win + Alt + Prtscrn.
The image below shows the button for taking a screenshot. Also, the button that navigates to where the screenshots taken are saved.

5. You can also socialize with your friends online using the Xbox Social to play games and use free voice and chat with them.

I hope you found this blog post on how to Capture and Record your Screen in Windows 10 with Xbox Game Bar interesting and helpful. In case you have any questions do not hesitate to ask in the comment section.