In this guide, we shall discuss how to Install Hadoop on Linux. With the use of straightforward programming paradigms, the Apache Hadoop software library provides a framework for the distributed processing of massive data sets over networks of computers. Please see how to fix MySQL Workbench could not connect to MySQL server, fix “WARNING: The provided hosts list is empty only the localhost is available and note that the implicit localhost does not match all“, and How to perform SSH key-based authentication in Linux.
It is intended to scale up from a small number of servers to thousands of devices, each of which provides local computing and storage. The library itself is designed to identify and manage faults at the application layer, so it may give an available service on top of a cluster of computers, each of which may be prone to failures, rather than relying on hardware to deliver high availability.
Also, see how to Associate SSH Public key with Azure Linux VM, and how to install Java Runtime Environment on Mac OS.
Prerequisites to installing Hadoop on Linux
- Ubuntu 18.04 or Higher
- Access to a command line tool
- Sudo or root privileges on local /remote machines
Step1: Install OpenJDK on Ubuntu
A suitable Java Runtime Environment (JRE) and Java Development Kit are necessary for the Hadoop framework’s services, which are developed in Java (JDK). Before beginning a new installation, use the following command to update your system:
sudo apt updateCurrently, Apache Hadoop 3 fully supports Java 8.x. Both the runtime environment and the development kit are included in the Ubuntu OpenJDK 8 package.
To install OpenJDK 8 in your terminal, enter the following command:
sudo apt install openjdk-8-jdk headless -yThe interaction between components of a Hadoop ecosystem might be impacted by the OpenJDK or Oracle Java version. Check the current Java version when the installation is finished:
java -version; javac -versionWhich Java edition is being used is revealed in the output?

Step2: Create a Non-Root User in the Hadoop Environment
Particularly for the Hadoop environment, it is preferable to create a non-root user. You may more effectively manage your cluster and increase security by using a unique user.
The user must be able to create a passwordless SSH connection with localhost in order for Hadoop services to operate without interruption.
Install OpenSSH on Ubuntu
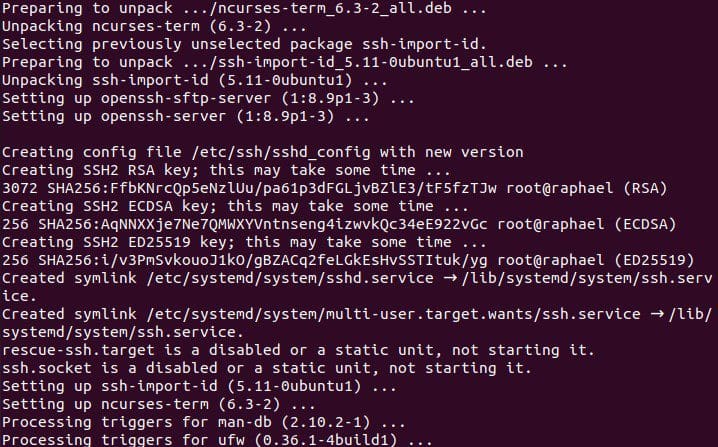
Install the OpenSSH server and client using the following command:
sudo apt install openssh-server openssh-client -y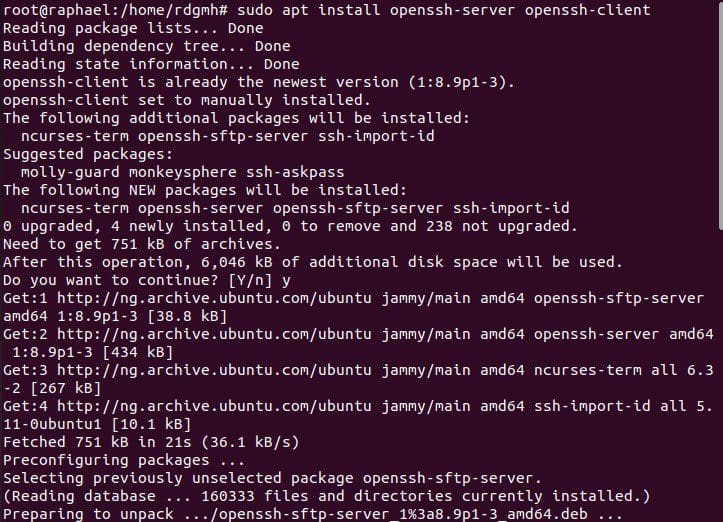
configure the SSH using the command
nano /etc/ssh/sshd_configYou can choose to change the port to anything you want

- Change the port number to the value of your choice. Make sure there is no “
#” at the beginning of the line. - Exit the editor and confirm that you want to save the changes.
- For the changes to take effect, restart the sshd service with this command:
service sshd restartCreate Hadoop User
To add a new user to Hadoop, use the adduser command:
sudo adduser hadoop
In the given instance, the username is hadoop. Any username and password that you want to use are acceptable. Change the current user to the newly created one, then enter the associated password:
su - hadoop
Now, the user must be able to connect to localhost over SSH without being requested for a password.
Enable Passwordless SSH for Hadoop User
Create an SSH key pair and specify where it should be kept with the command:
ssh-keygen -t rsa -P '' -f ~/.ssh/id_rsa
To save the public key as authorized keys in the ssh directory, use the cat command:
cat ~/.ssh/id_rsa.pub >> ~/.ssh/authorized_keysSet the permissions for your user with the chmod command:
chmod 0600 ~/.ssh/authorized keysNote: A password is no longer required each time the new user wants to SSH.
Use the hadoop user to SSH to localhost to ensure everything is configured properly.
ssh localhost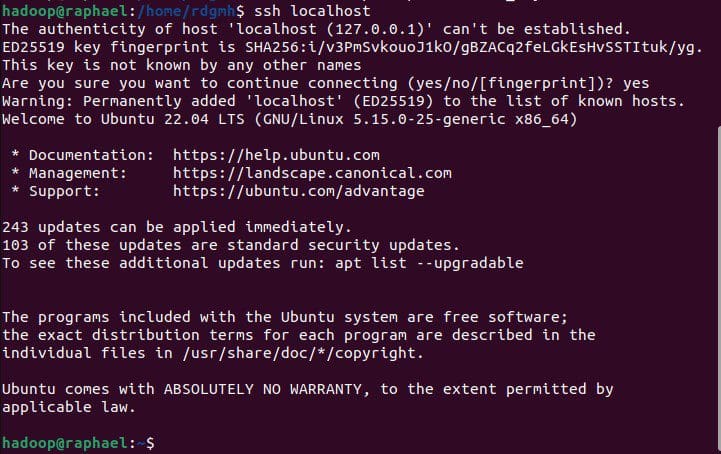
The Hadoop user may now effortlessly create an SSH connection to the localhost after a brief question.
Step3: Download and Install Hadoop on Ubuntu
You can use wget to download it from the official website

Download and extract

wget https://downloads.apache.org/hadoop/common/hadoop-3.3.3/hadoop-3.3.3.tar.gz
Once the download is complete, extract the files to initiate the Hadoop installation:
tar xzf hadoop-3.3.3.tar.gzNow, the hadoop-3.3.3 directory is where you may find the Hadoop binary files.
Step4: Single Node Hadoop Deployment
Hadoop performs best when set up on a sizable networked cluster of machines in a fully distributed configuration. However, you may set up Hadoop on a single node if you’re unfamiliar with it and wish to investigate fundamental commands or test out applications.
With this configuration, also known as pseudo-distributed mode, each Hadoop daemon can function as a separate Java process. Editing a collection of configuration files listed below allows you to customize a Hadoop environment:
- bashrc
- hadoop-env.sh
- core-site.xml
- hdfs-site.xml
- mapred-site-xml
- yarn-site.xml
Configure Hadoop Environment Variables (bashrc)
Edit the .bashrc shell configuration file using a text editor of your choice (we will be using vim):
sudo vim .bashrcI hope you found the steps on how to Install Hadoop on Linux very useful. Please feel free to leave a comment below.