Convert Windows Server Datacenter to Standard: Install Windows Server via iDRAC Virtual Media

In this article, I will show you how to Convert Windows Server Datacenter to Standard: Install via iDRAC Virtual Media. Previously, we have discussed how to convert Windows Server Essentials or Evaluation to Retail Edition, and we also discussed the differences between Windows Sever Evaluation, Essential and Retail Edition. Specifically, steps to convert Windows Server 2019 Essential Edition to Standard Edition were outlined. Please, see how to Create a Windows Server VM on Hyper-V, and how to deploy and integrate VHR with VBR.
Windows Server Standard Edition is designed for smaller organizations or environments with limited virtualization needs (that is, 2 VMs and 1 Hyper-V host per license). Most importantly, cheaper in license cost. This is my motivation for the downgrade. While, Windows Server Datacenter is built for large-scale data centers or heavily virtualized/cloud environments (Unlimited VMs and 1 Hyper-V host). But has a much higher cost with lot more virtualization features.
I had actually wanted to show the steps to downgrade and as such, I installed the Datacenter edition as shown below. Below is a guide that will show you all Windows related activation error. Here is how to check Windows activation status and change your product key

Please, see Upgrade Windows Admin Center 2306 – 2311: Run WACmg v2401, fix Microsoft SQL Evaluation period has expired: How to upgrade SQL Server instance, and How to delete a VM and Storage in Proxmox
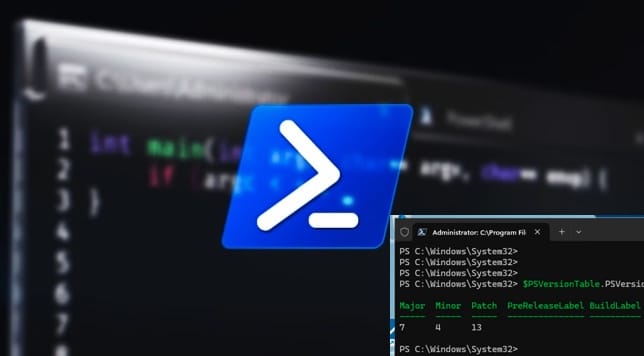
Activate Windows via KMS
Key Management Service (KMS) is employed by Microsoft to activate volume-licensed versions of Windows and Office products within an organization. This requires a company to have a KMS server set up and client devices connect to the KMS server to activate windows etc. This ensures centralized activation for many devices without manually entering keys on each one.
Please, see how to manage Windows Product key with Software Licensing Manager. if you do not want to use the command line, please take a look at the link referenced above on how to this this via Windows Setttings.

Next run to activate Windows.
slmgr /atoFrom the about window, you could also see the Edition of Windows that is being run.

Please, see Error 0x8007232B: Can’t activate Windows on this device as we can’t connect to your organization’s activation server, and “Editions of MSSQL Server: What are the differences between various Editions of Microsoft SQL Server“.
Convert Windows Server Datacenter to Standard Edition
As shared in some links referenced above, you can convert Windows Server Datacenter to Standard Edition via Deployment Image Servicing and Management (DISM).
DISM is a Windows command-line tool used to mount, service, and repair Windows images (like .wim or .vhd). Or the running OS, including adding/removing features, drivers, or updates. I have written a ton of article on this topic (DISM). This is because, it is used for system maintenance, troubleshooting, and OS deployment.
Yes, we already know the edition of Windows we have issues with. But, i would like to show you how to determine this via the command line. To do this, run any of the commands below.
slmgr /dliDISM /Online /Get-CurrentEdition
Note that, downgrading from Windows Server Datacenter to Windows Server Standard Edition is not officially supported by Microsoft. A a clean installation is recommended.
This is why, when you run the command below to check the target editions available. Only “ServerTurbine” is listed as shown below.
DISM /Online /Get-TargetEditions
Please, see How to Prevent Standard Users from Changing BitLocker Password, and how to enable Amazon S3 default bucket encryption using S3 Console. Also, see how to create a Shortcut That enables Standard Users to run Applications as Administrator.
Workaround via DISM method
Despite Microsoft frowns at this, this can sometimes resole the issue and can make your system unstable. Therefore, I do not recommend this approach. But, if you wish to proceed, please run the command below, where XXXXX-XXXXX-XXXXX-XXXXX-XXXXX is your product key.
DISM /Online /Set-Edition:ServerStandard /ProductKey:XXXXX-XXXXX-XXXXX-XXXXX-XXXXX /AcceptEulaBecause I do not have a product key as I utilize KMS, I would adhere to the best practice and make a clean installation. As you can see below, I had an error “Error 87: An error occurred while attempting to upgrade Windows Server operating system without providing a valid product key”.

Please, see In-place upgrade of Windows Server 2022 to 2025, and how to Install Remote Server Administration Tools on Windows 11.
Clean Installation of Windows Server Standard Edition
I will be installing the Operating System (OS) remotely via IDRAC. So, I will mount the virtual CD/DVD and select to both from it and select Power Cycle System (Cold boot). This will ensure a cold restart the server and proceed with the installation.
Here is a similar guide on how to install Windows Server unto ACEMAGICIAN Mini PC. Also, see how to Install Windows Server 2025 via iDRAC Virtual Media or PXE

Select the OS to install. Here, I am interested in Windows Server 2025 Standard Edition.

Click on install to install the OS (Windows Server 2025 (Desktop Experience)).

Installation progress of Windows Server

Since, I will activate via KMS, I will skip this and do it later.

When prompted, enter the Password and re-enter it as well and click on Finish.

To access the console of the VM, click on the Console Control from the Virtual console as shown below and click on Apply Keyboard Macros. When this is done, you should be able to login to your Server.

Lastly, do not forget to un-map the CD/DVD. Close the window when done.

Please, see DISM “Failed to open image” CWimImageInfo Mount(hr:0x8007000d): Fix Error DISM WIM Provider, and how To Get Install.WIM From Windows 10 Installation File. Also, see Synology NAS Domain Join: The Importance of DNS Configuration, and how to fix An account with the same name exists in Active Directory: Re-using the account was blocked by a security policy.
Post OS installation of Windows Server
Lastly, do not forget to configure the TCP/IP address, join Domain, enable RDP when needed, Apply Windows Updates and change Server name etc. Please, see how to join a computer to the Domain, and Post OS installation: Configure the properties of Windows Server

Lastly, do not forget to activate Windows Server by using the command below. This will point the Windows Server to the KMS.
slmgr.vbs /skms TechDAKMS.techdirectarchive.comActivate via KMS
slmgr.vbs /atoYou can verify activation b running any of the command below
slmgr.vbs /dliOr the following command below to display the license status, edition, and activation info..
slmgr.vbs /dlvNote that KMS requires at least 25 Windows clients or 5 Windows Server hosts in the domain for activation. Ensure firewall allows TCP 1688 (default KMS port). If you’re in a test environment with fewer clients, you can use a GVLK key (the KMS client key) and activate once connected to the KMS host.
These steps covers and resolve the steps on how to correctly (downgrade) convert Windows Server Datacenter to Standard.
I hope you found this article very useful on how to convert Windows Server Datacenter to Standard: Install via iDRAC Virtual Media. Please, feel free to leave a comment below.