This technical deep-dive stems from the guide Update WinPE Boot Images with Windows UEFI CA Certificates [Part 2]. In this guide, we shall discuss “Fix Operating System Loader failed signature verification” on Dell Safe BIOS Systems via PXE [Part 3]”. Since I observed a critical discrepancy during deployment. The devices that had not yet been patched with the 2023 Secure Boot CA were able to PXE boot normally. However, any device that had already received the certificate update as outlined in “Enable Secure Boot: Fix Secure Boot certificates expiration [Part 1]” failed to boot, Secure Boot 2023 Compliance Across WinPE, MDT, WDS, and ADK: Boot Chain Alignment and PXE Validation [Final Part]“..
The issue is a ‘Trust Gap.’ Once the Dell Safe BIOS update is applied. The hardware enforces the Windows UEFI CA 2023 requirement immediately. If the PXE server’s initial handshake files such as the bootmgfw.efi or wdsmgfw.efi still carry the legacy 2011 PCA signature. The BIOS rejects the connection as a security violation before the Lite-Touch process can even begin as shown below.

Note: Until Microsoft release newer version of ADK/WinPE Binaries. Whenever MDT rebuilds LiteTouchPE, it pulls directly from the ADK WinPE baseline, which still contains the revoked or outdated boot chain (2011‑CA Boot Manager, mismatched Winload, and unpatched WinPE kernel). This means that even if you manually patch WinPE, SafeOS, Boot Manager, or PXE loaders, MDT will overwrite those fixes the moment it regenerates the boot image. WDS then extracts those same outdated binaries into its PXE store, causing Secure Boot to reject the Winload/WinPE stage. As long as MDT is allowed to rebuild WinPE, the Secure Boot trust chain will remain inconsistent and the system will fail again.
The workaround this issue at the time of writing this article. You have to build a custom WinPE built outside MDT/WDS to bypasses the entire ADK → MDT → WDS regeneration pipeline. In this model, you manually patch WinPE, inject MDT scripts, and import the WIM directly into WDS. This means, MDT never touches it, and WDS never regenerates it WinPE files with older binaries. This produces a stable, Secure‑Boot‑compatible boot chain.
Also, see how to protect Microsoft 365 beyond native limits with VDC [Part 1], how to perform Tape Drive Cleaning in Practice, and Active Directory Vulnerability Assessment with Purple Knight: Domain Controller Owner Is Not an Administrator.
Identifying the “Trust Gap” in the PXE Handshake
Before applying the fix, it is vital to understand that UEFI Secure Boot operates on a Chain of Trust. In a WDS/MDT environment, the boot process is a relay race. If any “runner” in this race is carrying an outdated 2011 signature. The Dell Safe BIOS will terminate the process immediately to prevent a potential security exploit.
Note: The failure occurs because the Dell Safe BIOS has been “hardened” to trust only the Windows UEFI CA 2023. If your WDS server is still serving files from the legacy 2011 trust provider, the handshake is rejected at the first point of contact.
Stages of Verification
To find the root cause, you must verify the digital signatures of the files at these three distinct stages:
- The Network Boot Program (NBP): When the Dell PC first contacts the WDS server. It downloads a small bootstrap file usually
wdsmgfw.efiorbootmgfw.efi. This is the “Front Gate.” If the Dell Safe BIOS update has been applied, it checks this specific file against its internal Revocation List (DBX). If it finds a 2011 signature, the boot fails before you are able to select the operating system to start (Windows Boot Manager) or even see a loading bar. - The Boot Manager handoff: Once the NBP is trusted, it calls the Boot Manager. On many systems, this is where the
bootmgr.efiorbootx64.eficomes into play. If your configuration uses one file to call another. Both must be updated to the 2023 CA as we will see very shortly. - The WinPE Kernel (Inside the WIM): Finally, the Boot Manager loads your
LiteTouchPE_x64.wim. Inside this image iswinload.efi. Even if your “Front Gate (NBP)” files are updated, the boot will still crash with a “Secure Boot Violation”. If the files inside your WIM were generated with an old ADK using the 2011 certificate and has not been updated as discussed here “Steps to customize Windows PE boot images” and with the 2023 CA.
Please see how to migrate Microsoft Enterprise Root Certification Authority and Forest Domain to Azure, and how to enable Bitlocker via the Local Group Policy Editor and the Group Policy Management Console.
Pinpointing the Rejected Boot Loader
To verify which file the WDS server is using as the entry point. We will run this on the WDS server as hsown below.
wdsutil /get-server /show:config
Here we have the x64UEFI boot program. In your case, the filename that is listed there is the one the one Dell BIOS is currently rejecting in my case. Ensuring this specific file has the 2023 signature is what will break the “boot loop” or the “Secure Boot Violation” error.

Please see Tape Backup Troubleshooting in Veeam: Real Cases, [World Backup Day] V13 Upgrade Failure: Veeam Configuration Backup Saved the Day, and how to Fix unable to contact Server: This may be the server does not exist.
Synchronizing WDS Boot Programs with UEFI CA 2023
Note: Before proceeding, ensure you perform a backup of these files “bootmgfw.efi” and “wdsmgfw.efi”. This is just a workaround similar to “Updating Windows Boot Manager and WinPE with the Windows UEFI CA 2023 Certificate“.
In our previous discussion, we identified that Dell devices patched with the 2023 Secure Boot certificate will immediately reject any Network Boot Program (NBP) signed with the legacy 2011 PCA certificate. Because WDS serves these files before loading the WinPE environment. Even a perfectly updated .wim file cannot save a deployment if the initial handshake fails.
The first step in our resolution is verifying the signatures of the files currently sitting in your RemoteInstall directory. You can view the details of the certificate by running the command below or via the File Explorer as shown below.
(Get-PfxCertificate -FilePath "F:\RemoteInstall\Boot\x64\bootmgfw.efi").Issuer

As shown in the diagnostic images below, the existing bootmgfw.efi was issued by the Microsoft Windows Production PCA 2011.

Note: On a Dell PCs with Safe BIOS enforcement, this 2011 signature is treated as a security risk. The BIOS sees this “forbidden” or outdated key and terminates the TFTP connection instantly. This results in a security violation warning as shown below.
Therefore, to protect the system, Secure Boot prevents the code from executing. Thereby, resulting in the “All bootable devices failed Secure Boot verification” warning.
Please see How to Disable Driver Signature Enforcement in Windows 11, how to Remove a profile on outlook, and how to update the BIOS on your Dell system.
[Part A] Sourcing and Replacing the 2023 Binaries
To bridge this “Trust Gap,” we must replace the legacy files with versions signed by the Windows UEFI CA 2023. These compliant binaries are found within the latest Windows ADK (November 2025). Locate the Source: Navigate to your updated ADK path:
…\Windows Preinstallation Environment\amd64\Media\EFI\Microsoft\Boot\
Verify the signature by right clicking on bootmgfw.efi and then on “Properties”. Select the Digital Signatures. Ensure the “Issued by” field reads Windows UEFI CA 2023. Copy this verified version into your WDS boot directory as shown below.
F:\RemoteInstall\Boot\x64\

As you can see, this file is currentl being replaced.

Now, proceed to verify the the signature by right clicking on bootmgfw.efi under the “RemoteInstall” path and then on “Properties”. Select the Digital Signatures. This field should read Windows UEFI CA 2023 now.

Please see What are the Differences between UEFI and BIOS, differences between ADK, MDT, Microsoft Endpoint Configuration Manager (SCCM), Intune, Autopilot, and WSUS, how to create a capture image on Windows Deployment Services.
Bridging the Local-to-Network Trust Gap
While your server already contains the Windows UEFI CA 2023 binaries required for its own boot process. These critical files are stored within the EFI System Partition (ESP). This remains hidden and unassigned a drive letter by default to maintain system security.
I will proceed and mount this partition to “take” the updated bootmgfw.efi. We will use this to overwrite the legacy wdsmgfw.efi in your RemoteInstall folder. This ensures that the file your WDS server hands out over the network is as secure as the file the server uses to boot its own local hardware.
But first, let us verify the the signature by right clicking on the wdsmgfw.efi under the “RemoteInstall” path. Then on “Properties”. Select the Digital Signatures. This field should read Windows UEFI CA 2011 which is expected at this time.

For some other articles, I have written WDS, see the following guides: No bootable media found system halted: Unable to PXE boot WDS to Virtualbox, WDS/DHCP scenarios: How to configure DHCP Server option 60, 66 and 67 for Windows Deployment Services, and how to remove Windows Deployment Services role via the GUI and PowerShell.
Mount the EFI Partition
To get the 2023 version, we need to access the server’s own hidden boot files. To do this, run the command below. This “unlocks” the EFI System Partition and assigns it the drive letter Z:. Thereby, allowing us to browse the internal Windows bootloader files that have already been updated by the OS.
mountvol Z: /s.

Next, we will have to copy (perform manual patch). We will do this by running the copy command, we take the 2023-signed bootmgfw.efi from the secure Z: drive. This will overwrite the legacy wdsmgfw.efi on the F: drive (RemoteInstall) with the comamnd below.
copy “Z:\EFI\Microsoft\Boot\bootmgfw.efi” “F:\RemoteInstall\Boot\x64\wdsmgfw.efi” /Y
This will therefore rename bootmgfw.efi to wdsmgfw.efi during this process because. In a WDS environment, wdsmgfw.efi is the specific filename the PXE service looks for to start the network boot.

You can then proceed to verify the wdsmgfw.efi digital signature. It should output “Windows UEFI CA 2023”.

Update Deployment Share
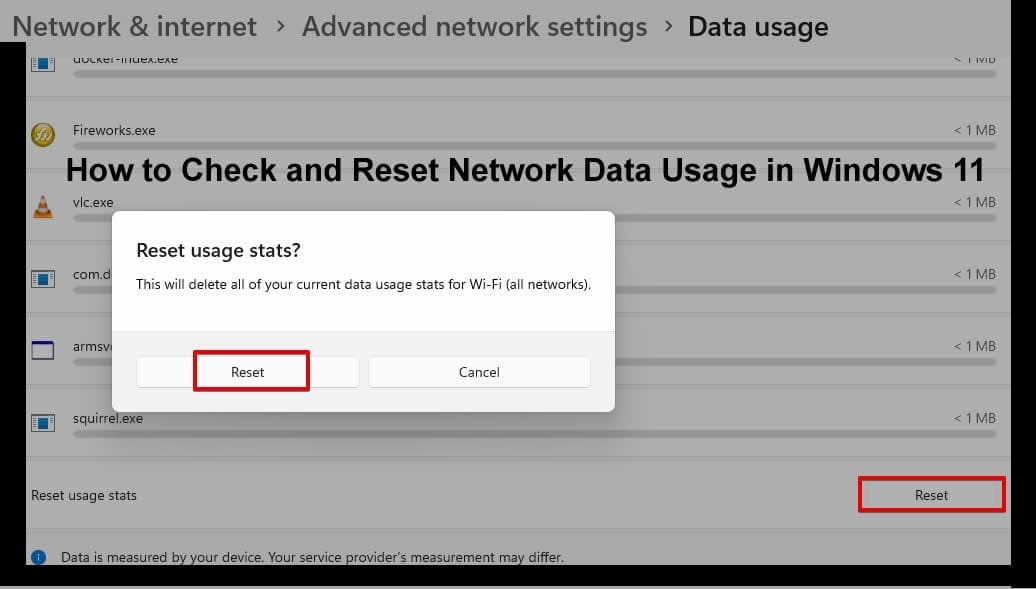
Note: When the above is complete. Yuu will have to update the “Deployment Share” and regenerate the Lite Touch Image. Then replace the old image in WDS as shown in the image below. I have outlined these steps compreensively here “ADK|WinPE|MDT: Deploy Windows with WDS“.
Note: In WDS/MDT environments, regenerated LiteTouch boot images can create duplicate image identities (for example LiteTouchPE_x64-(2).wim) when older boot-image metadata or BCD associations still exist.
As a result, WDS may continue referencing a stale PXE boot chain instead of the newly regenerated WinPE image. On Dell SafeBIOS systems enforcing updated Secure Boot trust requirements. This can cause PXE boot failure if the older boot chain still contains EFI components signed with deprecated or revoked trust chains.

Removing stale boot images, clearing cached WDS metadata, and regenerating/importing the LiteTouch image. This forces WDS to rebuild the BCD and PXE associations so the server consistently delivers the current Secure Boot–compliant boot environment.

Please see How to deploy images to computers using PXE Boot, how to Change Two-Factor Authentication in Microsoft 365/Office 365, and how to replace Veeam Recovery Orchestrator License.
Restart Windows Deployment Services (Clear the WDS Cache )
WDS utilizes a caching mechanism for boot binaries within system memory to optimize TFTP (Trivial File Transfer Protocol) throughput and reduce disk I/O overhead. Failure to cycle the service after replacing files can result in the server continuing to serve the stale 2011-signed binaries held in the volatile cache, rather than the updated 2023 versions.
To ensure the new signatures are active, the Windows Deployment Services (WDSServer) service must be restarted to flush the current cache and force a re-read of the updated binaries from the physical storage path. Therefore, proceed to the WDS server and right click on it. Select All Taks and click on restart as shown below.

As you can see, the WDS has been restarted correctly.

You could also use PowerShell to restrt WDS by running the command below. These steps fulfils the solution for this guide “Fix OS Loader failed signature verification on Dell Safe OS via PXE”.
Restart-Service WDSServer

Please see how to install Endpoint Configuration Manager on HyperV VM, “Windows PE working for Windows 11 and Windows Server 2022“, and “how to check the version of Windows ADK”.
[Part B] Other Alternative Ways For Sourcing Signed Binaries
Note: If you run into issues via PXE Boot, please see “PXE Boot Failure: “Access Denied or Aborted” with Secure Boot on“. With this guide and below steps, you will be able to overcome critical inconsistencies in the boot environment that can result in PXE or WinPE boot failures due to NTFS/Permissions issues.
Microsoft now provides updated WDS PXE boot binaries for the 2023 Secure Boot CA transition on fully patched Windows Server 2022 systems. Instead of copying EFI files from random EFI partitions or installation media, use the officially updated _EX (Extension) binaries located in the hidden C:\Windows\System32\RemInst\boot_EX\ directory.
Windows Update installs these files specifically for WDS and PXE environments to support the newer Windows UEFI CA 2023 trust chain while maintaining proper WDS network boot functionality.
#Copy the updated 2023-signed PXE loader
copy “C:\Windows\System32\RemInst\boot_EX\x64\wdsmgfw_EX.efi” “X:\RemoteInstall\Boot\x64\wdsmgfw.efi” /Y
#Copy the updated 2023-signed Boot Manager
copy “C:\Windows\System32\RemInst\boot_EX\x64\bootmgfw_EX.efi” “X:\RemoteInstall\Boot\x64\bootmgfw.efi” /Y
#(Optional but recommended) Copy the matching UI files
copy “C:\Windows\System32\RemInst\boot_EX\x64\en-US\wdsmgfw_EX.efi.mui” “X:\RemoteInstall\Boot\x64\en-US\wdsmgfw.efi.mui” /Y
After running the above commands

Or copying over File Explorer and renaming the files. Restart the “Windows Deployment Services” service and try the VM PXE boot again

net stop WDSServer
net start WDSServer
This acts an alternative to manually replacing WDS EFI binaries with files copied from WinPE installation paths or mounted ISO EFI partitions,. You can use the officially updated _EX (Extension) WDS binaries included on fully patched Windows Server 2022 systems.
Note: I did not have to do this. Verify that
wdsmgfw.efimatches the WDS environment, architecture, and Secure Boot requirements. Keep the corresponding.muifiles in sync with the EFI binaries to avoid resource/version mismatches and inconsistent pre-boot UI behavior.”

Please see Build a New DC vs Swing Migration: Upgrade Server OS Correctly, Azure File Sync : How to enable Self-Service restore, and Unicode Manipulation: CVE-2026-25177 Privilege Escalation in AD.
Other Potential Failure Points in the 2023 Trust Chain
If you have updated the WDS boot programs (bootmgfw.efi and wdsmgfw.efi) but patched Dell devices are still failing, the issue likely resides deeper in the deployment environment. Here are the secondary areas to synchronize with the 2023 trust chain but not applicable to my issue I have brough forward as this has been treated here Update WinPE Boot Images with Windows UEFI CA Certificates [Part 2]:
- Internal WinPE Bootloaders: Even if the network handshake is successful, the
winload.efifile inside yourLiteTouchPE_x64.wimmust also be signed with the 2023 CA. If you are using an older ADK to generate your images, the internal binaries will still carry the revoked 2011 signature. Please see how to download and install the Windows ADK Patches, and how to uninstall and upgrade ADK, WinPE, and MDT - ADK Source Media Mismatch: Sometimes, even a new ADK installation pulls from legacy template folders. In high-security environments, you may need to manually inject the 2023-signed binaries into the ADK’s
Mediafolder to ensure every newly generated WIM is compliant by default as refenced above. - DBX (Revocation List) Enforcement: Dell Safe BIOS updates often include an updated UEFI Forbidden Signature Database (dbx). This list explicitly blocks older Microsoft binaries. If any part of your boot process from the initial NBP to the final OS loader uses a binary on this list. The Secure Boot will halt the process.
I hope you found this blogpost on how to fix OS Loader failed signature verification on Dell Safe OS via PXE [Part 3] very useful. Please feel free to leave a comment below.