Skip to content

TechDirectArchive

Hands-on IT, Cloud, Security, Veeam & DevOps

  • Home
  • About
  • Advertise With US
  • Contact
  • Reviews
  • Toggle search form

Create and access a hidden share folder on Windows

Posted on 11/03/202107/08/2024 IT Expert By IT Expert No Comments on Create and access a hidden share folder on Windows
  1. Home
  2. Windows
  3. Create and access a hidden share folder on Windows
adm

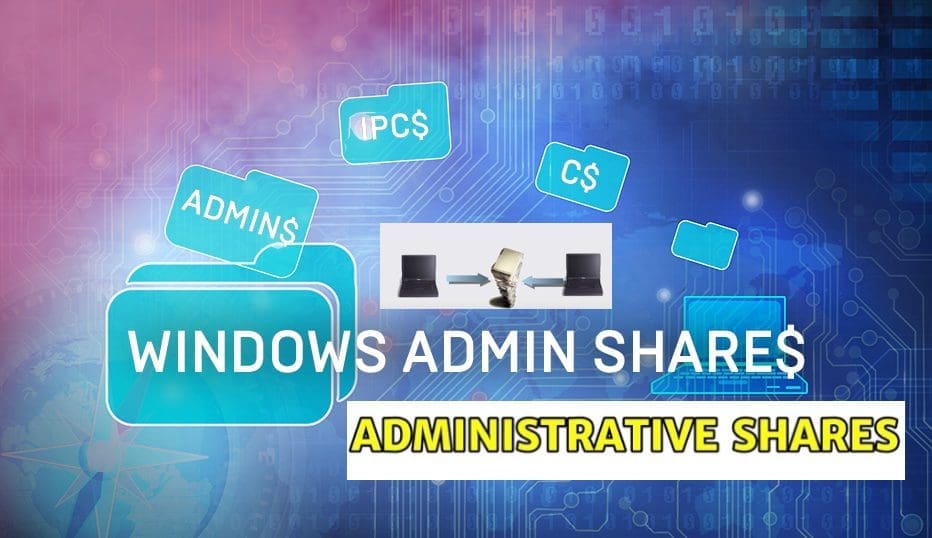
Administrative shares are also referred to as “hidden shares”. The hidden shares on a Windows PC have a name that ends with a dollar sign ($). These are shares available on the network share that is not visible when viewing another PC’s shares but are still accessible when the share name (hidden share) is known. See this troubleshooting guide for more information “Error Code: 0x80070035: MDT unable to access the Log share, the Network Path was not found“. In this article, I will be showing you how to Create and access a hidden share folder on Windows. Also, see Hide or Remove Search Button from Windows 10 Taskbar, and how to hide the Windows 10 Taskbar.

Windows includes some Administrative shares, such as PRINT$, FAX$, C$, IPC$, and ADMIN$. Here are some similar errors “You require permission from the trusted installer: How to delete or rename files protected by Trusted Installer”, Error 740: Elevated permissions are required to run DISM.

Administrative shares are beneficial when you wish to hide resources (directories) from users without completely denying them access will ACLs. My use case here is, I will be created a hidden directory for the Windows deployment log.

This is needed to store entries when devices are deployed via MDT. You may want to see the following comprehensive guide on “how to deploy Windows using ADK, MDT, and WDS“.

Create an Administrative Share

Part 1: To create a hidden share, kindly follow the steps below. First, we will need to create a new folder. You do not need to create a new folder if you already have one.

All you need to do is launch File Explorer and navigate to the folder you want to share. Please follow the steps discussed in step 3 below after the creation of a new folder.

Part 2: I assumed here that you do not have a folder already, I will be working you through the steps to create a new folder now. Open File Explorer and navigate to the folder you wish to have your share created in as shown below

Right-click on the folder and select New
folder1

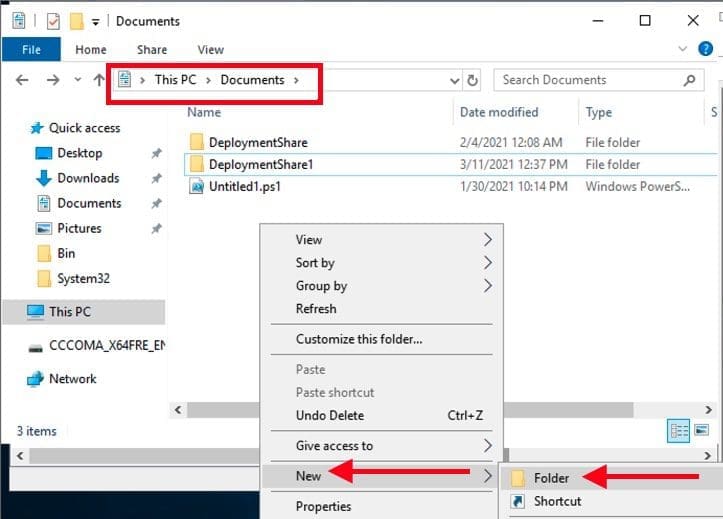
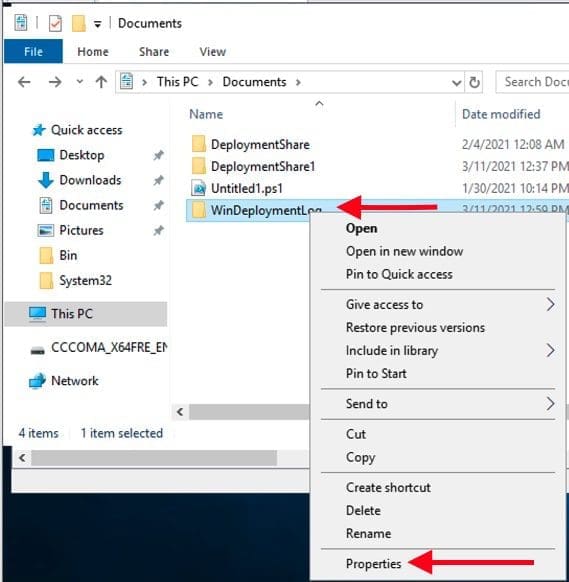
Part 2: Right-click the newly created folder, or an existing folder and select the Properties option.

Permissions

Also, see “Folder Access Denied: You require permission from SYSTEM: Unable to delete old windows folder“.

Enable Folder Sharing

This will open a Folder properties windows you just created. Click on the Sharing tab, and click on Advanced Sharing

sh1

Please see How to hide Folders and Files from Search Results in Windows, Implemented MBAM? Here is how to hide the Default BitLocker Drive Encryption item in the Windows Control Panel. Also, see how to Compact Virtual Hard Disks, and how to Prevent Windows from Saving RDP Connection History.

Enter the Share Name and Share the Folder

On the advanced Sharing Window, click on “Share this Folder”. Under the “Settings” section, type a name share name, and add the “$” character at the end to make the folder hidden.

Note: You do not need to add spaces within the share name. Click on Apply.

Screenshot-2021-03-11-at-13.22.47

Add the Desired Permission

Optional: Also Click on Permission if you wish to add more users with full administrative rights. To do this, click on the Add button below and select the right permission for the person or groups afterwards.

Permission

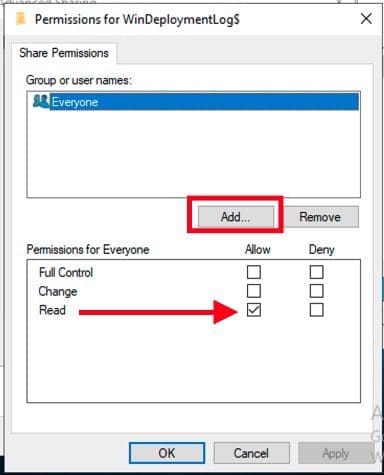
You will be prompted to select the users or groups as shown below. Enter the name and click on Check name. Click on Ok afterwards.

Screenshot-2021-03-11-at-13.32.55
Screenshot 2021 03 11 at 13.32.55
Screenshot-2021-03-11-at-13.33.07
Screenshot 2021 03 11 at 13.33.07

Now, assign the desired permissions as shown below. This should depend on your company policy for the user or group.

Screenshot-2021-03-11-at-13.37.17

On the Advanced Sharing Window, click on OK to have it closed. You will be left with the window below. Click on close. When you are done creating the administrative share.

Screenshot-2021-03-11-at-13.39.38

The shared folder will be invisible henceforth using File Explorer on any device. However, it’ll still be accessible using the folder path\\TECHDARCHIVEDC\winDeploymentlog$.

Screenshot-2021-03-11-at-13.47.57
Screenshot 2021 03 11 at 13.47.57
Screenshot-2021-03-11-at-13.48.17
Screenshot 2021 03 11 at 13.48.17

Kindly refer to the following guides for more information on WDS and MDT. How to setup and install WDS role, how to configure DHCP Server option 60, 66, and 67 for WDS, how to remove Windows Deployment Services role via the GUI and PowerShell, how to add boot and install images to WDS and configure Multicast transmission via the GUI/WDSUTIL, and how to deploy images to computers or virtual machines using WDS.

Set the Advanced (special Permission)

This step is Optional: For Advanced (special Permission), you will have to click on the Security tab and navigate to.

Screenshot-2021-03-11-at-13.49.25

This will open the Advanced Security for the folder you created.

Screenshot-2021-03-11-at-13.51.07

To see all the available shares on this server, launch the Computer Management Tool as shown below and navigate to the shared folder.

Screenshot-2021-03-12-at-23.46.06-1

I hope you found this blog post helpful on how to Create and access a hidden share folder on Windows. If you have any questions, please let me know in the comment session.

5/5 - (1 vote)

Thank you for reading this post. Kindly share it with others.

  • Share on X (Opens in new window) X
  • Share on Reddit (Opens in new window) Reddit
  • Share on LinkedIn (Opens in new window) LinkedIn
  • Share on Facebook (Opens in new window) Facebook
  • Share on Pinterest (Opens in new window) Pinterest
  • Share on Tumblr (Opens in new window) Tumblr
  • Share on Telegram (Opens in new window) Telegram
  • Share on WhatsApp (Opens in new window) WhatsApp
  • Share on Mastodon (Opens in new window) Mastodon
  • Share on Bluesky (Opens in new window) Bluesky
  • Share on Threads (Opens in new window) Threads
  • Share on Nextdoor (Opens in new window) Nextdoor
Windows Tags:deployment, Microsoft Deployment Toolkit (MDT), WDS, Windows 10, Windows 11, Windows Server 2016

Post navigation

Previous Post: Failure 5456: Unable to determine destination disk, partition, and/or drive, see BDD Log
Next Post: Error Code: 0x80070035: MDT unable to access the Log share, the Network Path was not found

Related Posts

  • Harica cert request and CSR
    Generate CSR and Request a Certificate from Herica CA Windows
  • Featured image multi monitor
    Enhanced Multi-Monitor Experience with Windows 11 Windows
  • Trellix BitLocker and fileVault Recovery
    Selfservice Recovery: Trellix BitLocker and fileVault Recovery Security | Vulnerability Scans and Assessment
  • hh
    Graphical Network Simulator: How to install GNS3 on a Windows device Windows
  • WCD
    Join Bulk Devices using a Provisioning Package to Azure AWS/Azure/OpenShift
  • Featured image 1
    How to Change User Account Type in Windows 10 Windows

More Related Articles

Harica cert request and CSR Generate CSR and Request a Certificate from Herica CA Windows
Featured image multi monitor Enhanced Multi-Monitor Experience with Windows 11 Windows
Trellix BitLocker and fileVault Recovery Selfservice Recovery: Trellix BitLocker and fileVault Recovery Security | Vulnerability Scans and Assessment
hh Graphical Network Simulator: How to install GNS3 on a Windows device Windows
WCD Join Bulk Devices using a Provisioning Package to Azure AWS/Azure/OpenShift
Featured image 1 How to Change User Account Type in Windows 10 Windows

Leave a Reply Cancel reply

You must be logged in to post a comment.

Microsoft MVP

VEEAMLEGEND

vexpert-badge-stars-5

Virtual Background

GoogleNews

Categories

veeaam100

Veeam Vanguard

  • Object First OOTBI Appliance Configuration
    How to Configure Object First OOTBI Appliance Backup
  • dvssvd
    Windows Cached Credentials: How does cached domain logon work? Windows
  • Veeam SureBackup
    Ensuring Backup Integrity and Reliable Recovery with SureBackup Backup
  • screenshot 2020 04 06 at 04.12.00
    How to install and Configure Pleasant Reset Password Virtualization
  • Capture 37
    How to Configure Network Load Balancing on Windows Server Backup
  • unzip mac 994x400 1
    How to set a default app to archive files on macOS Mac
  • Featured image 2
    Enable Microsoft Defender SmartScreen: How to prevent Exe files from getting deleted randomly in Windows 10 and 11 Security | Vulnerability Scans and Assessment
  • Distributed File System DFS
    All About Distributed File System Windows

Subscribe to Blog via Email

Enter your email address to subscribe to this blog and receive notifications of new posts by email.

Join 1,796 other subscribers
  • RSS - Posts
  • RSS - Comments
  • About
  • Authors
  • Write for us
  • Advertise with us
  • General Terms and Conditions
  • Privacy policy
  • Feedly
  • Telegram
  • Youtube
  • Facebook
  • Instagram
  • LinkedIn
  • Tumblr
  • Pinterest
  • Twitter
  • mastodon

Tags

Active Directory Azure Bitlocker Microsoft Windows PowerShell WDS Windows 10 Windows 11 Windows Deployment Services Windows Server 2016

Copyright © 2025 TechDirectArchive

Loading Comments...

You must be logged in to post a comment.