Skip to content

TechDirectArchive

Hands-on IT, Cloud, Security & DevOps Insights

  • Home
  • About
  • Advertise With US
  • Contact
  • Reviews
  • Toggle search form
Home » AWS/Azure/OpenShift » Add or Remove Network Interface from a VM in Azure
  • Grant Non Domain Admin Privileges to Manage Workstation
    Grant Non-Domain Admin Privileges to Manage Workstation Windows
  • VeeamOn 2023 Miami
    Why you should attend VeeamOn 2023 Backup
  • Veeam Plugin update for Proxmox
    Update Veeam Backup for Proxmox Plugin to support PVE 9.0 Backup
  • centos feature
    How to change the system time zone under RedHat and CentOS Linux
  • How to Enable or Disable Inherited Permissions for Files and Folders in Windows
    How to Enable or Disable Inherited Permissions for Files and Folders in Windows Windows
  • dfggg
    SimpleSAMLphp Setup on Windows Server [Part 1] Windows Server
  • Bulk operations in Azure AD
    Perform Bulk User Operations in Azure AD AWS/Azure/OpenShift
  • FailedRegistration
    DNS Bad key 9017: The Cluster Name registration failed of one or more associated DNS names Virtualization

Add or Remove Network Interface from a VM in Azure

Posted on 06/09/202115/09/2023 Christian By Christian No Comments on Add or Remove Network Interface from a VM in Azure
Webp.net-resizeimage-3-2

A network interface enables an Azure Virtual Machine to communicate with the internet, Azure, and on-premises resources. When creating a virtual machine using the Azure portal, the portal creates one network interface with default settings for you. Also, Network Interface Card (NIC) is assigned with an IP address and associated with NSG rules, which is used for communication between virtual machines or internal networks or the internet. The VM needs at least one NIC, NIC connects the VM to the VNet. One VM can have multiple NICs as well. In this article, I will show you how to Add or Remove Network Interface from a VM in Azure.

kindly refer to some of my contents: How to configure and install ansible on Azure VM, how to use Azure key vault secrets in Azure pipelines, and understand the overview concept of Azure cloud shell.

How to add or remove interface card in Azure VM

Create an Azure VM. Add a network interface card to an existing VM Remove a network interface card from a VM in Azure. Here are some exciting articles: Remove Azure VM: How to delete a Virtual Machine via the Azure Portal, How to install Windows Server 2022 on VirtualBox, How to Check the Size of Video Random Access Memory (VRAM) in Windows, How to Add and Format a New Virtual Disk to an EC2 Instance, and how to Create a new Azure Disk: How to create and attach an extra Disk to Azure Virtual Machine.

Sign in to Azure

First, sign in to the Azure portal following this link https://portal.azure.com and using your Microsoft login credentials.

Webp.net-resizeimage-3

Create a VM

From your Azure dashboard, at the top, perform the following below:

  1. Type virtual machines in the search.
  2. Under Services, select Virtual Machines.
  3. In the Virtual Machines page, select Create then Virtual Machine.
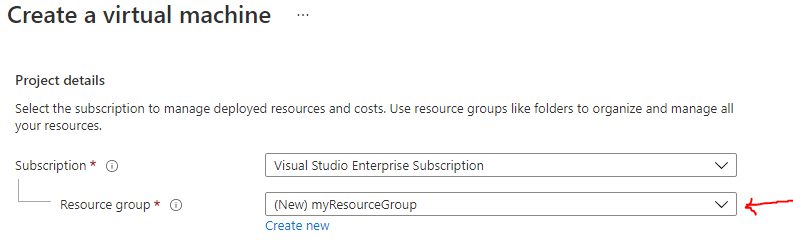
  4. In the Basics tab, under Project details, make sure the correct subscription is selected and then choose to Create a new resource group. Type myResourceGroup for the name.
Webp.net-resizeimage-4

Click on Create

Webp.net-resizeimage-5
Webp.net-resizeimage-6

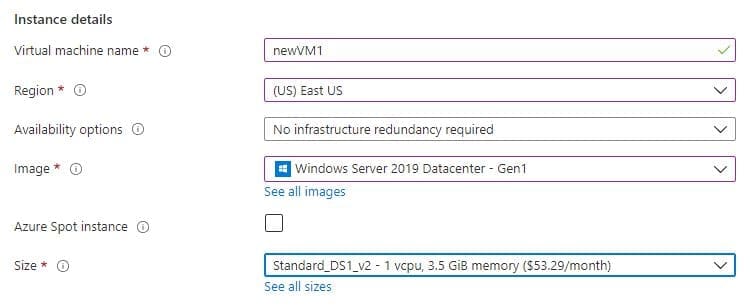
Under Instance, details, type newVM1 for the Virtual machine name and choose East US for your Region. Choose Windows Server 2019 Datacenter for the Image and Standard_DS1_v2 for the Size. Leave the other defaults.

Webp.net-resizeimage-7

Under Administrator account, type in a username, such as myusername, and set a password that must be at least 12 characters long in order to meet the requirement.

Webp.net-resizeimage-8

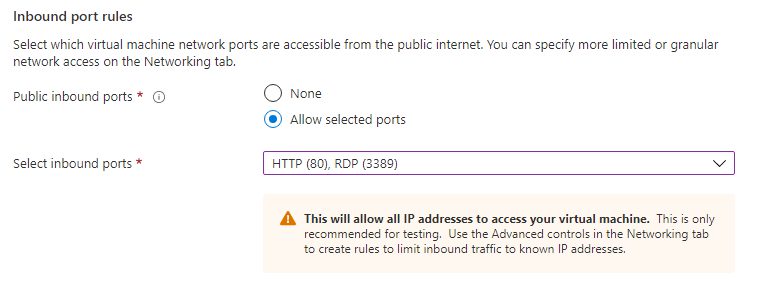
Under Inbound port rules, choose to Allow selected ports and then select RDP (3389) and HTTP (80) from the drop-down.

Webp.net-resizeimage-9

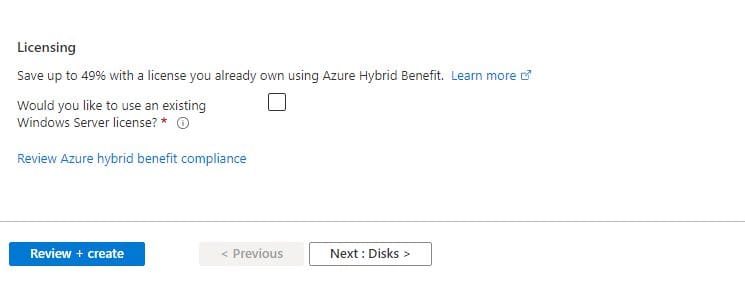
Then leave the remaining as defaults Lastly, select the Review + Create button at the bottom of the page.

Webp.net-resizeimage-10

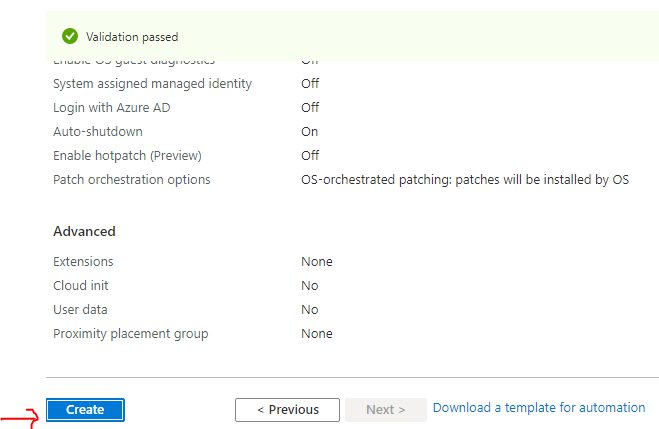
After validation runs, select the Create button at the bottom of the page.

Webp.net-resizeimage-11

The deployment is complete. Select Go to the resource.

Webp.net-resizeimage-12

Add a network interface card to an existing VM

Sign in to the Azure portal with your credentials.

In the search box at the top of the portal, type the name of the VM you just created or select any VM name to which you want to add the Network Interface Card, or browse for the VM by selecting All services, and then Virtual machines. After you’ve found the VM, select it. The VM must support the number of network interfaces you want to add. 

Webp.net-resizeimage-14

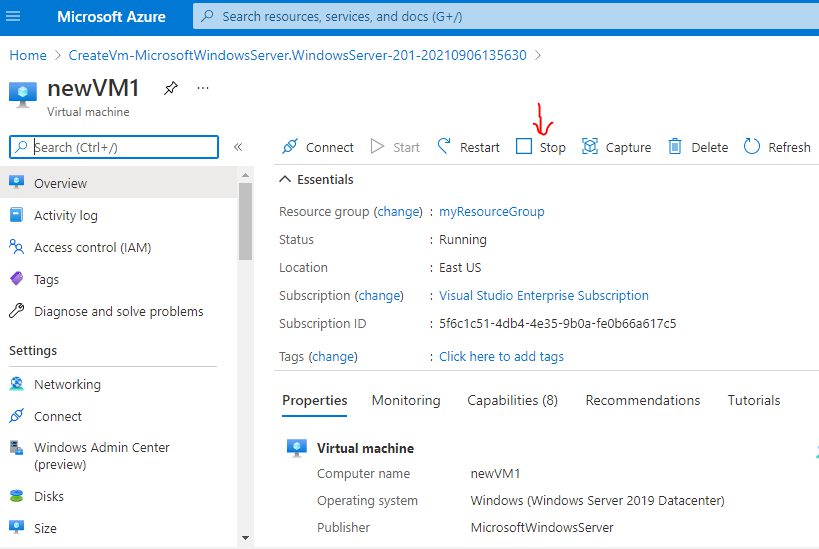
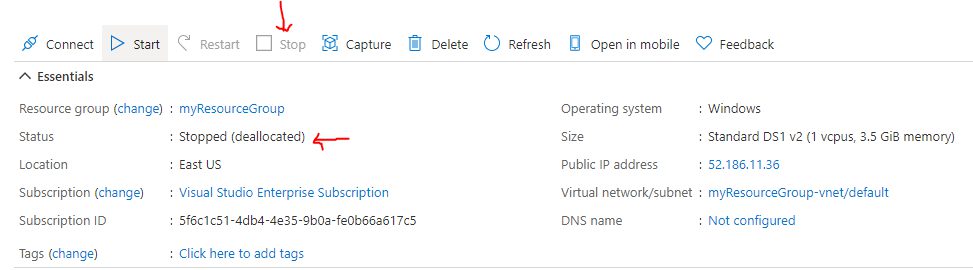
Then Select Overview, under SETTINGS. Select Stop, and then wait until the Status of the VM changes to Stopped (deallocated).

Webp.net-resizeimage-13

Select Networking, under SETTINGS at the left pane

Webp.net-resizeimage-15

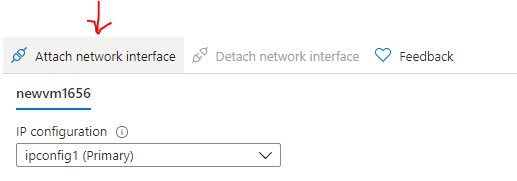
Select Attach network interface. From the list of network interfaces that aren’t currently attached to another VM, select the one you’d like to attach.

Webp.net-resizeimage-16
Webp.net-resizeimage-19

If you don’t have an existing network interface, you must first create one. To do so, select Create network interface.

Webp.net-resizeimage-17

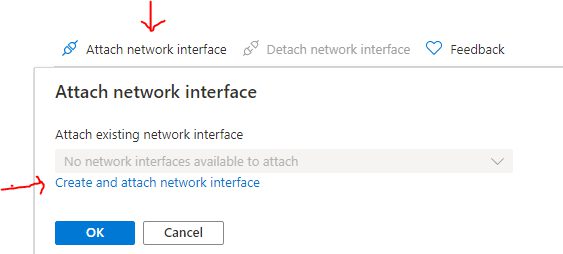
Click on Create and attach the network interface as shown below

Webp.net-resizeimage-18

Next, select OK and Create. Select Overview, under SETTINGS, and then Start to start the virtual machine.

Here are some exciting articles: How to fix Connectivity to a writable domain controller from node could not be determined because of an error: The distinguished name of the node could not be determined, and how to configure Windows LAPS, and Set up Veeam Backup for Microsoft Azure.

Remove a network interface card from a VM

Sign in to the Azure portal with your credentials.

In the search box at the top of the portal, search for the name of the VM you want to remove (detach) the Network Interface from, or browse for the VM by selecting All services, and then Virtual machines. After you’ve found the VM, select it.

Once the VM is open select Overview at the left hand side, under SETTINGS, and then Stop. Wait until the Status of the VM changes to Stopped (deallocated).

Webp.net-resizeimage-21

Then select Networking, under SETTINGS.

Webp.net-resizeimage-22

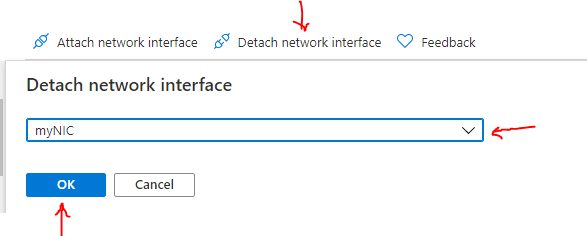
Select Detach network interface. From the list of network interfaces currently attached to the virtual machine, select the network interface you’d like to detach. If only one network interface is listed, you cannot detach it, because a virtual machine must always have at least one network interface attached to it.

Webp.net-resizeimage-23

You will need to click on “Detach network interface” as shown below and click on OK.

Webp.net-resizeimage-24

We have seen the step by steps on how to add or remove Network Interface from VM in Azure. Knowing how to add a network interface card to an existing VM in Azure, how to create a network interface card, also how to remove or detach a network interface card from a VM in Azure. I hope you find this article useful.

Rate this post

Thank you for reading this post. Kindly share it with others.

  • Click to share on X (Opens in new window) X
  • Click to share on Reddit (Opens in new window) Reddit
  • Click to share on LinkedIn (Opens in new window) LinkedIn
  • Click to share on Facebook (Opens in new window) Facebook
  • Click to share on Pinterest (Opens in new window) Pinterest
  • Click to share on Tumblr (Opens in new window) Tumblr
  • Click to share on Telegram (Opens in new window) Telegram
  • Click to share on WhatsApp (Opens in new window) WhatsApp
  • Click to share on Pocket (Opens in new window) Pocket
  • Click to share on Mastodon (Opens in new window) Mastodon
  • Click to share on Bluesky (Opens in new window) Bluesky
  • Click to share on Threads (Opens in new window) Threads
  • Click to share on Nextdoor (Opens in new window) Nextdoor
AWS/Azure/OpenShift Tags:Azure

Post navigation

Previous Post: Create an App Service Plan with Continuous Deployment to deploy a .NET Application from GitHub
Next Post: How to manage costs with AWS Budgets

Related Posts

  • AzureAD
    Azure Active Directory integration with on-premise AD using PTA AWS/Azure/OpenShift
  • a Multiple SPF Records  Issues and Examples@2x
    How to setup SPF and TXT Records in AWS AWS/Azure/OpenShift
  • AWS Budgets
    How to create AWS Budget AWS/Azure/OpenShift
  • Amazon EC2 and S3
    How to sync S3 Bucket with an EC2 instance AWS/Azure/OpenShift
  • featureimagepshell 1
    Running PowerShell remotely on Azure VMs AWS/Azure/OpenShift
  • New OpenShift Featured Image
    OpenShift common Commands AWS/Azure/OpenShift

More Related Articles

AzureAD Azure Active Directory integration with on-premise AD using PTA AWS/Azure/OpenShift
a Multiple SPF Records  Issues and Examples@2x How to setup SPF and TXT Records in AWS AWS/Azure/OpenShift
AWS Budgets How to create AWS Budget AWS/Azure/OpenShift
Amazon EC2 and S3 How to sync S3 Bucket with an EC2 instance AWS/Azure/OpenShift
featureimagepshell 1 Running PowerShell remotely on Azure VMs AWS/Azure/OpenShift
New OpenShift Featured Image OpenShift common Commands AWS/Azure/OpenShift

Leave a Reply Cancel reply

You must be logged in to post a comment.

Microsoft MVP

VEEAMLEGEND

vexpert-badge-stars-5

Virtual Background

GoogleNews

Categories

veeaam100

sysadmin top30a

  • Grant Non Domain Admin Privileges to Manage Workstation
    Grant Non-Domain Admin Privileges to Manage Workstation Windows
  • VeeamOn 2023 Miami
    Why you should attend VeeamOn 2023 Backup
  • Veeam Plugin update for Proxmox
    Update Veeam Backup for Proxmox Plugin to support PVE 9.0 Backup
  • centos feature
    How to change the system time zone under RedHat and CentOS Linux
  • How to Enable or Disable Inherited Permissions for Files and Folders in Windows
    How to Enable or Disable Inherited Permissions for Files and Folders in Windows Windows
  • dfggg
    SimpleSAMLphp Setup on Windows Server [Part 1] Windows Server
  • Bulk operations in Azure AD
    Perform Bulk User Operations in Azure AD AWS/Azure/OpenShift
  • FailedRegistration
    DNS Bad key 9017: The Cluster Name registration failed of one or more associated DNS names Virtualization

Subscribe to Blog via Email

Enter your email address to subscribe to this blog and receive notifications of new posts by email.

Join 1,836 other subscribers
  • RSS - Posts
  • RSS - Comments
  • About
  • Authors
  • Write for us
  • Advertise with us
  • General Terms and Conditions
  • Privacy policy
  • Feedly
  • Telegram
  • Youtube
  • Facebook
  • Instagram
  • LinkedIn
  • Tumblr
  • Pinterest
  • Twitter
  • mastodon

Tags

Active Directory AWS Azure Bitlocker Microsoft Windows PowerShell WDS Windows 10 Windows 11 Windows Server 2016

Copyright © 2025 TechDirectArchive


Loading Comments...
 

You must be logged in to post a comment.