How to install LXC/LXD for container management

In this article, we shall discuss Installing LXC/LXD for container management. You can’t talk about this without referring to Canonical, the company behind Ubuntu. This is because Canonical built upon the architecture of LXC for LXD. It will shock you to know that Docker is also built upon the technology of LXC, but that will be a story for another day. But you have to understand that Docker is a lightweight and uncomplicated container runtime that enables users to create only one application process per Docker container. Please see The executor requires OSType=windows, but Docker Engine supports only OSType=linux, and how to Install a Windows Server Container Host.
As you read along, you will understand the differences. So, you might also be wondering ah! Why do I want to use LXC or LXD in 2021, or maybe you are even reading this article in 2023 and beyond. This article describes how to install LXC/LXD for container management.
LXC (LinuX Containers) is an operating system level virtualization technology that enables the creation and execution of multiple isolated Linux Virtual Environments (VE) on a single control host.
Why Install LXC/ LXD?
96.3 per cent of the world’s top 1 million servers use Linux. Meanwhile, only 1.9 per cent of the rest use Windows, with 1.8 per cent using FreeBSD. LXD allows you to isolate not only apps but also the complete operating system to have all the features of Linux.
Its support scripts specialize in transforming containers to lightweight computers or servers that load faster and use less RAM.
Additionally, LXD is a next-generation system container and virtual machine manager. It also offers a unified user experience around complete Linux systems running inside containers or virtual machines.
LXD is network-aware, and you can handle all interactions via a simple REST API. Furthermore, this allows you to interact with containers on remote systems remotely, copying and moving them as needed. Do you want to go all out? LXD also includes clustering capabilities, allowing you to combine dozens of servers into a single LXD server.
The crucial advantage of LXD is that it is an extension of LXC. Thus, it can handle most LXC functionalities and advanced features. In addition, LXD’s capabilities have indeed been enhanced thanks to the use of REST APIs.
Please see Pull and Deploy Nginx Container Images from Docker Hub, and how to install and uninstall Docker Desktop on Windows 10 and Windows Server.
Installing LXC/LXD
Now that I have been able to make you see why having a container that can run a complete Linux operating system is important, let’s get our virtual machines ready.
Thus, I shall be using Ubuntu 16.04 installed on VM Workstation pro for the task in this article. To install LXC/LXD containers, follow the steps below:
Install LXC/LXD by updating the system
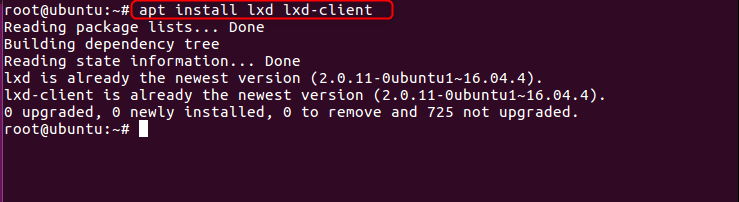
Let’s run an apt-update on the system LXD client. Proceed to run the command below.
apt install lxd lxd-client
LXC’s originally named ‘lxc’ (LX Client’). The original LXC starting with ‘lxc’ Client installation command installs the CLI as well.
LXC provide the basic functionality used under the hood by LXD. However, it should not be confused with the lxc CLI client tool provided by LXD.
The LXD client lxc is a command tool to manage your LXD servers.
After installing LXC/LXD, we need to make LXD ready for container and images.
sudo lxd init
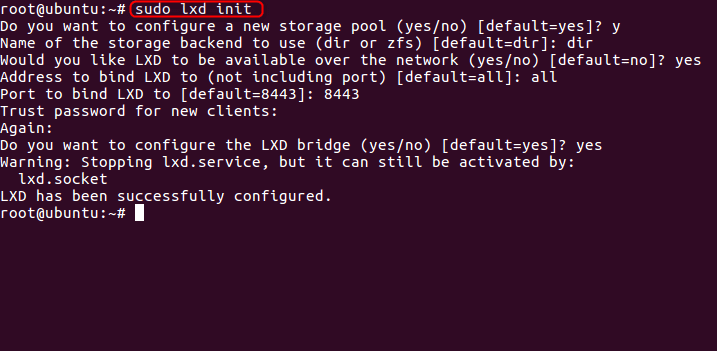
Initializing LXC/LXD
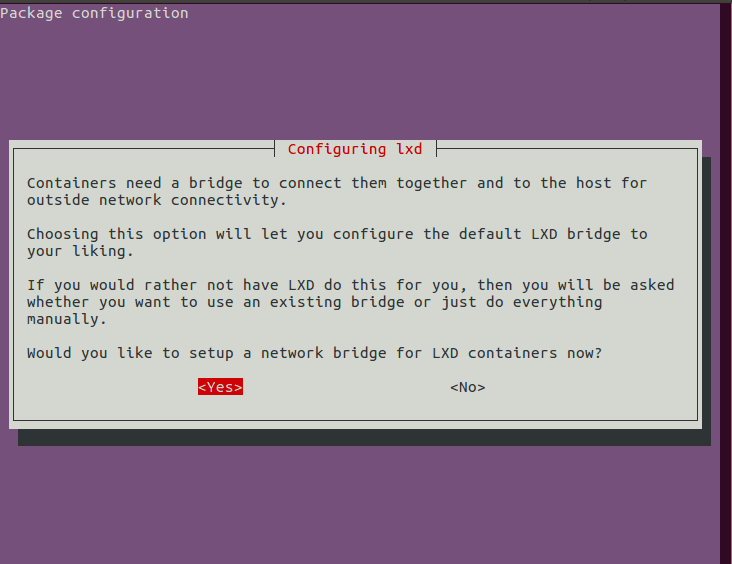
while configuring, there were a lot of options we were asked to make. What’s more, I chose yes for all and entered the given password.
Then, I just hit enter, indicating a blank keyboard. An example of one of the options from the lxd init command is shown below.
The last step for installing LXC/LXD is adding the user to lxd group. In this case of the task we are working on, I am the user
sudo usermod -aG lxd raphael

Before we proceed, let us see how we are doing with this command, It might take a while but let’s be patient
lxc list
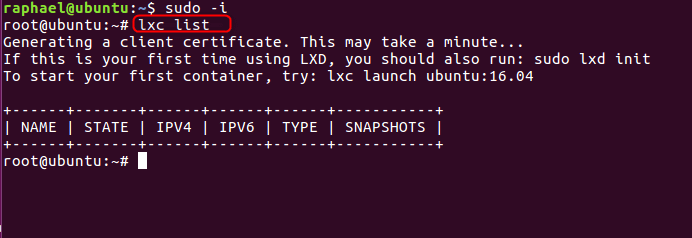
lxc list shows you what container is running on your host. At the moment we do not have images downloaded so it’s empty. So let us do something about this with this command below; we choose to call the name of the image techdirectarchive.
Make you run systemctl restart lxd if not you might get image creation error with the message certificate signed by an unknown authorityLaunching LXC/LXD
Follow the commands below to install and launch LXC/LXD on Linux/Ubuntu
sudo lxc launch ubuntu:16.04 techdirectarchive

lxd launch ubuntu:16.04

However, if you don’t specify a name, it will automatically create it for you. As you can see from the above screenshot we didn’t choose comic-hyena as the preferred name in the launch command

if we do an lxc list, we can see that the containers we created are in the running state
Meanwhile, if we run the command below, we will know that we logged into the container
#lxc exec techdirectarchive -- /bin/bashFollowing this, we can exit this container by typing exit on the terminal

Did you notice what is in the screenshot? you have been given the full powers of the computer, so as the container you are not restricted in any way at all. we can do the same for the second container called comic-hylx
#lxc exec comic-hyena -- /bin/bash
So, let’s stop the container comic-hyena with the command below and see the state with lxc list
#lxc stop comic-hyena
If we do the same for techdirectarchive container we will see that both containers are no longer running

Congratulations! You’ve successfully install LX /LXD container.
Summary on Installing LXC/LXD for Container Management
Linux containers allows you to isolate not only apps but also the complete operating system to have all the fe tures of Linux. we saw this when we ran the command #lxc exec comic-hyena – /bin/bash. The container itself became root. sudo apt install lxd lxd-client will enable you to install it.
You start with LXD init and accept all defaults. You can create a container with the command #lxc launch <image> : version. By now, you should have an adept knowledge on how to install LXC/LXD container.
Please see how to Install LXC/LXD for container management. Please feel free to leave a comment below.