

The BitLocker Network Unlock allows automatic access to the BitLocker key needed to unlock the volume. This automatic access occurs over the corporate network when the machine boots up thereby bypassing any input from the user. In this guide, I will show you how to implement BitLocker PIN bypass: How to configure Network Unlock in Windows. Please see how to backup and restore a Windows DHCP Server via the DHCP Manager and PowerShell, and “How to backup and restore a Windows DHCP Server via the DHCP Manager and PowerShell“.
Network Unlock allows BitLocker-enabled systems that use TPM+PIN and that meet the hardware requirements to boot into Windows without user intervention. This feature requires the client hardware to have a DHCP driver implemented in its UEFI firmware.
This brings us to the point, what is BitLocker? See the following guides on how to enable or disable BitLocker on Windows 10” or this link.
Note: BitLocker Drive Encryption is a data protection feature that integrates with the operating system and addresses the threats of data theft or exposure from lost, stolen, or inappropriately decommissioned computers. BitLocker is Microsoft’s easy-to-use, proprietary encryption program for Windows that can encrypt your entire drive.
BitLocker Network Unlock requirements
For Network Unlock to work, it requires the following mandatory hardware and software configurations before it can automatically unlock domain-joined systems: You need to meet the following prerequisites
- Run at least Windows 8 or Windows Server 2012 (But in this lab, I am testing on Windows 10 and Windows Server 2019).
- Any supported operating system that uses UEFI DHCP drivers can be a Network Unlock client.
- Network Unlock clients must have a TPM (trusted platform module) chip and at least one TPM protector.
- You must have a server running the Windows Deployment Services (WDS) role installed and running in your environment.
- The BitLocker Network Unlock optional feature can be installed in your environment.
- A DHCP server is required and
- A WDS Server is needed as well.
- You must have a properly configured public/private key pairing.
- Network Unlock Group Policy settings must be configured.
Configure Network Unlock in Windows
Network unlock uses MS-NKPU protocol encapsulated into DHCP packets”. To properly support DHCP within UEFI, the UEFI-based system should be in native mode and shouldn’t have a compatibility support module (CSM) enabled.
Step 1 – Install and Configure a DHCP Server
DHCP refers to Dynamic Host Configuration Protocol. Basically, it’s a mechanism that assigns IP addresses to computers dynamically. DHCP is a role (service) running on a server machine in the network in order to assign dynamic IP addresses to hosts. See this guide on how to configure DHCP Server option 60, 66, and 67 for WDS.
Note: If you have segmented your LAN/Network into VLANS, simply create other scopes as shown above for those VLANS then configure your router to get IPs’ from the DHCP Server accordingly.
Optional Step
I assumed you do not have a DHCP server. If you would like to create a DHCP Server via PowerShell, please follow the steps below. See how this can be done via the DHCP Manager “How to install DHCP on Windows Server 2019″. Ensure to run PowerShell as an Administrator.
Install-WindowsFeature DHCP -IncludeManagementTools

Since I am installing the DHCP Server in a domain environment, I have to perform the following steps to authorize the DHCP server to operate in the domain. See how this is done via the DHCP Management console “Perform Post-deployment of DHCP Server“.
Authorize the DHCP Server
To authorize the DHCP Server. Launch the Server Manager and you would see a flag as shown below.

Click on it and complete the DHCP configuration.

Skip the description window by clicking next and specify your desired credential and click on commit.

Create a New scope and follow the prompts to complete it as described below. Please see BitLocker Drive Encryption architecture and implementation types on Windows.
Enter a “Scope Name” and “description” as shown below
- Input your start IP Address and end Address- On the “Add Exclusion and Delay Page”, you can reserve some IPs’ in the range server if you have- Enter the Default Gateway of the Subnet and activate the scope.

Step 2 – Install the WDS server role
As explained previously in this link, the BitLocker Network Unlock feature will install the WDS role if not already installed. If you decide to install it separately before you install BitLocker Network Unlock you can use ServerManager or Windows PowerShell.
To install the role using Server Manager, select the Windows Deployment Services role in Server Manager.
See this guide for more information on how to set up and install the WDS role and how to remove the WDS role via the GUI and PowerShell. For more information on WDS, see this link.
To install the role using Windows PowerShell, use the following command below. After installation, you do not necessarily have to configure WDS for Network Unlock to work.
Install-WindowsFeature WDS-Deployment

Before proceeding to the next step, please ensure that the WDS service is running. As you can see below, the service is stopped and if you are having issues starting the WDS services, see this troubleshooting guide “An error occurred while trying to start the windows deployment services“.
Get-Service WDSServer

Here is a similar troubleshooting guide on WDS “The service could not be started either because it is disabled or because it has no enabled devices associated with it“.
Step 3 – Installing the Network Unlock Feature
Network Unlock is a Windows feature that can be installed via the Server Manager or Windows PowerShell cmdlets. In Server Manager, the feature name is BitLocker Network Unlock, and in Windows PowerShell, it is called “BitLocker-NetworkUnlock”.
In this guide, I will be using the command-line interface for these steps. To learn how to install Windows features via the GUI, please visit the following how-to article “How to install Telnet via the command line and GUI in Windows 10 and Windows Server”. To install the feature via Windows PowerShell, use the following command.
Install-WindowsFeature BitLocker-NetworkUnlock

After the Feature is installed successfully, it should appear this way.
If you are interested in a Full Disk Encryption (FDE) solution with PBA, kindly see the following guide “How to download and install DriveLock” that I have tested. kindly take a look at this guide as well “Important DriveLock components to master.

Step 4 – Create the Network Unlock certificate
The Network Unlock certificate is used to create Network Key Protectors and protects the information exchanged with the server to unlock the computer.
This step assumes you have a Certificate Authority, if you do not currently have this, kindly visit the following guide on how to set up and how to install and configure Active Directory Certificate Services (Microsoft Certification Authority). Also, see this guide on how to create a certificate template for BitLocker Network Unlock.
Note: Network Unlock can use imported certificates from an existing PKI infrastructure. If you have a CA already, please perform the following steps discussed below.
- Create a certification template,
- Installing the BitLocker Network Unlock component,
- Network Unlock Certificate Request.
For other related content I have created around this topic, see these guides on how to request a certificate signing request in Windows using MMC and how to export a certificate in PFX format in Windows, and also the needed components to create a certificate signing request.
Step 5 – Create the Network Unlock certificate Request
It is worth noting again that the Network Unlock can use imported certificates from an existing public key infrastructure (PKI) or even a self-signed certificate. To create a certificate unlock, you must launch the WDS console described below.
On the WDS server, launch the MMC console or open Certificate Manager by using “certmgr.msc” to open the Current User snap-in.
Note: MMC offers a common framework in which various snap-ins can run so that you can manage several services by using a single interface.

Under Certificates, Current User, right-click Personal as shown below. Next, select All Tasks, and Request New Certificate.

This will open up the Certificate Enrollment wizard as shown below. Click on Next to continue

Now, Select Active Directory Enrollment Policy

Choose the certificate template
This is the certificate template that was created for Network Unlock on the domain controller. As you can see below, more information is required to enrol for this certificate. Click on the link to configure the settings

This will open up the Certificate Properties.
Select the Subject Name and provide a friendly name value.

Your friendly name should include information for the domain or organisational unit for the certificate.

Next, select Enroll

Create on Finish to complete this step

On the Certificate Authority Management console.

You will have to approve as shown in the image below.

To ensure the certificate appears in the Personal folder, just copy the certificate from the Certificate Enrolment Request to the Personal as shown below.

Step 6: Next, we will have to export the received certificate two times and because of this, I will be diving these steps into Part A and Part B. First, the public key certificate for Network Unlock and the other a public key with a private key for Network Unlock.
Here is an example of an FDE solution with PBA “how to download DriveLock software and install DriveLock” that I have tested. kindly take a look at this guide as well “Important DriveLock components to master.
Part A: Create a Public Key certificate for Network Unlock without exporting the private key
Please follow the below steps to do this. Right-click on the BitLocker Network Certificate, choose All Tasks and select Export as shown below.

Click on Next on the Welcome to the Certificate Export Wizard.

Select No, do not export the private key because we only we take the DER format.

Select DER encoded binary X.509, and then finish exporting the certificate to a file.

Enter the file a name, such as BitLocker-NetworkUnlock.cer and click on Next

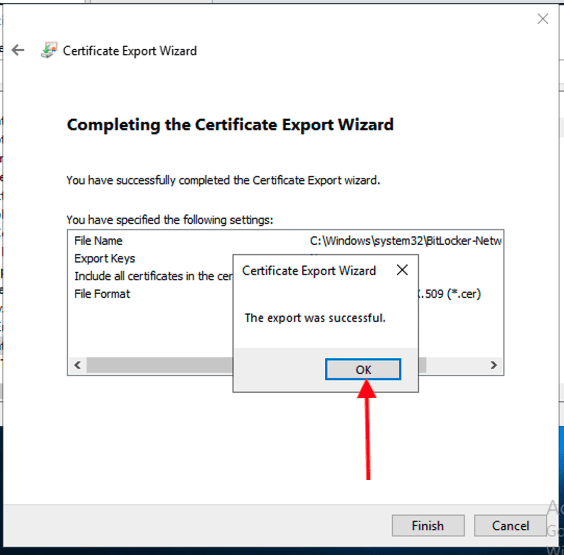
Click on Finish to complete the task, and on the prompt, click on OK to have the Window close.

Also, see How to unlock a fixed drive protected by BitLocker via the Control Panel or Command Prompt in Windows, A guide to how Bitlocker Network Unlock works, and “Force BitLocker Recovery mode: How to unlock BitLocker Protected Drive“.
Part B – Export the public key with a private key for Network Unlock
We will follow the same steps as step 1 above but this time select Yes, and export the private key.

By default, the Personal Information Exchange – PKCS #12(.PFX) is selected. Ensure your set-up is similar to the image below.

You will be requested to protect your private key for security reasons. This is the recommended best practice.

Enter a file you would like to export

Finally, click on Finish to complete this setup, and on the prompt, click on OK to have the Window close.


Step 7 – Deploy the private key and certificate to the WDS server
Now that you’ve created the certificate and key, deploy them to the infrastructure to properly unlock systems. To deploy the certificates please follow the steps below. On the WDS server.
Open a new Microsoft Management Console (MMC) by using the Run dialog box

Accept the UAC control. for more UAC, please see the following link. And Afterward, the MMC console will open up.

Add the certificates snap-in. When you’re prompted, select the computer account and local computer.


Finally, click on OK to

Part 8: We will have to add the private key certificate to the BitLocker Drive Encryption Network Unlock store in the Local Computer console on the WDS server. To do this, Right-click Certificates (Local Computer).
BitLocker Drive Encryption Network Unlock, and Select All Tasks and then Import.

On the welcome to Certificate Import Wizard, click on Next

In the File to Import dialog box, choose the .pfx file that you created previously.


Click on Next to continue

Enter the password that you used to create the .pfx file,

Select to place the certificate in the BitLocker Drive Encryption Network Unlock certificate store.

As you can see below, the import is successful


Part 9 – Configure Group Policy settings for Network Unlock
You will use Group Policy settings to deploy the public key certificate to computers that you want to be able to unlock by using the Network Unlock key.
For more information on Group Policy, please see the following guides “what is Group Policy Object and how can it be launched“, how to analyze group policies applied to a user and computer account, and for a comprehensive list of articles I have written on GPO, please visit the following link.
To create a new GPO with the minimum required parameters for network unlocking, fire up the Server Manager and click on Tool and Select Group Policy Management console as shown below.

Usually, you will want to create a new Group Policy Object and Link it to your desired Domain, or Container as shown below.

But Because I have created a Group Policy previously for BitLocker Disk Encryption, I will therefore be modifying that. To do this, I will select the Policy and right-click on it. If you are an experienced System Admin, this step should not be strange to you and select Edit.
Turn on BitLocker with TPM+PIN protectors on all domain-joined computers by linking the policy to an OU or Domain.

This will open up the Group Policy Management Editor. Navigate and find Group Policy settings for BitLocker in the following path below
Computer Configuration\Policies\Administrative Templates\Windows Components\BitLocker Drive Encryption
You will have to enable the policy Require additional authentication at startup, and then select Require startup PIN with TPM or Allow startup PIN with TPM.


Part 10 – Enable the Group Policy setting that’s required to configure Network Unlock
You will need to configure the group policy setting on the domain controller to distribute this certificate to computers in your organization.
To do this, open Group Policy Management Console using the Server Manager or via “gpmc.msc“, it is the same thing and it will open up the Group Policy Management Console.

Expand and navigate through the following path below.Computer Configuration\Policies\Windows Settings\Security Settings\Public Key Policies
Click on BitLocker Drive Encryption Network Unlock Certificate in the context menu. Click on Add Network Unlock Certificate

In the Add Network Unlock Certificate, click on Next as this is only informational.

On the “Select Network Unlock Certificate” window, click o Browse Folders as shown below

Follow the steps and import the “.cer” file that you copied earlier in Step 6 (Part A) above. This is a Public Key certificate we created for Network Unlock without exporting the private key.

When prompted, click on yes to install the certificate as shown below and click on Next to continue.


Finally, click on Finish to complete this step.

As you can see, the certificated has been successfully deployed needed to perform Network Unlock.

Run Group Policy update
Kindly perform a Group Policy update. See this guide for more information on GPUpdate Switches: GPUpdate vs GPUpdate force. Also, reboot the clients after you deploy the Group Policy.

The Network (Certificate Based) protector is added only after a reboot where the policy is enabled and a valid certificate is present in the FVE_NKP store.
Only one network unlock certificate can be available at a time. If you need a new certificate, delete the current certificate before you deploy a new one. The Network Unlock certificate is located in the following path below.
HKEY_LOCAL_MACHINE\Software\Policies\Microsoft\SystemCertificates\FVE_NKP key on the client computer
Note: On Windows clients, ensure the first Network Adapter is configured to support DHCP and this adapter will be used for Network Unlock. This is because, if you have multiple adapters and you want to configure one without DHCP, such as for a lights-out management protocol.
The configuration is necessary because Network Unlock stops enumerating adapters when it reaches an adapter that has a DHCP port that has failed for any reason.
So if the first enumerated adapter doesn’t support DHCP, isn’t plugged into the network, or fails to report the availability of the DHCP port for any reason, then Network Unlock will fail. Here is an article on BitLocker Network Unlock FAQ.
I hope you found this blog post helpful on BitLocker PIN bypass: How to configure Network Unlock in Windows. If you have any questions, please let me know in the comment session.



Hello. How can i use WDS server in other subnet if i have, for example, client in vlan 100, dhcp server in vlan 101 and WDS in vlan 102. On router i can config only one IP helper for vlan ( to dhcp). How can PC send dhcp request to WDS server after receiving IPV4 address? how does my computer know where WDS is? Thanks.
I think this guide might help you “WDS and DHCP deployment scenarios”: The clients will have to find WDS through option 66 and 67 set in DHCP: https://techdirectarchive.com/2020/05/26/wds-and-dhcp-deployment-scenarios-how-to-configure-dhcp-server-option-60-66-and-67-for-windows-deployment-services/
If I only need to use Network Unlock (not Network Boot) do I only need to configure Option 66?
Also if i disable ipv6 on UEFI config, i don`t see any request to WDS server.
Should i need some configure ip helper on IPv6?
With DHCP Options or IP Helper configured, I am sure you can achieve this goal. Unfortunately, I haven’t tested with IPv6. Therefore, I cannot advise further.
Can you give me dump wireshark (steps for network unlock)?
When wds is on broadcast domain i see :
1. Uefi get ipv4 ip address
2. Send icmpv6 and dhcpv6 requests
3. Wds reply
4. It works great.
But when my wds server in other network it doesn’t work.
1. Uefi get ipv4 ip address
2. Send ipv6 requests
My wds server cannot see requests from PC
I don’t see any ipv4 request (( i see only ipv6 icmpv6 and dhcpv6
How can i use ipv4 requesting to wds server?
georgiyyatskovskiy@gmail.com
Thank
I got stuck on importing the certificate to the GPO. However, I do Group Policy on my domain controller. The cert was created on the WDS server. It states that it does not have a 2048 bit RSA encryption key. Any advice?
Hi, I would advise you to regenerate (create) a new certificate on the WDS server with a 2048-bit RSA encryption key. This should address the certificate import issue due to the required encryption standards