
Looking to streamline your files? Easily move OneDrive Folder, a default Microsoft service in Windows 10 (that is, Move OneDrive Folder to a different location in Windows). Sync and access files across devices seamlessly. Looking to optimize your file management? Easily move OneDrive Folder to a new location. Accessible on any device once logged in, OneDrive offers a default storage spot. However, situations may arise where relocating the OneDrive location becomes beneficial. Please see how to Stop OneDrive from Starting Up Automatically on Windows 11.
In this guide, I will be showing you how to change the default location to your desired location. If you want to read more guides on OneDrive, you can check these: How to Disable or Uninstall OneDrive on Windows 10 and 11, and how to Share Files, Stop Sharing and Restore Previous Versions of Files on Microsoft OneDrive.
Accessing the Default OneDrive Location on Windows 10
Open your Windows 10 system and locate the User’s folder or use this “C:\Users\Your User Account\OneDrive.”, you will see the OneDrive icon inside this location and when you click, it will open the OneDrive service where you can save your files.
This is the default location that comes with Windows 10.

An alternative way to open OneDrive is by checking the right side of the taskbar, you would see OneDrive’s icon that looks like a cloud.

Another way you can access it is through the search box and type OneDrive
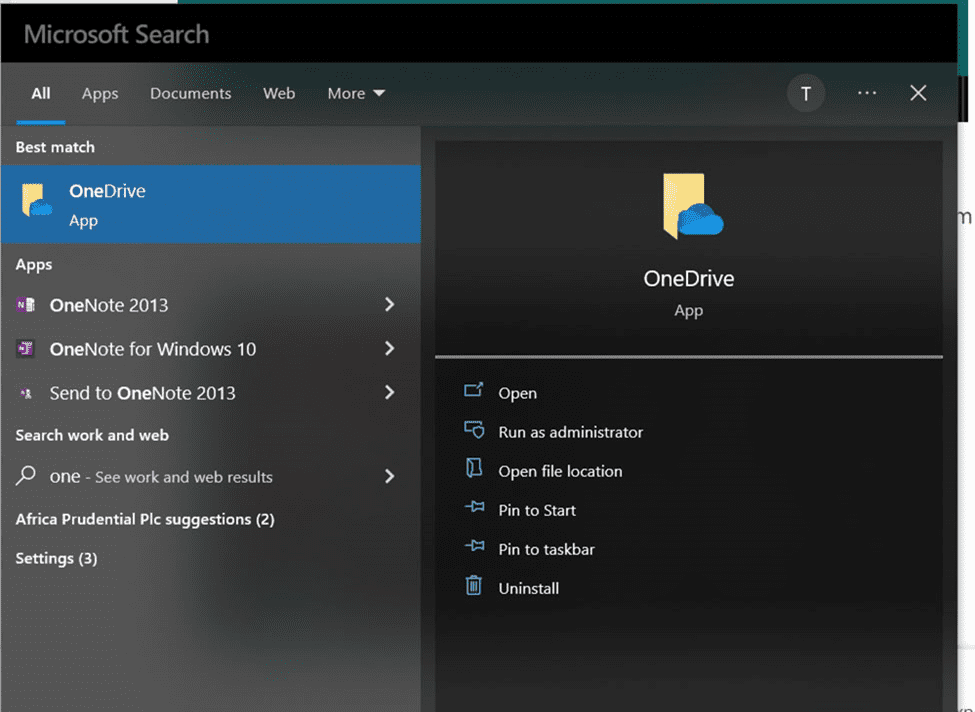
To access the setting right-click on the OneDrive icon and click on Settings

Unlink OneDrive from Windows
On the next page called Microsoft OneDrive you need to select the Account tab, and then click Unlink this PC.

Immediately you click on the Unlink this PC OneDrive will inform you of all the actions that will be carried out once you click the button that will confirm the action.
This will make OneDrive to stop syncing your files, and this is a compulsory steps that must be carried out for you to be able to move the OneDrive folder to another location.

Once this is done then the next step is to move your OneDrive folder from its original location to the location that you prefer. Open the default location for the OneDrive which is “C:\Users\Your User Account\OneDrive.”
Then select the OneDrive icon and click on Move to which will now open different folders or you can click on Choose location to select a new location for your OneDrive.
Also, see Files On-Demand with OneDrive: Microsoft OneDrive Setup On Windows 10 and 11 and Key Features Explained, and How to remove OneDrive from Windows.
Selecting Destination and Initiating OneDrive Move
Now make your choice of the folder or drive you to want for your OneDrive and click on the Move button to start moving the OneDrive. The time spent on the movement is dependent on the number of files available in the OneDrive.

Now go ahead to re-login to your Microsoft OneDrive account

Since we want to use a different location for the OneDrive, click “Change location” link.
You can now “Choose your OneDrive location.” Find and select the location where you moved the OneDrive folder on your system and click the Select Folder button.

Moreover, OneDrive immediately detects that the OneDrive folder already exists on this PC before, you only need to confirm you still want to continue to use the folder.

Here are some intersting guides: Microsoft Phone Link: Connect Android to Windows 11, How to Disable or Uninstall OneDrive on Windows 10 and 11, and how to share Files and Restore Previous versions of Files in Microsoft OneDrive.
I hope you found this blog post on How to move OneDrive Folder to a Different Location in Windows 10 interesting and helpful. In case you have any questions do not hesitate to ask in the comment section.


