Skip to content

TechDirectArchive

Hands-on IT, Cloud, Security & DevOps Insights

  • Home
  • About
  • Advertise With US
  • Reviews
  • Contact
  • Toggle search form
Home » AWS/Azure/OpenShift » Deploy a Linux virtual machine (VM) on Azure using the Azure CLI
  • windows server 1
    In-place upgrade for Windows Server 2012 to Windows Server 2019 Windows Server
  • veeamONE integration with VBR
    Install Veeam ONE and Add VBR: Fix failed to connect to VBR Backup
  • featureunions
    How to Install Unison on Linux System Linux
  • Convert OST to PST
    How to install and work with Stellar Converter for OST Reviews
  • Featured image 8
    How to restore quarantined files in Microsoft Defender Antivirus Security | Vulnerability Scans and Assessment
  • delete5
    How to Delete Diagnostic Data in Windows 10 and Windows 11 Windows
  • tredfghgfde3456578
    How to install Java Runtime Environment on Mac OS Mac
  • Webp.net resizeimage 1
    Automate Infrastructure Deployments in the Cloud with Ansible and Azure Pipelines AWS/Azure/OpenShift

Deploy a Linux virtual machine (VM) on Azure using the Azure CLI

Posted on 24/08/202214/12/2023 Imoh Etuk By Imoh Etuk 2 Comments on Deploy a Linux virtual machine (VM) on Azure using the Azure CLI
Azure-VM-Creation-With-CLI-1

In this quick guide, I demonstrate how to deploy a Linux virtual machine (VM) on Azure using the Azure CLI, install an Nginx Web Server, and open port 80. Azure resources can be provisioned and managed via the Azure Portal and Azure CLI, either directly from the command line or using scripts and PowerShell cmdlets. We’ll be installing the most recent Ubuntu LTS image in this guide. At the end of this guide, you will be able to install the NGINX web server, establish an SSH connection to the VM, and start using it just as you would use it in real-life scenarios. Please see how To Configure VM Update Management on Azure Stack Hub, and how to use the Azure Cloud Shell or Azure CLI and Azure PowerShell.

The Azure Cloud Shell, according to Microsoft, is a free interactive shell that you can use to run the steps to create and manage resources on Azure. It has common Azure tools preinstalled and configured for use with your account.

Azure CLI can be assessed by clicking on the Cloud Shell icon on the Azure Portal from the upper right corner of the screen. Alternatively, you can also open Cloud Shell in a separate browser tab by going to https://shell.azure.com/bash.

If you prefer to install and use the CLI locally, you can also do so by downloading and installing Azure CLI version 2.0.30 or later. Run az --version to find the new version. If you need to install or upgrade, see Install Azure CLI.

Create Azure Linux Virtual Machine Using Azure CLI

To get started with creating your first Linux VM with Azure CLI, sign into Azure Portal. Note: to be able to create a Linux Virtual Machine on Azure, you must have an active subscription. If you don’t have one, you can sign up for an Azure free trial account.

After logging into the portal, the first step is to create the Azure Resource Group—a logical container for deploying and managing resources. In our example, we create a resource group named techdirecharchiveRG in the westus location using the CLI command below:

az group create --name techdirectarchiveRG --location westus
Create-A-Resource-Group
Creating an Azure Resource Group

Now, let’s proceed to create the Linux Virtual Machine. Still, on the same Cloud Shell window, type the command below:

avm create --name techdirectvm --resource-group techdirectarchiveRG --location westus --image UbuntuLTS --admin-user azureuser --generate-ssh-keys 
VM-Created
Creating an Azure VM

See how to back up an Azure VM from the VM settings, and remove Azure VM: How to delete a Virtual Machine via the Azure Portal. Learn how to Add or Remove Network Interface from a VM in Azure

Installing the Nginx Web Server Linux Virtual Machine

Next, to make good use of the Linux Virtual Machine we just created. We need to install the NGINX web server.

To do this we need to update the package sources first and install the Nginx web server. To do this, run the below command:

az vm run-command invoke -g techdirectarchiveRG -n techdirectvm --command-id RunShellScript 
--scripts "sudo apt-get update && sudo apt-get install -y nginx"
Nginx-is-Installed
Package Sources updated and Installed Nginx Web Server

Also, see Pull and Deploy Nginx Container Images from Docker Hub, and Creating and Deploying Docker Registry Using Docker Image.

Opening Port 80

The last step in this series is to open the TCP port 80 for web traffic to and from our web server. When provisioning a Linux Virtual Machine in Azure for the first time, it only opens SSH connections by default.

Open TCP port 80 with the command az vm open-port to use with the NGINX web server:

az vm open-port --port 80 --resource-group techdirectarchiveRG --name techdirectvm
Opening-Port
Opening TCP Port 80

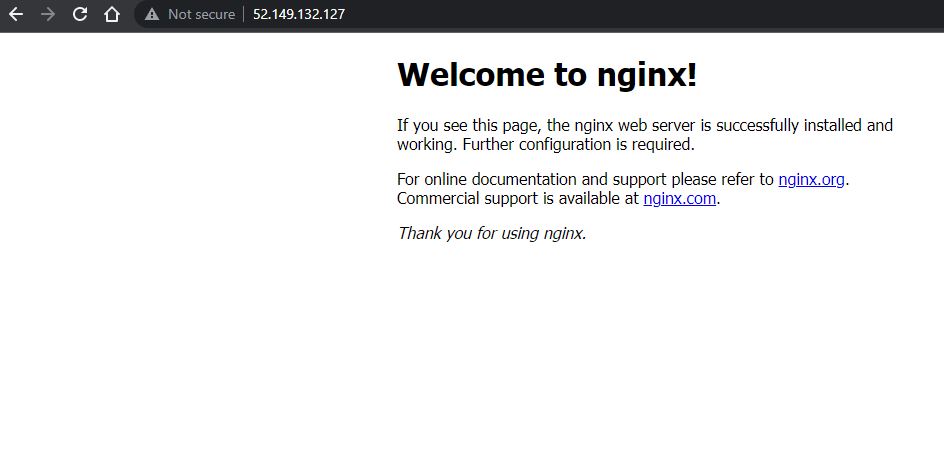
Accessing the Web Server via Web Browser Linux Virtual Machine

Now you can browse to the NGINX default welcome page using any of your preferred web browsers. Visit the Linux VM overview page, and copy the public IP for using it as the website address.

VM-Overview-page
The overview page of an Azure VM

The default NGINX website is displayed as shown in the screenshot below:

Nginx-Web-Server-Default-Page
Nginx Web Server Default Page

I hope you found this blog post on how to Deploy a Linux virtual machine (VM) on Azure using the Azure CLI helpful. Please let me know in the comment session if you have any questions.

Rate this post

Thank you for reading this post. Kindly share it with others.

  • Click to share on X (Opens in new window) X
  • Click to share on Reddit (Opens in new window) Reddit
  • Click to share on LinkedIn (Opens in new window) LinkedIn
  • Click to share on Facebook (Opens in new window) Facebook
  • Click to share on Pinterest (Opens in new window) Pinterest
  • Click to share on Tumblr (Opens in new window) Tumblr
  • Click to share on Telegram (Opens in new window) Telegram
  • Click to share on WhatsApp (Opens in new window) WhatsApp
  • Click to share on Pocket (Opens in new window) Pocket
  • Click to share on Mastodon (Opens in new window) Mastodon
  • Click to share on Bluesky (Opens in new window) Bluesky
  • Click to share on Threads (Opens in new window) Threads
  • Click to share on Nextdoor (Opens in new window) Nextdoor
AWS/Azure/OpenShift, Web Server Tags:Azure, Azure CLI, Ubuntu

Post navigation

Previous Post: Workaround for there were no pages selected to print or the documents could not be printed from Adobe Acrobat Reader
Next Post: How to Disable Automatic Offloading of Apps on iPhones

Related Posts

  • aks 1
    Azure Storage: How to create Blob Storage and upload files AWS/Azure/OpenShift
  • maxresdefault 2 6
    How to create an AMI from the Command line AWS/Azure/OpenShift
  • Screenshot 2024 02 09 at 1.06.54 PM
    Programmatically Deploying App Service Resources in Azure AWS/Azure/OpenShift
  • images
    AWS Network Adapter: Redhat to Citrix PV and AWS PV Driver AWS/Azure/OpenShift
  • DeleteAzureVM
    Remove Azure VM: How to delete a Virtual Machine via the Azure Portal AWS/Azure/OpenShift
  • Capture 91
    How to install IIS Web Server on Windows Server Web Server

More Related Articles

aks 1 Azure Storage: How to create Blob Storage and upload files AWS/Azure/OpenShift
maxresdefault 2 6 How to create an AMI from the Command line AWS/Azure/OpenShift
Screenshot 2024 02 09 at 1.06.54 PM Programmatically Deploying App Service Resources in Azure AWS/Azure/OpenShift
images AWS Network Adapter: Redhat to Citrix PV and AWS PV Driver AWS/Azure/OpenShift
DeleteAzureVM Remove Azure VM: How to delete a Virtual Machine via the Azure Portal AWS/Azure/OpenShift
Capture 91 How to install IIS Web Server on Windows Server Web Server

Comments (2) on “Deploy a Linux virtual machine (VM) on Azure using the Azure CLI”

  1. Avatar photo Mohee El-Din Jarada says:
    09/11/2022 at 11:20 AM

    Excellent article and AZURE CLI examples…all worked under my practice Azure VM sandbox, that Microsoft example itself….Thank you again, Mohee Jarada from Doha

    Log in to Reply
    1. E Imoh1 Imoh Etuk says:
      09/11/2022 at 12:44 PM

      Hi Mohee,
      I am happy to hear that the steps in the article work for you. Thanks for reading and trying out the Azure CLI commands!

      Log in to Reply

Leave a Reply Cancel reply

You must be logged in to post a comment.

Microsoft MVP

VEEAMLEGEND

vexpert-badge-stars-5

Virtual Background

GoogleNews

Categories

veeaam100

sysadmin top30a

  • windows server 1
    In-place upgrade for Windows Server 2012 to Windows Server 2019 Windows Server
  • veeamONE integration with VBR
    Install Veeam ONE and Add VBR: Fix failed to connect to VBR Backup
  • featureunions
    How to Install Unison on Linux System Linux
  • Convert OST to PST
    How to install and work with Stellar Converter for OST Reviews
  • Featured image 8
    How to restore quarantined files in Microsoft Defender Antivirus Security | Vulnerability Scans and Assessment
  • delete5
    How to Delete Diagnostic Data in Windows 10 and Windows 11 Windows
  • tredfghgfde3456578
    How to install Java Runtime Environment on Mac OS Mac
  • Webp.net resizeimage 1
    Automate Infrastructure Deployments in the Cloud with Ansible and Azure Pipelines AWS/Azure/OpenShift

Subscribe to Blog via Email

Enter your email address to subscribe to this blog and receive notifications of new posts by email.

Join 1,836 other subscribers
  • RSS - Posts
  • RSS - Comments
  • About
  • Authors
  • Write for us
  • Advertise with us
  • General Terms and Conditions
  • Privacy policy
  • Feedly
  • Telegram
  • Youtube
  • Facebook
  • Instagram
  • LinkedIn
  • Tumblr
  • Pinterest
  • Twitter
  • mastodon

Tags

Active Directory AWS Azure Bitlocker Microsoft Windows PowerShell WDS Windows 10 Windows 11 Windows Server 2016

Copyright © 2025 TechDirectArchive


Loading Comments...
 

You must be logged in to post a comment.