In this article, you will learn how to Improve Website Response Using Traffic Manager. The Traffic Manager can be used to create a highly responsive website by directing user traffic to the website with the lowest latency. Please see How to create a Windows firewall rule on Windows, how to Transfer User Profile to another User in Windows, and how to automate infrastructure deployments in the cloud with ansible and azure pipelines.
Generally, the data centre with the minimum latency is the one that is closest to the geographic distance. It is also a service that allows you to control the distribution of user traffic to your service endpoints which run in different data centres around the world.
It provides three traffic routing options. I’ll be creating a Traffic Manager profile that delivers high availability for our web application.
Also here are some of my related guides: How to manage Azure resource manager resource groups by using Azure CLI, how to configure azure resources with tools, how to install and configure Ansible on Ubuntu, and how to install Ansible on Windows with Cygwin. In this article, you learn how to:
- Create two virtual network
- Create 2 VMs running a basic website on (IIS)
- Configure DNS name for the VMs (running IIS)
- Create two tests VMs to view Traffic Manager in action
- Create a “Traffic Manager profile” for improved website performance
- Add VM (Instance) endpoints to the Traffic Manager profile
- View Traffic Manager in action
Prerequisites to Setting up Traffic Manager to Improve Network Traffic
In the interest of seeing the Traffic Manager in action, this article requires that you deploy the following:
- 2 instances (VMs) of basic websites running in different Azure regions – (East US and West Europe).
- 2 test VMs for testing the Traffic Manager – 1st VM in West Europe and the 2nd VM in East US. The test VM (Instance) is used to represent how Traffic Manager Routes user traffic to the website that is running in the same region as it provides the lowest latency.
Please see how to install Kerberos packages in Windows via Cygwin, how to configure a remote server (windows) to Support Ansible, and how to deploy Azure VMware solution private cloud, how to create a Traffic Manager profile in Azure, and how to improve website response using Traffic Manager
Create a virtual network (1)
Go to the Azure Portal. In the search bar, type and then select virtual networks. In the virtual network, click the Create button then create a virtual network. Type the following below
- Create virtual network window.
- Choose your subscription.
- Create a new Resource Group name (rg-eastus).

Instant details
- Name (vnet-eastus).
- Region (East Us). 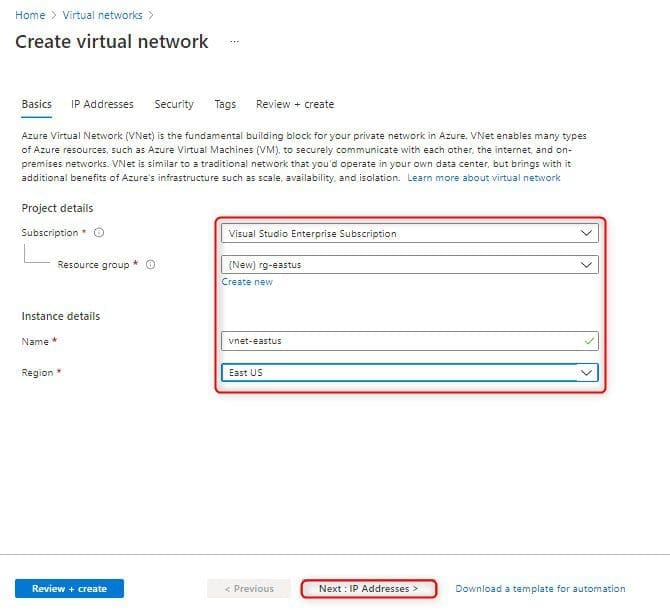
Click on Next: IP Addresses >
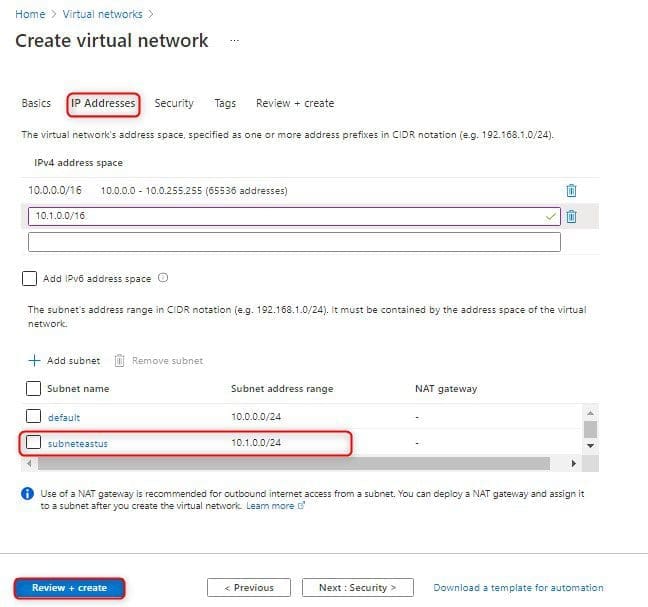
– Choose an address space IPv4 address space, I am selecting 10.1.0.0/16, but if you prefer to use a different address please feel free.
– Click + Add subnet and do the following below:
In the Add subnet dialog box
– Type a subnet name subneteastus and then
– Type 10.1.0.0/24 for Subnet address range.
To create service endpoint policy to allow traffic then select a service under services.
– Click add
– Next Click : Review + Create
Create a virtual network (2)
Go to the Azure Portal. In the search bar, type and then select virtual networks. In the virtual network, click the Create button then create a virtual network. Type the following below
- Create virtual network window.
- Choose your subscription.
- Create a new Resource Group name (rg-westus).

Instant details
- Name (vnet-westus).
- Region (West Us). 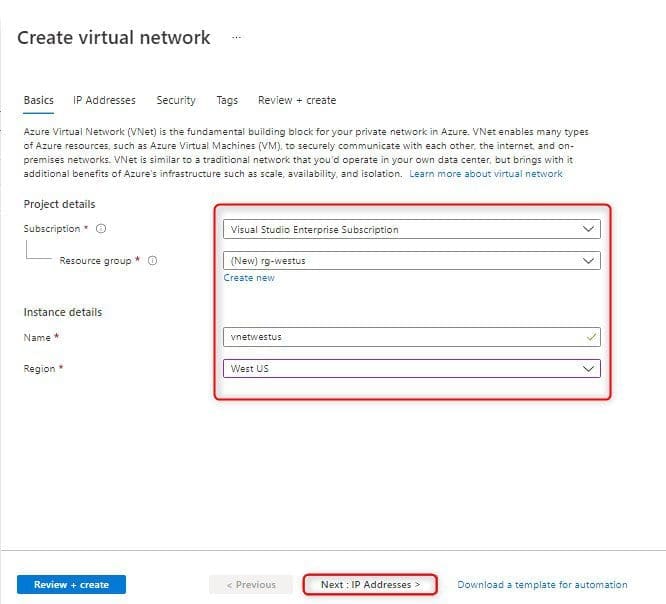
Click on Next: IP Addresses >
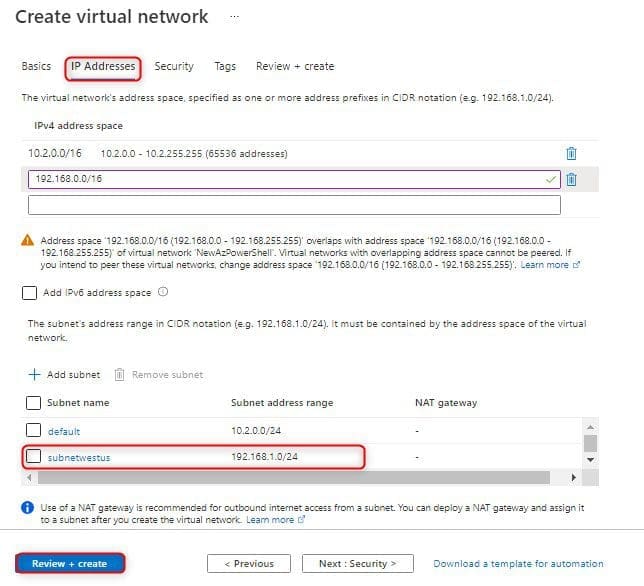
– Choose an address space IPv4 address space, I am selecting 192.168.0.0/16, but if you prefer to use a different address please feel free.
– Click + Add subnet and do the following below:
In the Add subnet dialog box
– Type a subnet name subnetwestus and then
– Type 192.168.1.0/24 for Subnet address range.
To create service endpoint policy to allow traffic then select a service under services.
– Click add
– Next Click : Review + Create
Virtual Network Overview.
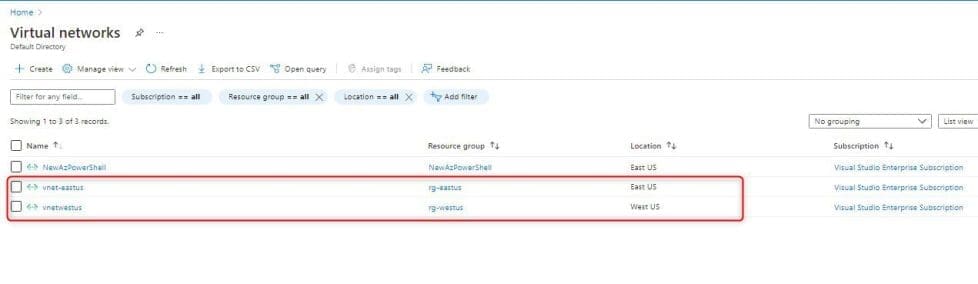
Create Virtual Machines (1)
Now that we have 2 different location in our Vnet, we need to create VM in each virtual network so that we can communicate between them.
- Go to the Azure Portal menu tab
- Select Virtual machines, and click the + Create button
- Type the following below
Resource group select existing (rg-eastus)

Instance details
- Enter a virtual machine name (eastus-servervm)
- Region select (East US)
- Image selects Windows Server 2019 Datacenter. You can select a different operating system, but the remaining steps presume you selected Windows Server 2019 Datacenter.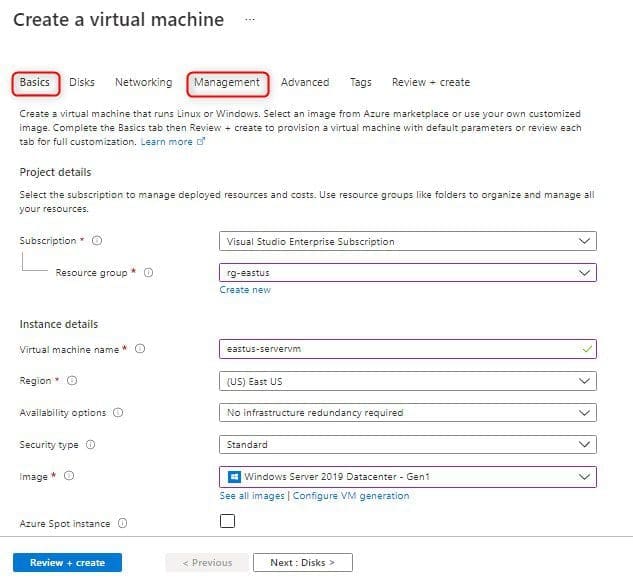
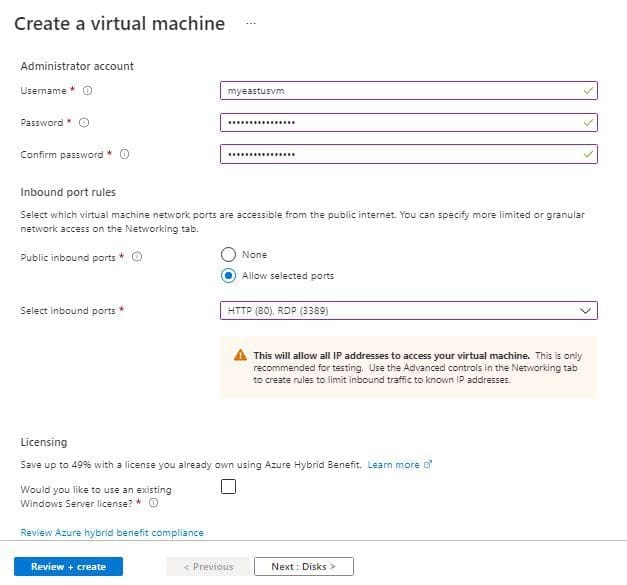
Administrator account.
– Enter a username (myeastusvm), Password.
– Public inbound ports choose allow selected ports.
– Select inbound ports (HTTP, RDP) and then click Next : create >
Under Management tab
– Monitoring boot diagnostics select (off or uncheck or disable)
– Then click Review + create
Create Virtual Machines (2)
Now that we have 2 different location in our Vnet, we need to create VM in each virtual network so that we can communicate between them.
- Go to the Azure Portal menu tab
- Select Virtual machines, and click the + Create button
- Type the following below
Resource group select existing (rg-westus)

Instance details
- Enter a virtual machine name (westus-servervm)
- Region select (West US)
- Image selects Windows Server 2019 Datacenter. You can select a different operating system, but the remaining steps presume you selected Windows Server 2019 Datacenter.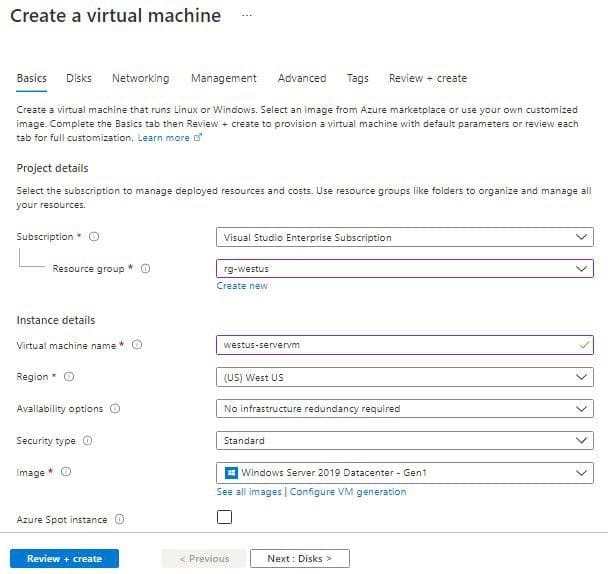
Administrator account.
- Enter a username (mywestusvm), Password.
- Public inbound ports choose allow selected ports.
- Select inbound ports (HTTP, RDP) and then click Next : create >

Under Management tab
- Monitoring boot diagnostics select (off or uncheck or disable)
- Then click Review + create 
VM Deployment Successful completed
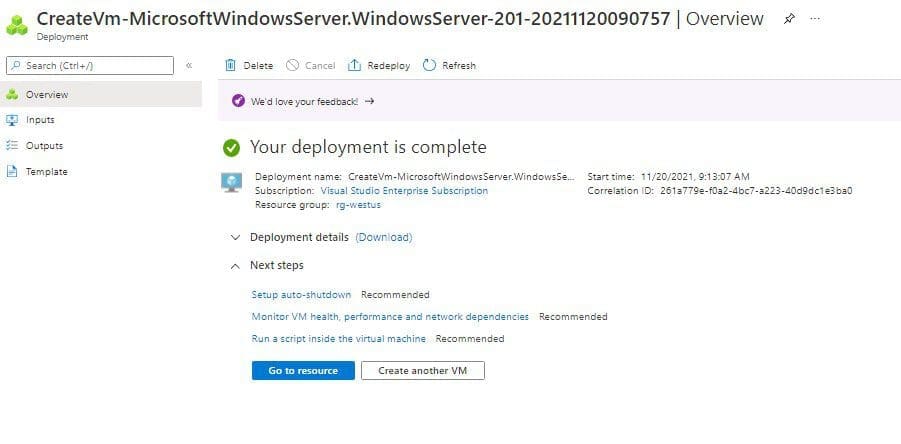
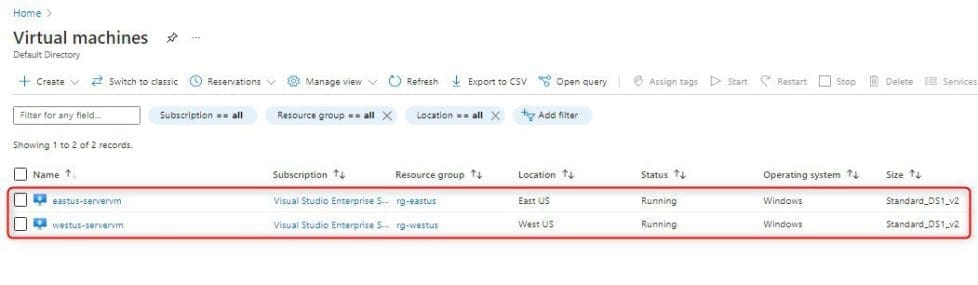
VMs (web1, web2) successfully created
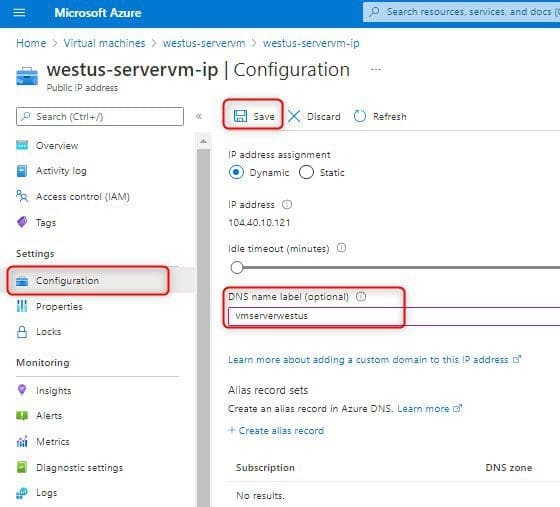
Configure DNS names for the VMs running IIS
I’ll be configuring the DNS names for the IIS servers – for both eastus-servervm and westus-servervm.
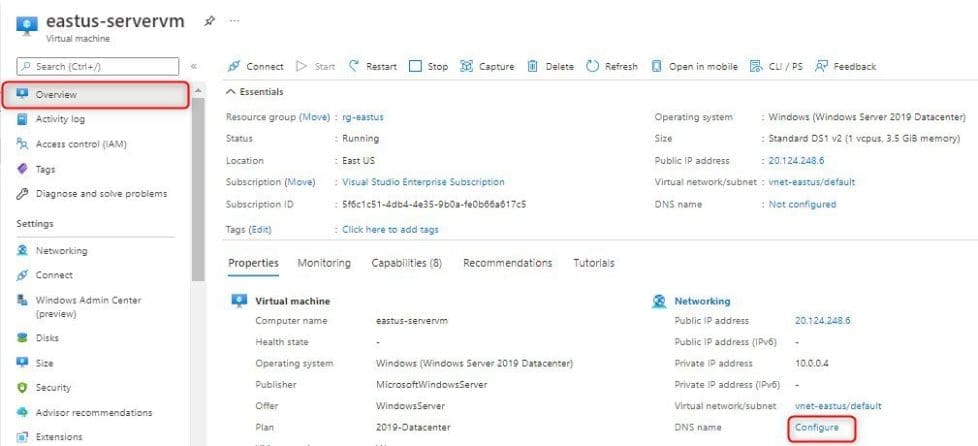
- Select eastus-servervm from the VM
- Overview page, under DNS name, select Configure
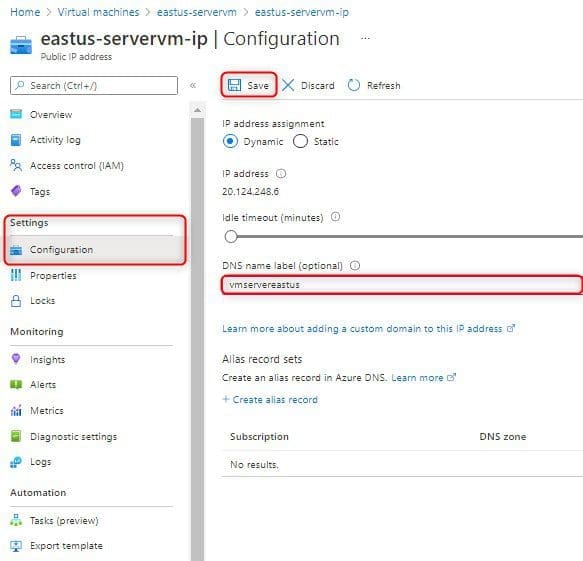
- Under Settings select Configuration, under DNS name label (optional), enter a unique name (vmservereastus), and then select Save.
Select westus-servervm from the VM. Overview page, under DNS name, select Configure
Under Settings select Configuration, under DNS name label (optional), enter a unique name (vmserverwestus), and then select Save.
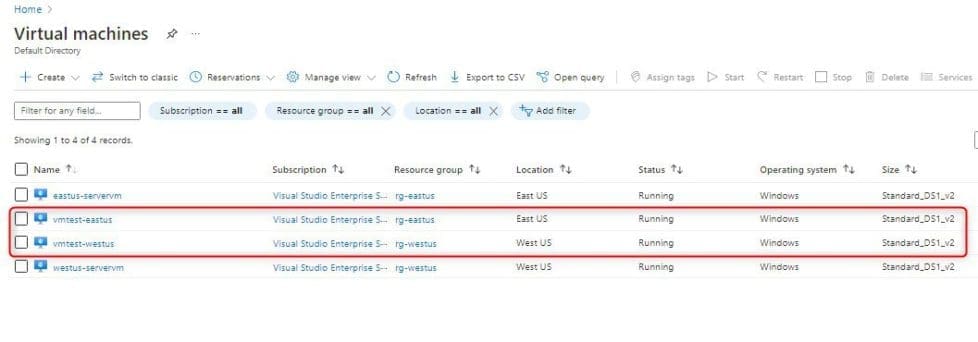
Create Test VMs
We’ll be creating a VM (vmtest-eastus and vmtest-westus) in each Azure region (East US and West US). And we’ll use these VMs to test how Traffic Manager routes traffic to the nearest IIS server when we browse to the website.
- Go to the Azure Portal menu tab
- Select Virtual machines, and click the + Create button
- Type the following below
The Basics Tab
Select your subscription
Resource Group – Select existing rg-eastus.

Instance details
- Enter a virtual machine name (vmtest-eastus)
- Region select (East US)
- Image – Windows Server 2019 Datacenter.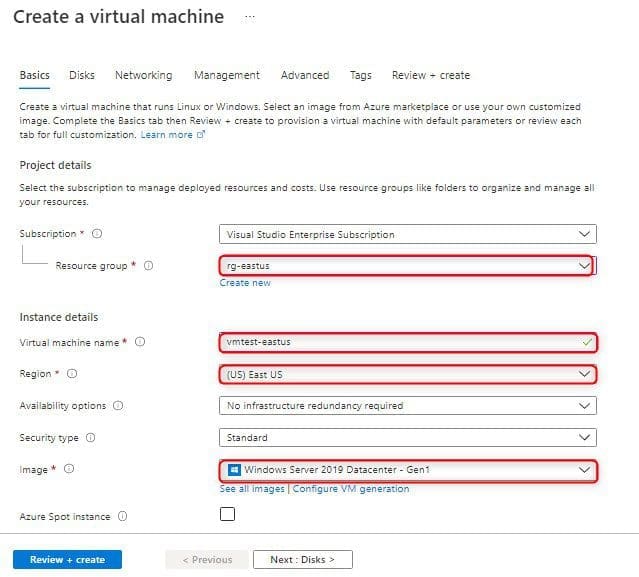
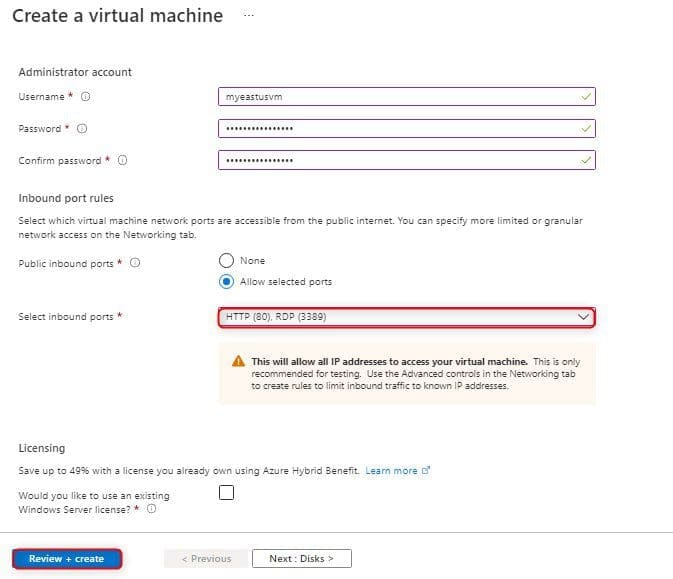
Administrator account.
– Enter a username (myeastusvm),
– Enter a Password.
– Public inbound ports – Choose Allow selected ports.
– Select inbound ports – Choose HTTP, RDP in the pull down box.
– Review the settings, and then click Create
Follow the Steps Below to Create a 2nd VM
Go to the Azure Portal menu tab. Select Virtual machines, and click the + Create button, then type the following below
The Basics Tab
Select your subscription
Resource Group – Select existing rg-westus.

Instance details
- Enter a virtual machine name (vmtest-westus)
- Region select (East US)
- Image – Windows Server 2019 Datacenter.

Administrator account.
- Enter a username (mywestusvm),
- Enter a Password.
- Public inbound ports – Choose Allow selected ports.
- Select inbound ports – Choose HTTP, RDP in the pull down box.
- Review the settings, and then click Create
The VMs take a few minutes to create. Please do not continue with the remaining steps until all VMs are created and completed
Create a Traffic Manager profile
We’ll be creating a Traffic Manager profile that instructs user traffic by sending them to the endpoint with the lowest latency.
- Go to the Azure Portal, type traffic manager profile in the Azure search bar
- Click on Traffic Manager Profiles
- Type the following below:
Create Traffic Manager Profiles wizard

- Type a name – trafficmanager
- Routing Method – select Performance
- Select Subscriptions
- Resource group – select rg-eastus
- Select Create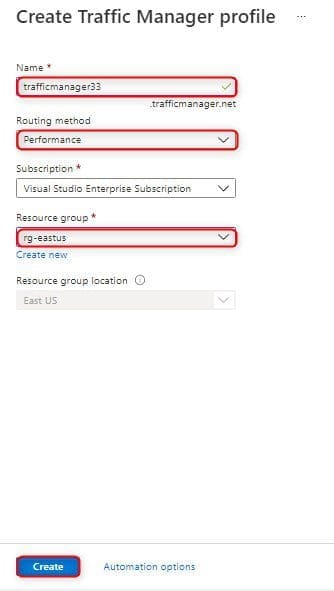
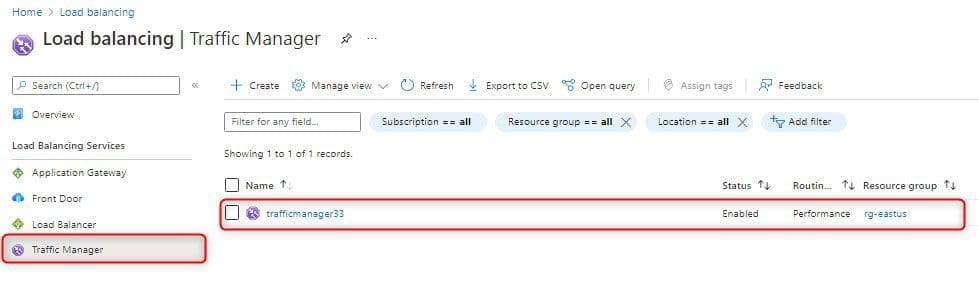
Overview of Traffic Manager profiles.
Add Traffic Manager Endpoints
Add the two VMs running the IIS servers – server-eastus & server-eastus to route user traffic to the closest endpoint to the user.
- Go to the Azure Portal, type traffic manager profile in Azure search bar
- Click on Traffic Manager Profiles
- In Traffic Manager profile, click on trafficmanager33
- Under settings select Endpoints, and then click + Add.
- Type the following below:
Azure endpoint

- Name – eastusendpoint
- Target Resource type – Public IP address
- Public IP address – server-eastus-ip
- Click Add
Select + add button again to create second endpoint. Type the below details
Azure endpoint

- Name – westusendpoint
- Target Resource type – Public IP address
- Public IP address – server-westus-ip
- Click Add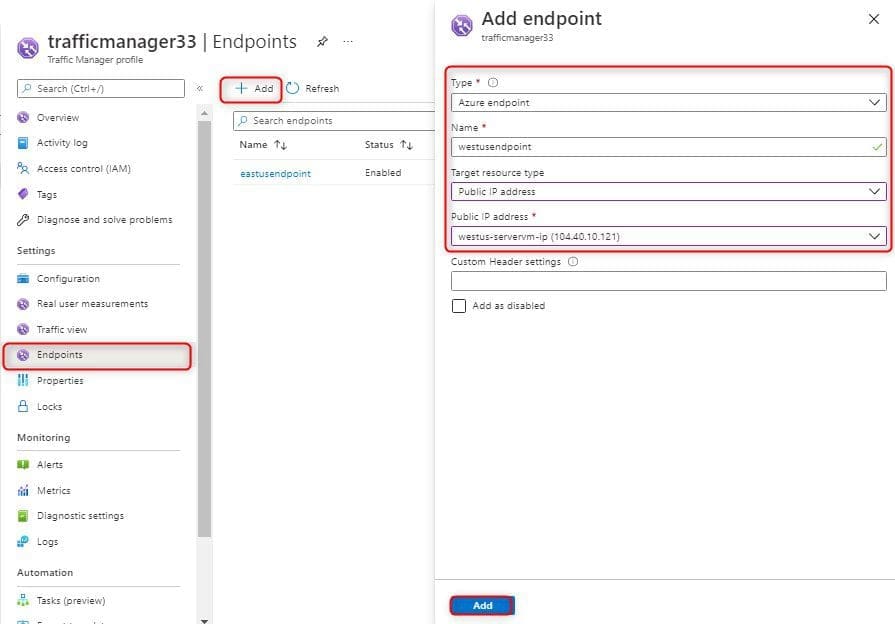
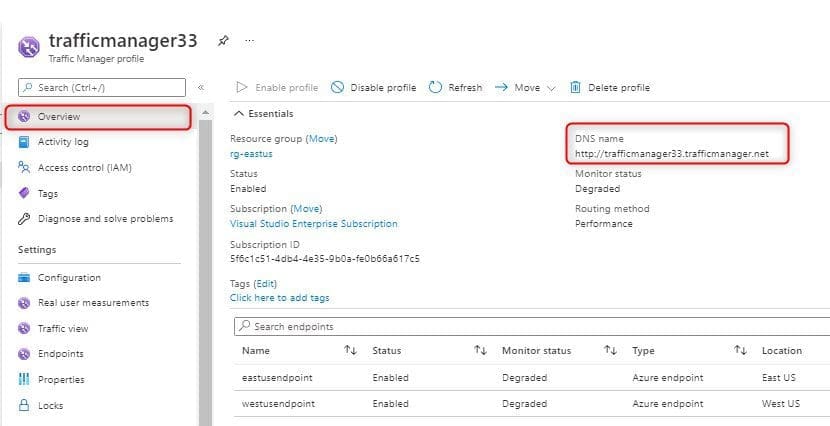
After the addition of both endpoints completed, they will displayed in Traffic Manager Profile together with their monitoring status as Online.
Test Traffic Manager Profile
We’ll determine the DNS name of Traffic Manager Profile, we’ll use the DNS name of the Traffic Manager profile to visit the websites.
- Go to the Azure Portal, type traffic manager profile in Azure search bar
- Click on Traffic Manager Profiles
- In Traffic Manager profile, click on trafficmanager33
- Copy DNS name
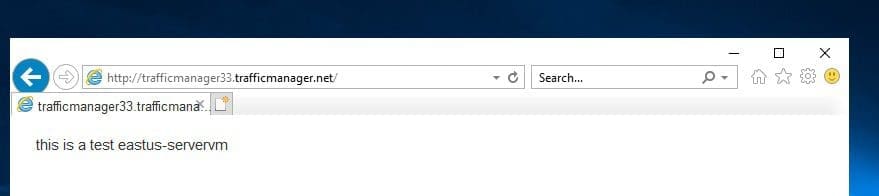
Improve Website Response using Traffic Manager
Go to the virtual machines and then click vmtest-eastus. Connect virtual machine (eastus-servervm), using RDP. Connect using RDP virtual machine (eastus-servervm).
Open web browser on the VM (instance) vmtest-eastus, enter the DNS name of the Traffic Manager profile to view the website. Since the VM located in East US, you are routed to the nearest website hosted on the nearest IIS server eastus-servervm that is located in East US.
Repeat the same steps to connect the virtual machine (weatus-servervm), using RDP
Open web browser on the VM vmtest-westus, type the DNS name of your Traffic Manager profile to view your website. Since the VM located in West US, you will be routed to the nearest website hosted on the nearest IIS server westus-servervm that is located in West US.The above articles show how to improve website response using a traffic manager. I hope you found this guide on How to Improve Website Response Using a Traffic Manager useful. Please let me know in the comment section if you have any questions.