Skip to content

TechDirectArchive

Hands-on IT, Cloud, Security, Veeam & DevOps

  • Home
  • About
  • Advertise With US
  • Contact
  • Reviews
  • Toggle search form

Add additional CC400W Cameras to Synology Surveillance Station

Posted on 07/10/202507/10/2025 IT Expert By IT Expert No Comments on Add additional CC400W Cameras to Synology Surveillance Station
  1. Home
  2. Backup
  3. Add additional CC400W Cameras to Synology Surveillance Station
Add camaeras

In a world where smart surveillance is no longer a luxury but an expectation. The Synology CC400W steps up as a WiFi-enabled, AI-powered camera that aims to offer high resolution, flexible mounting, and intelligent detection without the mess of running cables. Therefor3, in this guide, we shall discuss how to Add additional CC400W Cameras to Synology Surveillance Station. Please, see the Review of the Synology CC400W Installation and Configuration, and A Review of Stellar Repair for Outlook.

The key features of the Synology CC400W include 4 MP QHD resolution, a 125° wide-angle lens, dual-band Wi-Fi connectivity, infrared night vision up to 10 m, and AI-powered functions such as person and vehicle detection, intrusion alerts, and auto-tracking. Its privacy and security features include HTTPS and SRTP encryption, signed firmware, IP and block-list filtering. This includes a configurable privacy masks to protect sensitive areas from being recorded.

Lastly, before we jump into how to add CC400W cameras to your surveillance station. We will discuss a little on the limitations below.

Synology CC400W include the need for a Synology DVA system to enable advanced analytics like facial or license plate recognition, potential dependence on Wi-Fi stability for consistent streaming, and limited local storage capacity of up to 256 GB on microSD cards (to avoid uninterrupted recording in an unstable or poor network conditions).

Edge recording on the Synology CC400W provides the opportunity to store video footage directly onto its internal storage (microSD card), even when the network or NAS connection is temporarily unavailable.

Also, see How to disable Camera Access in Windows, and how to Fix we could not find a camera compatible with Windows Hello Face.

Add cameras to Synology Surveillance Station

When the cameras are mounted and connected to power. Synology Surveillance Station will automatically detect them thanks to the seamless native integration. Thereby, allowing you to start live viewing and recording without any complex setup

Open Surveillance Station from the main menu. Launch the IP Camera application. Surveillance Station will automatically detect Synology cameras like the CC400W on the network. Click on Add Now.

Add new synology
Make sure the camera and Synology NAS are on the same local network

On the IP Camera wizard, let us initialize the Cameras once after the other. I will select the first and click on Initialize.
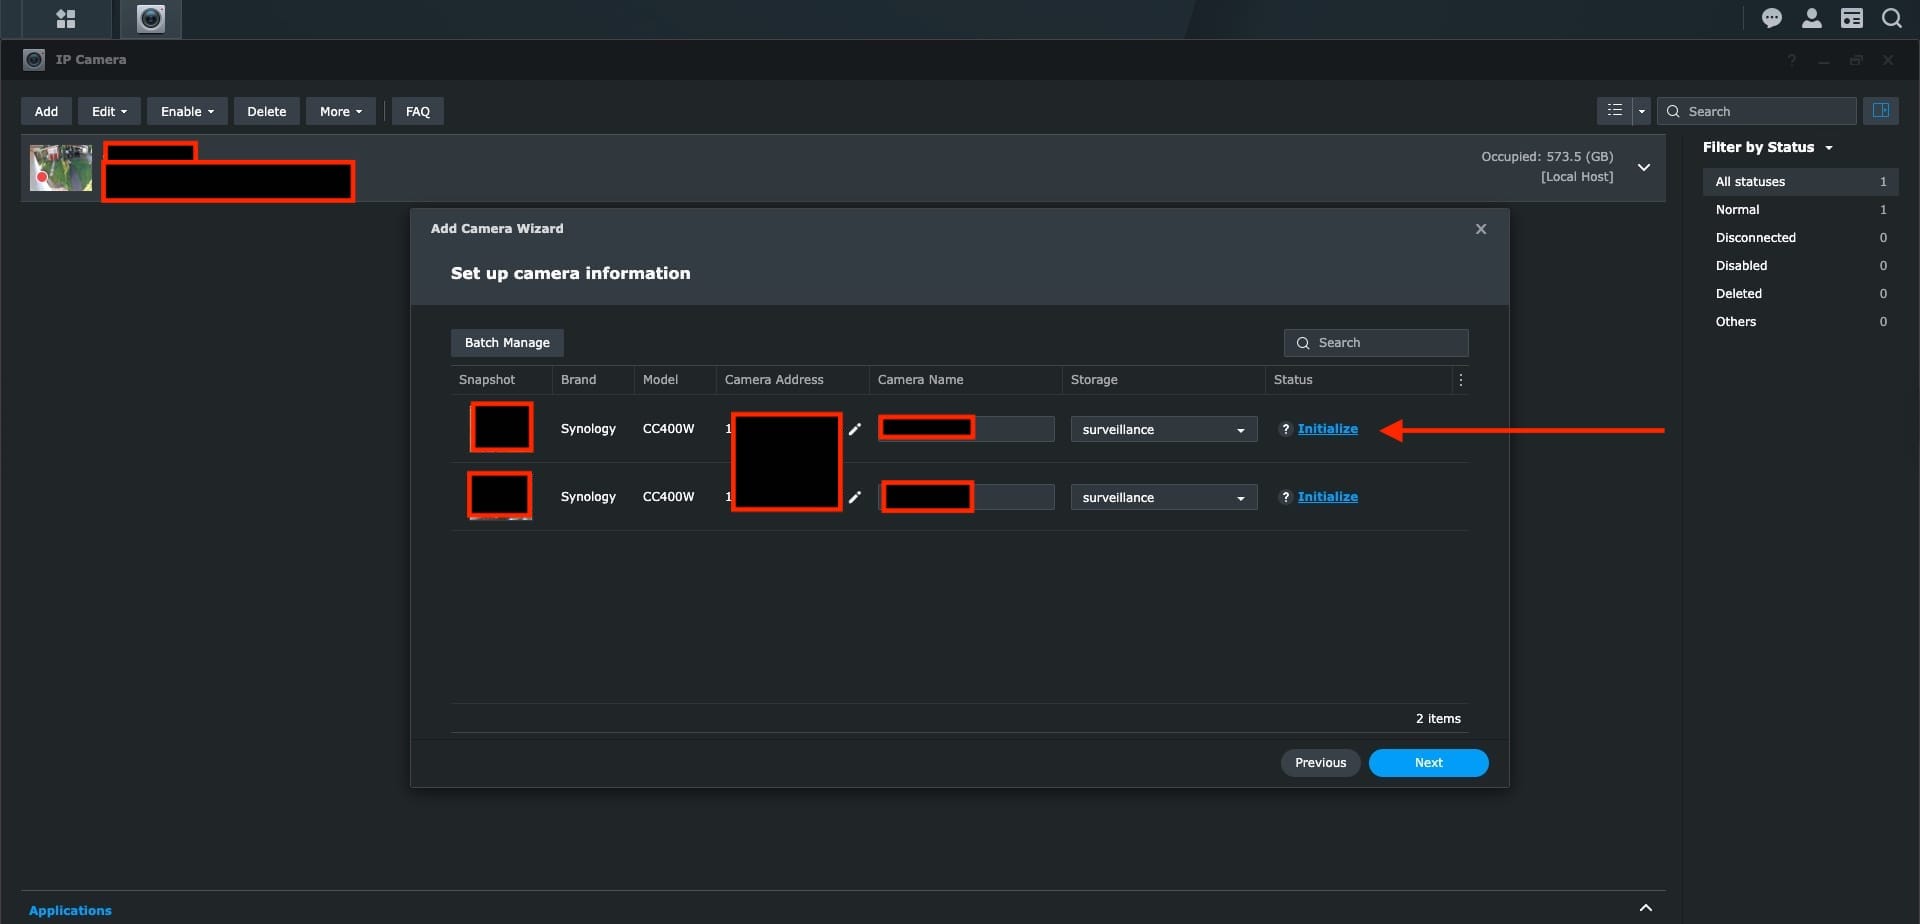
initialize camera

As you can see, the first camera initialized correctly. Let us do the same for the second.
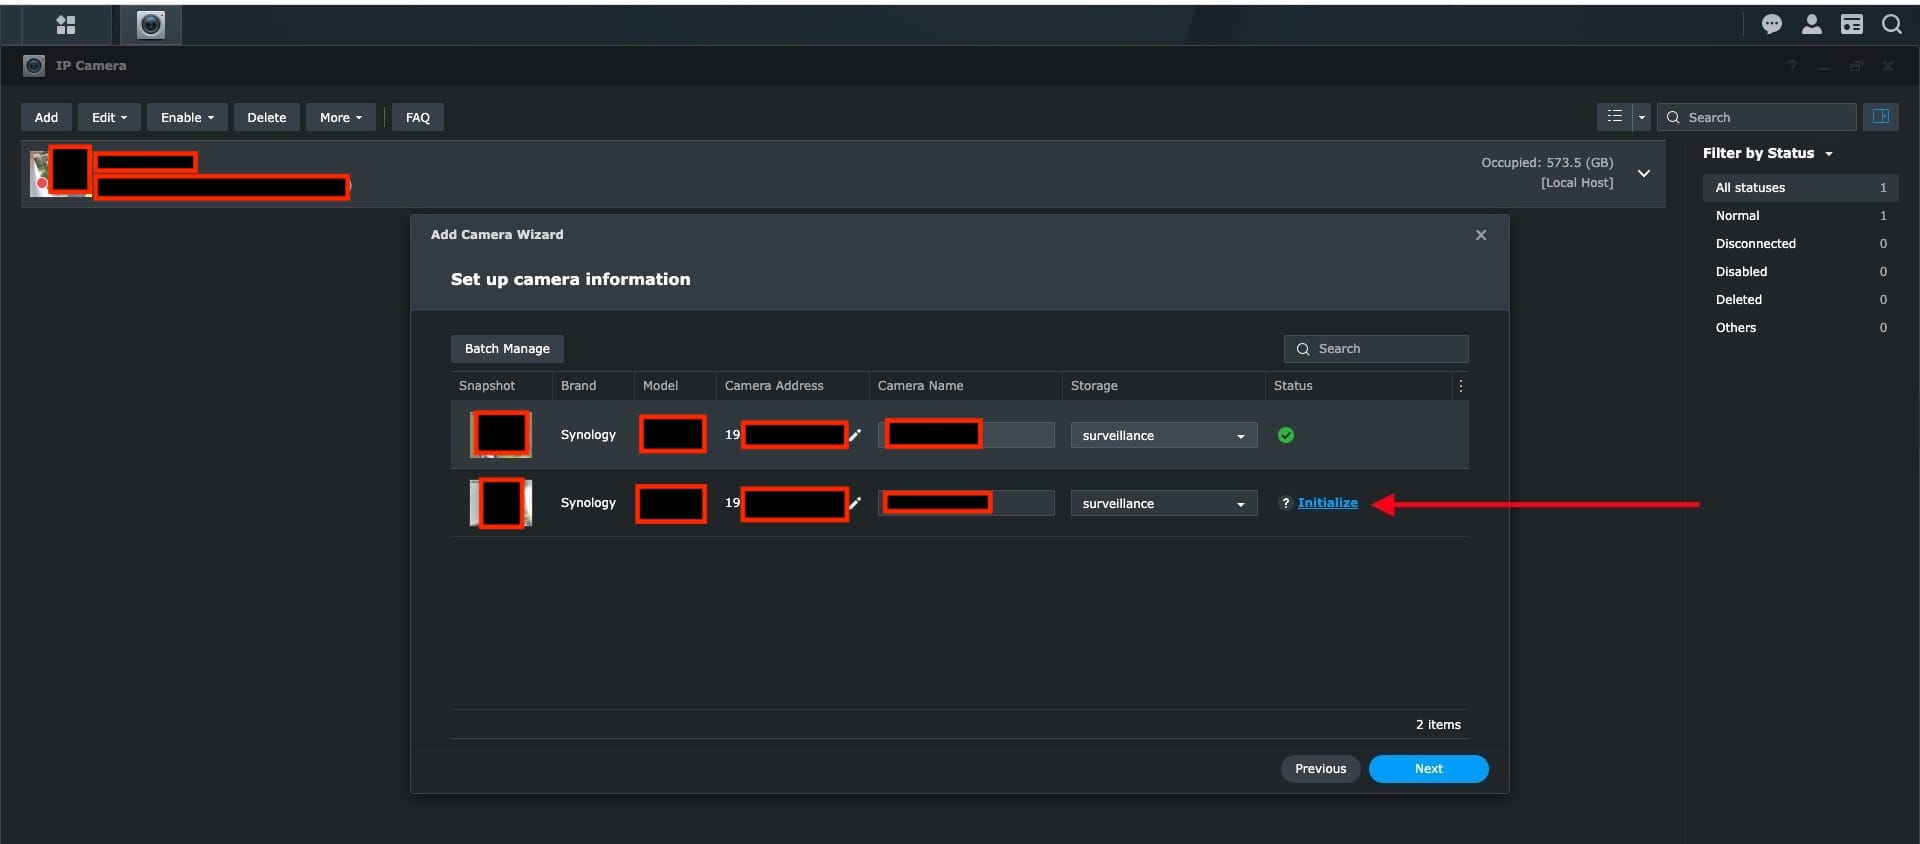
initialize second camera

Both completed successfully. Proceed by clicking on Next.
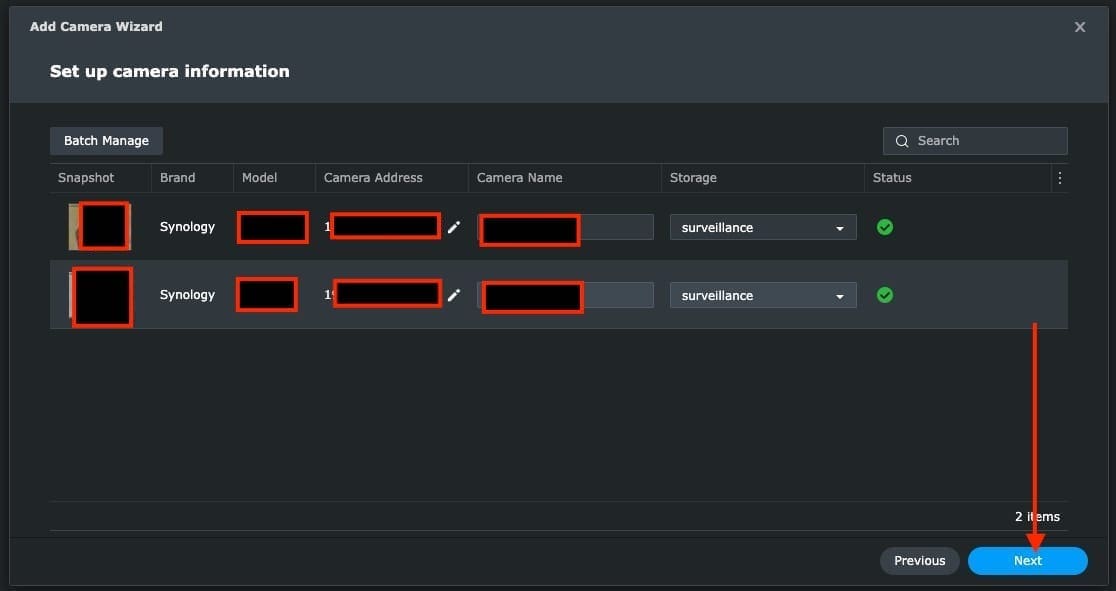
Add camera

Please, see Windows 11 Hardware and Software Requirements: Upgrade to Windows 11, and how to fix Windows Can’t find the path: Please check the spelling and try again.

Apply Settings (Configuration)

Since I already have some cameras setup previously, I will select coy settings and click on next. Else, you can choose any of the settings for quick setup or complete setup as you wish.

copy settings from old camera

On the summary page. Click on done as the settings will be copied.

Add amera summary

Shortly, the cameras will attempt activating as shown below

Activating and updating

You can see the status of both cameras as disconnected.

Note: After setup, when the disconnected status is prompted. This is because the camera is disconnected from the Power source. Ensure it is plugged in correctly. Another thing to look at for is to ensure the firmware are correctly updated.

updating

Since we have copied the settings over, we do not have to manually download and apply the firmware updates. This will be done automatically.

Note: During a new setup of CC400W camara, if the firmware updates are not correctly applied. the CC400W cameara will not be useable and will appear to be in a disconnected state.

It will be updated for sure

As you can see below, the updates completed successfully. All cameras are in the Normal status as shown below.

Cameras recording

I will recommend auto update of frimware. Keeping your Surveillance Station up to date ensures your video management system (VMS) always runs the latest version with the newest features, security enhancements, and bug fixes, reducing the risk of software vulnerabilities and compatibility issue. This ensures you maintain system reliability and minimise manual maintenance.

Please, see how to Update Veeam Backup for Proxmox Plugin to support PVE 9.0, and Logon Failure: User has not been granted the requested logon type. Also, see how to update Proxmox VE 9.0 now Supported by Veeam.

Modify Synology CC400W Settings

Depending on how you mounted the camera, you might have to manually rotate the view as shown below. Other settings can be performed this way.

save oriantation

I hope you found this article very useful on how to add additional CC400W Cameras to Synology Surveillance Station. Feel free to leave a comment below.
5/5 - (1 vote)

Thank you for reading this post. Kindly share it with others.

  • Share on X (Opens in new window) X
  • Share on Reddit (Opens in new window) Reddit
  • Share on LinkedIn (Opens in new window) LinkedIn
  • Share on Facebook (Opens in new window) Facebook
  • Share on Pinterest (Opens in new window) Pinterest
  • Share on Tumblr (Opens in new window) Tumblr
  • Share on Telegram (Opens in new window) Telegram
  • Share on WhatsApp (Opens in new window) WhatsApp
  • Share on Mastodon (Opens in new window) Mastodon
  • Share on Bluesky (Opens in new window) Bluesky
  • Share on Threads (Opens in new window) Threads
  • Share on Nextdoor (Opens in new window) Nextdoor
Backup, Network | Monitoring Tags:Add Additional CC400W Cameras, add Synology CC400W camera, CC400W, how to link CC400W cameras Synology, install CC400W on Synology NAS, setup new CC400W on Surveillance Station, Synology

Post navigation

Previous Post: Update Veeam Backup for Proxmox Plugin to support PVE 9.0
Next Post: How to set up and configure the Key Management System (KMS)

Related Posts

  • Windows 11
    How to Change the Lock Screen Wallpaper in Windows 11 Network | Monitoring
  • Step to migrate from microsft SQl to PostgreSQL
    Migrate Veeam Configuration Database to PostgreSQL Server Backup
  • Azure backup for MSSQL
    Restore MSSQL Server on Azure VMs using Azure Backup Network | Monitoring
  • maxresdefault 2 3
    How to configure WatchGuard WebCenter Network | Monitoring
  • cisco switches
    Delete the configuration of a Cisco router: How to wipe configuration off an interface on a Cisco router Network | Monitoring
  • pst
    Outlook Data File: Fix PST Error – Exceeded Maximum Large Items Network | Monitoring

More Related Articles

Windows 11 How to Change the Lock Screen Wallpaper in Windows 11 Network | Monitoring
Step to migrate from microsft SQl to PostgreSQL Migrate Veeam Configuration Database to PostgreSQL Server Backup
Azure backup for MSSQL Restore MSSQL Server on Azure VMs using Azure Backup Network | Monitoring
maxresdefault 2 3 How to configure WatchGuard WebCenter Network | Monitoring
cisco switches Delete the configuration of a Cisco router: How to wipe configuration off an interface on a Cisco router Network | Monitoring
pst Outlook Data File: Fix PST Error – Exceeded Maximum Large Items Network | Monitoring

Leave a Reply Cancel reply

You must be logged in to post a comment.

Microsoft MVP

VEEAMLEGEND

vexpert-badge-stars-5

Virtual Background

GoogleNews

Categories

veeaam100

Veeam Vanguard

  • Featured image
    How to Disable or Uninstall OneDrive on Windows 10 and 11 Backup
  • tux through window 620x354 1
    WSL Error 0x8007019e: WSL Register Distribution failed with error Windows
  • Synergy software kvm
    Why Software KVMs such as Synergy is replacing Hardware KVMs Linux
  • Private and Public networks in Windows to VPN
    The differences between Private and Public networks in Windows to VPN? Network | Monitoring
  • screenshot 2020 02 07 at 20.59.01
    How to use the PsInfo utility from SysInternals Windows Server
  • featuredimage
    Create App Service Resource with Azure CLI AWS/Azure/OpenShift
  • 1 kajkbmlyehn0inifwrh 8w
    How to install Kerberos packages via Cygwin in Windows Windows Server
  • SSH Keys Generation
    How to Generate SSH keys in Windows 11 Windows

Subscribe to Blog via Email

Enter your email address to subscribe to this blog and receive notifications of new posts by email.

Join 1,801 other subscribers
  • RSS - Posts
  • RSS - Comments
  • About
  • Authors
  • Write for us
  • Advertise with us
  • General Terms and Conditions
  • Privacy policy
  • Feedly
  • Telegram
  • Youtube
  • Facebook
  • Instagram
  • LinkedIn
  • Tumblr
  • Pinterest
  • Twitter
  • mastodon

Tags

AWS Azure Bitlocker Microsoft Windows PowerShell WDS Windows 10 Windows 11 Windows Deployment Services Windows Server 2016

Copyright © 2025 TechDirectArchive

Loading Comments...

You must be logged in to post a comment.