How to setup Veeam Software Appliance v13

Veeam Software Appliance (VSA) v13 represents a significant advancement in data protection. VSA v13 offering a streamlined, secure, and efficient solution for modern IT environments. Therefore, this guide will discuss how to setup Veeam Software Appliance v13. Please, see How to Configure Object First OOTBI Appliance, “Object First OOTBI Appliance Unboxing and Quick Setup“, and How to set up the OOTBI Virtual Appliance on Proxmox VE.
Table of contents
Features of Veeam Software Appliance
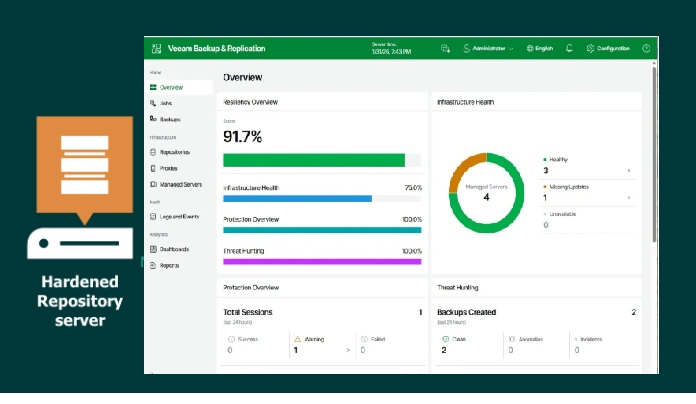
Below are some reasons to choose Veeam Software Appliance in the image below. Let’s take a look at what makes v13 a game-changer:

Hardened Security from the Start: Built with security at its core, v13 incorporates a minimalistic Linux-based operating system. Thereby, reducing the attack surface and enhancing system integrity. Features like SELinux in strict mode and disabled SSH by default. This ensure that your backup infrastructure is secure from day one
Simplified Deployment and Management: Deploying the Veeam Software Appliance v13 is straightforward. Whether you’re using the ISO for bare-metal installations or the OVA for virtualized environments. Post-deployment, management is made easy through a web-based user interface, allowing administrators to monitor and configure the appliance with ease.
Optimized for Performance: Designed to handle the demands of modern workloads, v13 delivers improved performance and scalability. Whether you’re backing up virtual machines, physical servers, or cloud environments. The appliance is engineered to provide efficient and reliable data protection.
Future-Proof Architecture: With the release of v13, Veeam has laid the foundation for future innovations in data protection. The appliance’s architecture is built to support upcoming features and integrations. This ensures that your investment remains relevant as your IT landscape evolves
Simple Deployment
Veeam does not recommend you to install Veeam Backup & Replication directly on a Hyper-V host. Such installation may lead to unpredictable system behavior. Instead, install Veeam Backup & Replication and its components on dedicated machines. Backup infrastructure component roles can be co-installed.
Veeam Backup & Replication v13 supports three primary deployment models which are Simple Deployment, Advanced Deployment, and Distributed Deployment. Each model is tailored for different scales and complexities of infrastructure:
- Simple Deployment is ideal for smaller environments with a single server handling all roles.
- Advanced Deployment suits moderate-sized enterprises that separate proxy, repository and database roles; and
- Distributed Deployment fits large or global organizations with multiple backup servers, remote sites and high-availability or disaster-recovery configurations

I will be going for a “Simple Deployment model”. Here, all core components such as the backup server, repository, proxy and optionally the configuration database are installed on a single machine. If you are using Hyper-V or vSphere, you may need to visit the HelpCenter to learn more.
This streamlines setup and reduces administration overhead. You install the backup server first, add or provision a repository on the same host (or locally attached), and configure basic backup jobs and restore tests. This approach is well-suited for small to medium environments, labs or Proof-of-Concepts, because the single-node architecture minimizes complexity and cost.
Please, see Resolve the Update Package Database failure on Proxmox VE, and “Install Proxmox VE on a Beelink EQ12 Mini PC“
Download Veeam Virtual Appliance
You can download the Veeam Appliance from here. Before you install Veeam Software Appliance, review known issues and limitations described in release notes. To proceed, click on Download Trail.

You will be redirected to login

Select your download type. Shortly, the download will continue automatically.

Please, do not forget to request the license key

Please, see Deep Dive into Protecting AWS EC2, RDS Instances and VPC. Here is how to integrate ObjectFirst OOTBI Appliance with VBR.
Upload ISO Image to Proxmox
Note: If you must use a Simple Deployment, Veeam recommended that you install Veeam Backup & Replication on a VM. This will enable you to use the Virtual appliance transport mode and, as a result, LAN-free data transfer.
To create a VM on Proxmox, navigate to the URL of your Proxmox instance. Log in with your root or admin user credentials. Note: Before creating a VM, you need to upload the ISO image. In Proxmox Web UI, navigate to Datacenter, and select a storage location.
Select ISO images and click on upload. Choose the ISO file and upload it. Alternatively, you could select the storage on the fly and select ISO images and click on upload.

Select the downloaded ISO

Upload in progress

Please, see how to update Object First OOTBI Cluster, and how to delete a VM and Storage in Proxmox.
Create a VM in Proxmox for VSA v13
These steps are similar to the steps discussed here: how to deploy and integrate VHR with VBR. But since the release of Proxmox v9.0, there are slight changes to the UI.
Therefore, follow along as well. Before proceed with this step, I had created an NFS Storage for Proxmox to house its VMs and ISO etc. Please, see how to add Synology NFS Storage to Proxmox VE for VMs and Backups.
Click “Create VM” at the top-right or right click the node and select “create vm’ as shown below.

Enter VM name. The ID is automatically generated in this case and click next to proceed.

Under the OS, please specify the storage location and ISO image to use and click ne

Under Systems, UEFI is a requirement. Therefore, I will select OVMF (UEFI). Please select all options as shown below.

Plesae, see how to Fix missing path and delete a Veeam Backup Repository, how to Backup and Restore Proxmox VE virtual machines with Veeam, and Relating Due Diligence and Due Care to Veeam Backup and Replication.
Create Disks
The Veeam Software Appliance requires at least two disks. A 240 GB+ system disk for JeOS, Veeam software, database, and instant recovery cache (recommended 480 GB multi-TB SSD depending on workload size). And a second 240 GB+ disk for catalogs and backups, with any extra disks automatically merged into a single LVM volume. For “Veeam Infrastructure Appliance”, the requirements are different!
Note: If the Disk size is below 240, the VSA installation will fail.

Add another disk with same size at least as shown above

The Veeam Software Appliance requires an x86-64 processor with at least 8 cores. Though in my lab setup, I will use 4 cores.

The Veeam Software Appliance requires 16 GB of RAM plus 500 MB per concurrent job. But, in my lab I initially allocated 4 GB and later scaled it up to 9 GB.

Click on next on the Network tab as shown below and ensure the right bridge is selected etc.

Ignore the details in this image. I have resized to the specified disk size and increased the memory. I initially tried with these values because I am low on sources on this server. Click on Finish to complete the VM setup.

Please, see Troubleshooting WinRM and Kerberos Delegation for WAC, and Setup Windows Admin Center Modern Gateway for Single Sign-On.
VSA Installation
To install VSA, there are various ways to start the VM as shown below. Select the VM and click on start as you wish. You can click on console to open a new browser window.

Select Backup and Replication

Choose the first option to install – Fresh install, wipes everything (including local backup).

The system will load from the ISO as shown below

Click Yes to proceed with the installation

Shortly, you will see a customized version of Rocky Linux provided by Veeam a shown below

Installation progress! Please, pay great attention to the keyboard selection.

The below image shows that it is starting the host management service

Review and accept the terms of the EULA, Veeam licensing policy, license agreements for third party components and, third-party.

Please, see What is taking up by Synology NAS Volume Space, how to Download and update Synology DiskStation NAS to DSM 7.3, and how to Patch Veeam Backup and replication 12.3.2.3617 to 12.3.2.4165.
Initial Configuration
When prompted to enter the hostname, enter yours as desired.

I am fine with the below, click next to proceed.

For the NTP server, you can change the Time Zone

I will choose “Europe Berlin” as shown below.

Next to proceed

Please, see Configure Active Directory-Based Activation (ADBA) for Windows, and how to set up and configure the Key Management System (KMS)
Host Administrator Account Setup
At the Host Administrator step of the Initial Configuration wizard, configure the default host administrator account to perform administrator activities in the Host Management console. The username is “veeamadmin“.

Click on show QR code or type the following code into your app.

Scan the QR code with your mobile device

Enter the code from your authenticator and click on Ok.

Hit the next button to proceed

Security Officer
At the Security Officer step of the Initial Configuration wizard, configure the default security officer account to perform specific operations in the Host Management console “veeamso“.
This account type provides an additional security layer to protect your infrastructure against malicious system administration. Enter your password

Note that you cannot use the same password for both accounts.

I am not skipping but just showing you the steps to as this account is required for approval for certain operations on VSA.

Note: If you do not want to configure the security officer account, select Skip setting up Security Officer. To enable this account later, you will have to reinstall Veeam Software Appliance and complete the initial configuration.
Therefore, I will press escape as described in the image below.

On the summary page, click on Finish.

The system will apply the configuration and restart required services.

After installation and initialization complete, the appliance displays links to the Host Management web UI on port 10443 and the application web UI on port 443 on the splash screen.
Right now, the Veeam Backup & Replication is ready for use right after the installation. The only thing you must do is add virtualization servers that you plan to use as source and target for backup, replication and other activities.

Please, see how to Add additional CC400W Cameras to Synology Surveillance Station, and how to Update Veeam Backup for Proxmox Plugin to support PVE 9.0.
Veeam Host Management Access
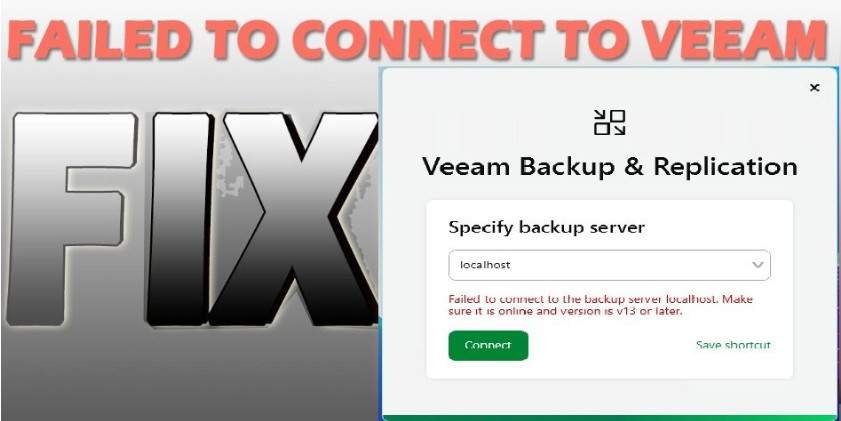
Host Management is a lightweight, highly secure Cockpit-based UI that allows administrators to perform system operations safely. Log in using the administrator account you created during setup. if you run into the following issue “unable to access”. Here is the Fix Authentication failed: Invalid credential after installing VSA.
You can now manage your appliance directly through the native host console or the Web UI. To access the Veeam Host Management via the console, click to accept the self signed certificate warning and proceed to any of the Web UI for VBR or Host Management. Then, enter your username and password

You will be prompted to enter your 2FA code as shown below.

Below are some available options to manage your VSA.

You can also use the Web UI following by the port 10443 to access the Veeam Host Management interface. Use the veeamadmin account for this.

Here is How to update Proxmox VE 9.0 now Supported by Veeam, and how to fix Logon Failure: User has not been granted the requested logon type.
Logging in to Veeam Backup & Replication Web UI
The Backup Console features a redesigned interface with enhanced login options, integrated SSO, and customizable role-based access to deliver a more efficient and secure user experience.
Click to accept the self signed certificate warning and proceed to any of the Web UI for VBR or Host Management.
Note: When a security officer first logs in to the Host Management console, they must complete the initial setup We will complete these steps in another guide.

Please, see how to Upgrade Veeam Backup and Replication v12.3.x to 12.3.2, how to upgrade Veeam Backup and Replication 12.3, and How to update Veeam Backup and Replication [VBR]. Here is Install Veeam Backup and Replication with the default PostgreSQL.
FAQs
How can I access the Host Management UI?
You can access the Host Management UI by opening a browser and navigating to https://<appliance-IP>:10443, then logging in with the administrator account created during setup.
Which account should I use to log in to the Backup Console?
Use the veeamso account to log in to the Backup Console via https://<appliance-IP>. This account manages backup and replication operations within the appliance.
Can I expand storage after deployment?
Yes, you can add new virtual disks to the appliance, and it automatically merges them into the existing Logical Volume Manager (LVM) pool for additional backup capacity
How can I switch between the Host Console and Web UI for management?
You can manage the appliance through either the native host console or the Web UI, depending on whether you prefer command-line access or a browser-based interface.
I hope you found this article on how to setup Veeam Software Appliance v13 very useful. Please, feel free to leave a comment below.