How to perform Windows Server backup with Nakivo or Windows Server backup utility

Hyper-V is a hypervisor developed by Microsoft that is used to create a virtual environment. This software helps to run and manage different operating systems on a single physical server. It does not just virtualize the operating system but the whole physical servers components like hard disk and memory. It works just like Virtualbox and VMware. A virtual Machine (VM) is an image of a physical system. It is like an actual physical system and can quickly be set up to run programs and deploy applications. This VM can come in different operating systems which can be Windows, Linux, Ubuntu etc. Kindly refer to some of these related guides: Hyper-V Server Core Mode: How to install free Hyper-V Server on a VMware Workstation, and how to delete Virtual Switches from Hyper-V. In this article, you will learn how to perform Windows Server backup with Nakivo or Windows Server backup utility.
Spinning Up Windows Server ISO Image
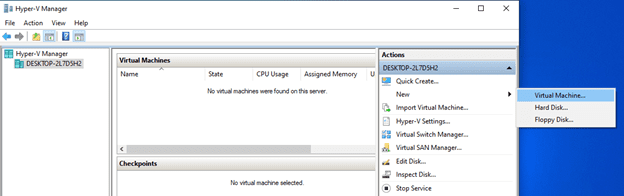
1: Open Hyper-V manager and on the Actions section click on New and select Virtual Machine. Follow through with the wizard.
Here are some guides that may also interest you. Why does the legacy PXE not does work on Generation 2 VM, how to create a HyperV checkpoint, and how to set up a VM via PXE boot on a Generation 1 VM, how to install and Configure Hyper-V on Windows Server on Windows Server 2019, and 2022 via the Server Manager, PowerShell or DISM, and how to install and configure Hyper-V Cluster On Windows Server via PowerShell and Server Manager
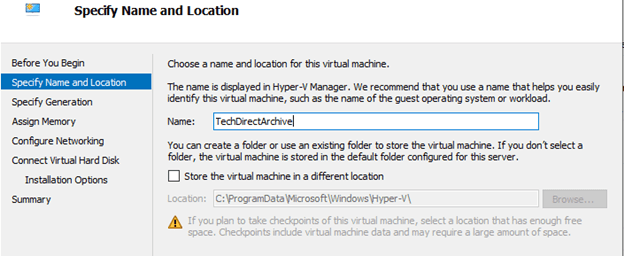
2. Specify the name of the Virtual Machine and select where you want the location of the VM whether default or changing it to your preferred location.
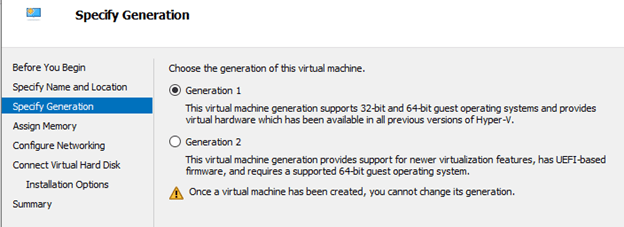
3. Specify the generation you want to configure whether Generation 1 that supports both 32-bit and 64-bit operating system and also support previous versions of Hyper-V or Generation 2 that only support 64-bit operating system and newer versions of Hyper-V.
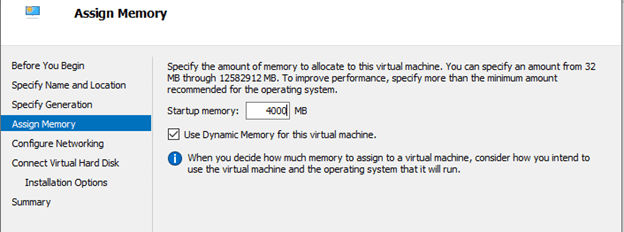
4. Specify the size of memory you want for the virtual machine. The default memory is usually 1024MB, it is recommended to have enough memory for an improved VM performance. You can either set up a static memory or dynamic memory for the VM.
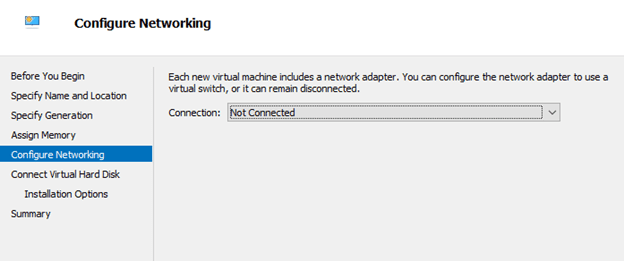
Configure the VM Network
5. You can go to the Virtual Switch Manager to create a virtual switch and you link your system network adapter to it.
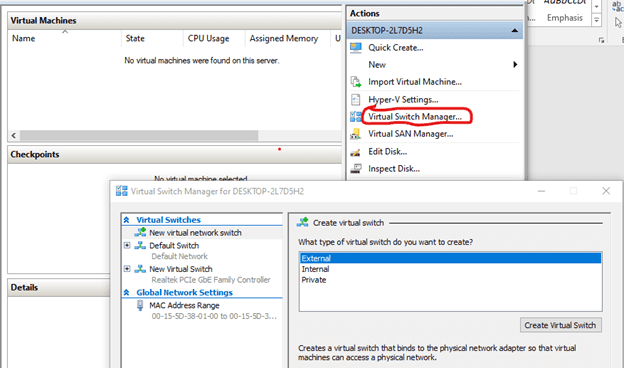
After creating the Virtual switch then you can select it from the connection drop down
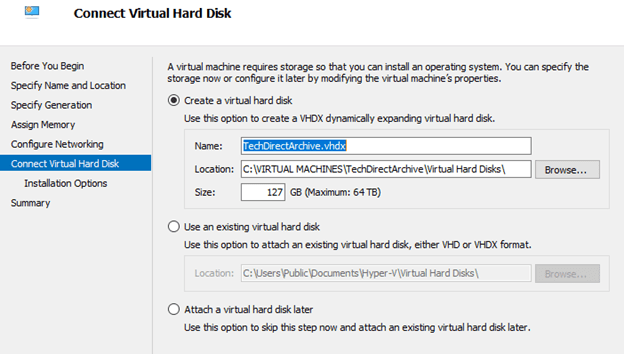
6. Connect your Virtual Hard Disk. You can either create a virtual hard disk, Use an existing virtual hard disk or Attach a virtual hard disk later.
In our case, we will be adding ISO Image at the installations option. So we will be creating a virtual hard disk first.
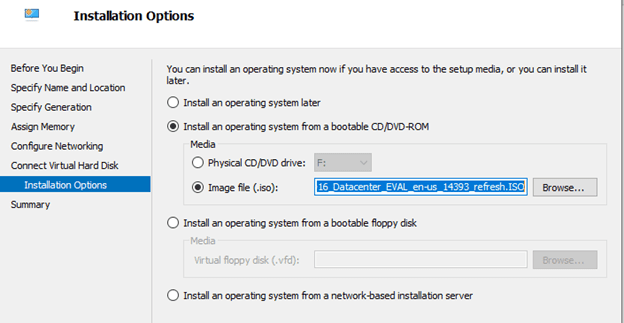
7. At the installation options select the image file (.iso) that you want to attach.
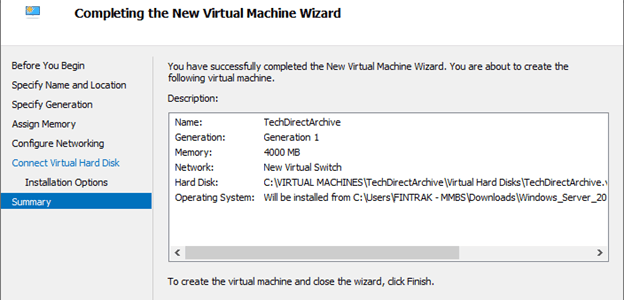
8. At the summary page you get to see the details of the VM you are configuring. Now click finish.
9. Finally, our VM has been created and it is now time to start it and install the ISO image (Windows Server 2016 Datacenter). Right-click the VM and start.

10. Follow through with the OS installation wizard.

Congratulations!!! The Windows Server 2016 Datacenter is up and running after being spun up from an ISO Image.

Perform Windows Server backup with Windows Server backup utility
Follow through now as we will be backing up Hyper-V Windows Server VM.
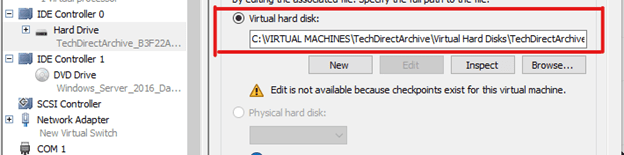
1: Now go to Hyper-V Manager and confirm where the Window Server VM files is located by right-clicking on the VM and selecting settings

2. Under Hardware click on Hard Drive and by your right you can confirm where the VM files that you want to backup is located.
Select Windows Server Backup
3. Now on the Server Manager at the top right click on Tools and select Windows Server Backup

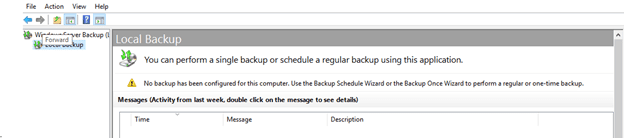
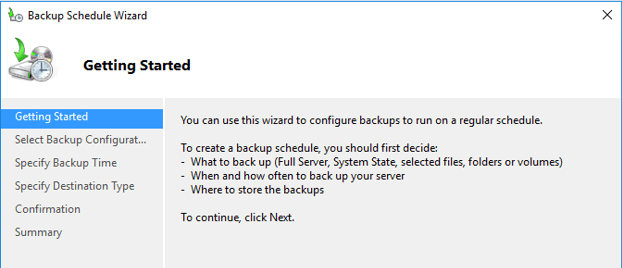
4. When you click the Windows Server Backup you will notice that no backup is already set up. You may also have noticed that Windows Server Backup is not installed on the computer and you will need to install it from Server Manager by selecting “Add roles and features” and follow through with the wizard and select Windows Server Backup features for installation. After installation, you will see the below image.
5. Click on Backup Schedule at the top right and follow the wizard.
6. Even though Full server backup is recommended but for this guide, we are selecting Custom. This will allow us to select exact things we want to backup. Remember we are doing backup for VM’s. Expand the Hyper-V box and select the VM you want to backup. You know we earlier mentioned that Hyper-V is the engine that powers virtual machines.

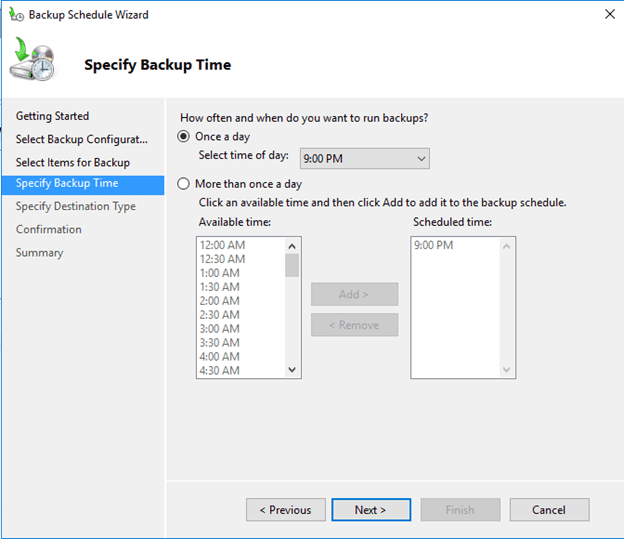
7. Specify the Backup time that is appropriate for your environment.
Specify Backup Destination
8. It is necessary you know the destination of your VM backup, in case of any disaster recovery incident. You can back up to a dedicated hard disk, to a volume or to a shared network folder. For the purpose of this guide, we will be backing up to a dedicated hard disk.
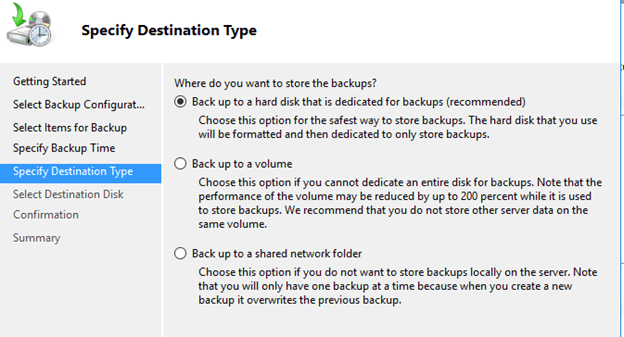
9. But note that an appropriate disk that has system files or a critical disk will not display for the backup process and also any selected disks will be reformatted and any data on it will be lost.

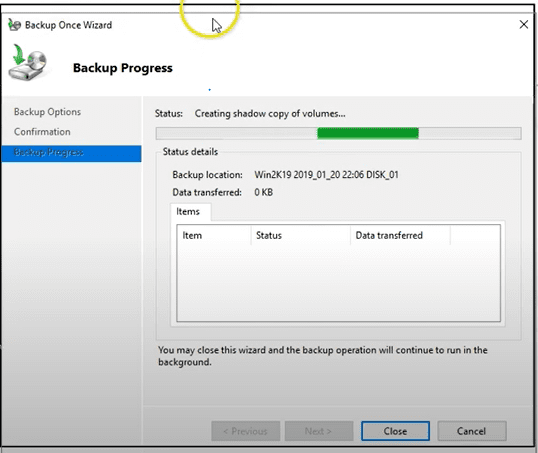
10. Follow the wizard to the confirmation point and you get to see the summary of the schedule. You can decide to wait for the scheduled time or you can manually run the initial backup by clicking Backup Once at the top right corner. The Backup process will take some time even though as it depends on how heavy your VM is.
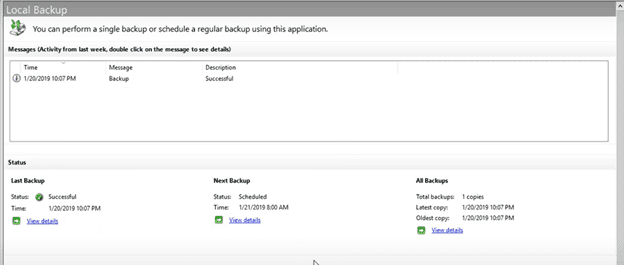
11. After the backup is successful you will get the overview page below
12. In the Windows task scheduler. Under backup, you will see the Windows backup schedule you created for your VMs.
Please refer to these related guides: An error occurred while attempting to connect to the server: Check if the virtual machine management is running, “how to Enable HyperV on Windows: How to install Windows 11 on HyperV“, how to back up an Azure VM from the VM settings, and How to enable Hyper-V on a VMware Workstation.

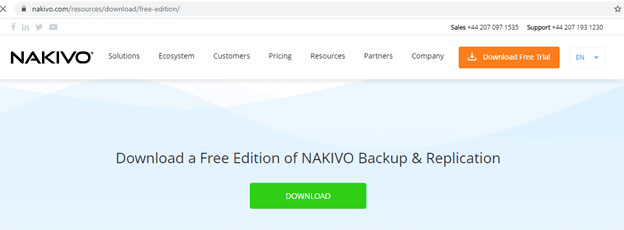
If you do not want to use Windows Server Backup, another Backup software you can use is NAKIVO.
Backup your Hyper-V VM with Nakivo
Download a free edition of NAKIVO Backup & Replication from the following link.
Kindly refer to these interesting articles: Map a Network Drive: How to mount a Network Drive, how to add or remove email addresses from a mailbox, how to increase Email Size Limits for your High Profile Users in Exchange 2010, and how to update Cisco ASA software from Cisco Website.
Create the Microsoft Hyper-V backup job
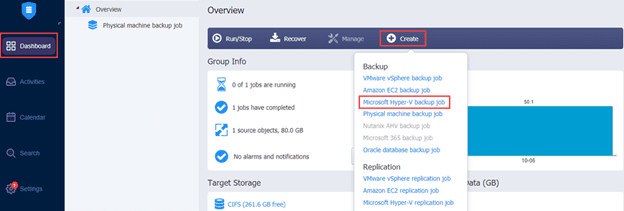
13. After downloading and installing NAKIVO, create a Microsoft Hyper-V backup job by clicking Create on the Dashboard and then clicking Microsoft Hyper-V backup job from the drop-down list.
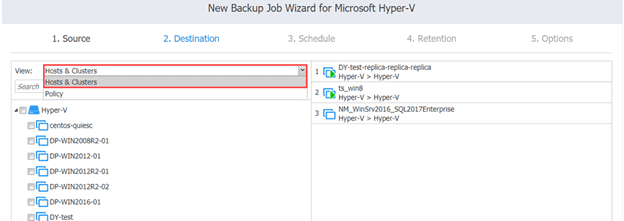
Then the New Backup Job Wizard for Microsoft Hyper-V opens.
14. The next page which is the New Backup Job Wizard for Microsoft Hyper-V is where the Hyper-V VMs that you want to back up (Source) are located.
Also in the (Destination), you will need to select where you want the backup to be, select the checkboxes of the desired destination and click Next.
15. You can also set different backup repositories for your VM’s

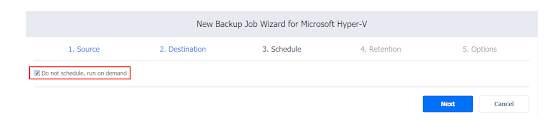
16. If you decide to run the backup job manually, you will select the Do not schedule, run on demand checkbox on the Schedule page.
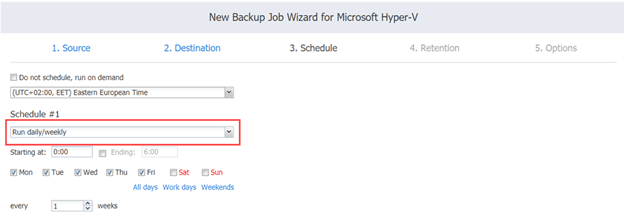
17. Next you need to configure the Job Schedule. Make use of the Schedule drop-down list. In the drop-down list, you will find the Run daily/weekly, Run monthly/yearly, Run periodically, and Run after another job. Considering your environment, you can select the kind of job schedule that fits you.
You are the one to make the decision on the kind of backup system you want to configure between the Windows Server Backup and Nakivo.
I hope you found this blog post on how to perform Windows Server backup with Nakivo or Windows Server backup utility very interesting and helpful. In case you have any questions do not hesitate to ask in the comment section.