In this guide, you will learn about Python Automation in Windows with Visual Studio Code. Visual Studio Code is a lightweight but powerful source code editor that runs on your device. VS Code is available for Windows, macOS and Linux. It comes with built-in support for JavaScript, TypeScript and Node.js. Kindly refer to these guides: How to deploy your Angular App to Azure from Visual Studio Code, and how to install Cypress on Windows and perform your first Automation test.
It has a rich ecosystem of extensions for other languages and runtimes (such as C++, C#, Java, Python, PHP, Go, and NET). I would recommend taking a look at “Run Python Script via Windows Task Scheduler“.
Python is a relatively easy-to-learn programming language. It has efficient high-level data structures and a simple but effective approach to object-oriented programming. Python’s elegant syntax and dynamic typing, together with its interpreted nature, make it an ideal language for scripting.
Before proceeding to install VS code, I will show you the need to have Python installed. As you can see from the image below we do not have an interpreter.

Note: Since Python is an interpreted language and to run Python code. You will have to instruct the Virtual Code (VS Code) on which interpreter to utilize. Once you’ve installed the Python extension.
Select a Python 3 interpreter by opening the Command Palette (Ctrl+Shift+P). Start typing the command Python: Select Interpreter to search, then select the command.
You can also use the Select Python Environment option on the bottom Status Bar if available. It may already show a selected interpreter. The command presents a list of available interpreters that VS Code can find automatically, including virtual environments.
How to install Python Correctly on Windows
Microsoft recommends installing Python from the Microsoft Store. Since installing from the Microsoft Store uses the basic Python3 interpreter, and handles the set-up of your PATH settings for the current user (avoiding the need for admin access), in addition to providing automatic updates. Please see how to deploy your Angular App to Azure from Visual Studio Code
Here are some more related guides: How to set up SonarLint in VS Code for your App Project, Ansible: No python interpreters found for the host, how to Run Python Script via Windows Task Scheduler, How to upgrade and downgrade PIP on Windows, and How to install Ansible on Windows with Cygwin.
Install Python on Windows
To install Python, kindly follow the steps below. Navigate to the Start menu (lower left Windows icon), type “Microsoft Store”, and select the link to open the store.
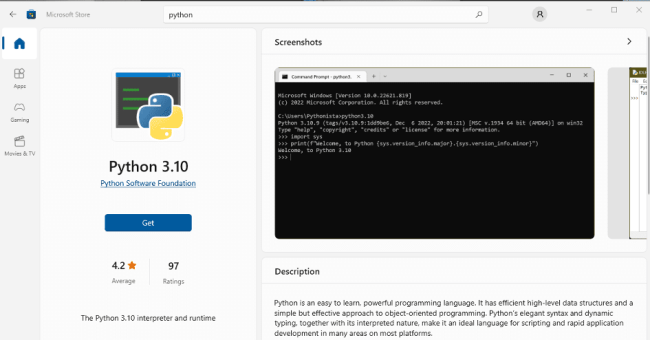
Once the store is open, select Search from the upper-right menu and enter “Python” as shown below. It is recommended to use the most recent version of Python. Unless you have a reason not to (such as aligning with the version used on a pre-existing project that you plan to work on).

Once you’ve determined which version you would like to install, select Get.
Python is currently being downloaded and will be installed very shortly. If you have installed Python and your VS Code Editor does not still recognize it. I would suggest you close and re-open the editor.

Now that you have installed Python, you can verify the version very quickly by running the following command: Python –-version. Also, Microsoft Store installation of Python includes pip, the standard package manager.
Pip allows you to install and manage additional packages that are not part of the Python standard library.
To confirm that you also have pip available to install and manage packages, enter the command below.
pip --version
Also, if you will be using Windows for Web development, Microsoft also recommends using the Windows Sub System for Linux for this purpose.
When coupled with the WSL extension, you get full VS Code editing and debugging support while running in the context of WSL. Please see how to Visualize MBAM Recovery Audit Report with Python.
Why do I recommend using Visual Studio Code?
By using VS Code as your text editor / integrated development environment (IDE). You can take advantage of IntelliSense (a code completion aid), Linting (helps avoid making errors in your code), Debug support (helps you find errors in your code after you run it), Code snippets (templates for small reusable code blocks), and Unit testing (testing your code’s interface with different types of input).
Also, see how to deploy a function app from Visual Studio to Azure Platform, and how to implement Interactive Authentication using MSAL dotNET.
Install Virtual Studio Code
Step 1: To download Virtual Studio Code, kindly proceed to this link. Click on the download link for your respective OS. Since I am focused on Windows, I will click on Windows 11 as shown below.

Double-click on the downloaded installer as shown below
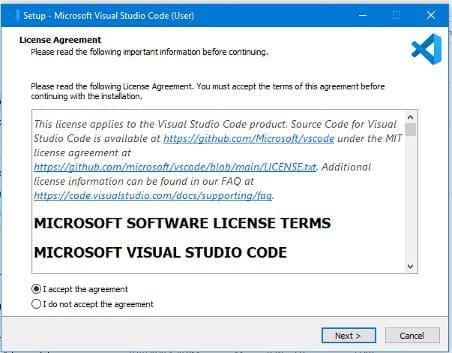
I am fine with the default installation location, I will click on continue
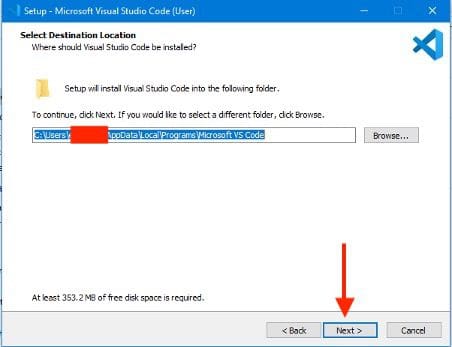
Click on Next on the next windows since I am fine with the defaults.

On select additional tasks, please select as your demand needs and click on continue. You can click a desktop icon in order to locate the visual studio code directly from the desktop instead of searching the start menu.

On the ready-to-install, click on install

As you can see, Visual studio code is being installed.

Click on Finish as shown below

Because you have the Launch Visual Studio Code, this will be opened automatically upon clicking on Finish.

Install Python extension
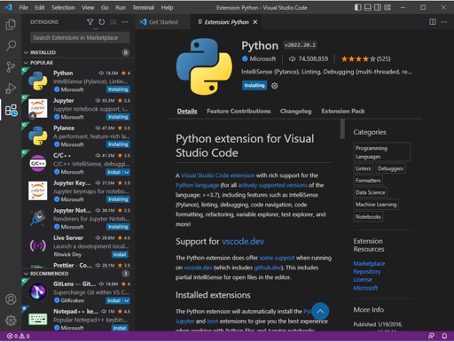
Once VS Code has been installed, you must also install the Python extension. To install the Python extension, you can select the VS Code Marketplace link or open VS Code and search for Python in the extensions menu (Ctrl+Shift+X).
In order to get the most out of Visual Studio Code, there is a need to have some extensions installed. You must install a Python interpreter yourself separately from the extension as we have done above. People often confuse this step by thinking the extensions are sufficient.
Note: The Python extension will install “Pylance”, “Jupyter” and “sort” extensions automatically to give you the best experience when working with Python files and Jupyter notebooks.
However, Pylance is an optional dependency, meaning the Python extension will remain fully functional if it fails to be installed. You can also uninstall it at the expense of some features if you’re using a different language server.
Note: You can also install Python Extended is a vscode snippet that makes it easy to write codes in python by providing completion options along with all arguments. You will find a lot of information on how to install Python and its extensions, how to debug, and how to run some basic python code, please see this link.
How to run Python Code
To experience Python, create a file using File Explorer named xxxxxx.py and paste in the following code for example print(“Hello World”). In subsequent guides, I will be working you through the automation of some systems and network tasks.
The Python extension then provides shortcuts to run Python code in the currently selected interpreter (Python: Select Interpreter in the Command Palette). In the text editor, right-click anywhere in the editor and select Run Python File in Terminal. If invoked on a selection, only that selection is run.
In Explorer: right-click a Python file and select Run Python File in Terminal as shown below.
Install Git for Collaboration with Python Projects
This step is optional. I will be creating another Guide on how to perform this task. If you plan to collaborate with others on your Python code or host your project on an open-source site (like GitHub), VS Code supports version control with Git. The Source Control tab in VS Code tracks all of your changes and has common Git commands (add, commit, push, pull) built right into the UI.
You first need to install Git to power the Source Control panel.Here are some guides we have written on how to download and install Git: How to install Git on macOS, how to clone a repository and install software from GitHub on Windows, Install Git on Windows: Practical Git use with markdown, how to install, register and start GitLab Runner on Windows, and how to uninstall Git on macOS.
But if you decide you no longer want to run Python Automation in Windows with Visual Studio Code, please follow the steps below to uninstall it.
Uninstall Virtual Code
This step is Optional: Only perform the step below if you do not wish to proceed with this specific IDE or wish to use another tool.
If you wish to uninstall Virtual Code for any reason, kindly proceed to Windows Settings, Apps and features and search or scroll down the installed application and have it uninstalled as shown below.

Click on the uninstalled button as shown above and select yes in the next uninstall window shown below.

To proceed with the installation, all instances of Virtual Studio code must be closed.

I hope you found this blog post helpful. In this getting started guide on Python Automation in Windows with Visual Studio Code, you have learned how to install Python, and Visual Studio Code for your python code development.
You will find other useful information in this link. If you have any questions, please let me know in the comment session.