Skip to content

TechDirectArchive

Hands-on IT, Cloud, Security, Veeam & DevOps

  • Home
  • About
  • Advertise With US
  • Reviews
  • Contact
  • Toggle search form

Set up OpenShift Cluster using Red Hat CodeReady Containers

Posted on 09/10/202128/08/2026 Christian By Christian No Comments on Set up OpenShift Cluster using Red Hat CodeReady Containers
  1. Home
  2. Linux
  3. Set up OpenShift Cluster using Red Hat CodeReady Containers
openshift

Red Hat OpenShift is the leading enterprise Kubernetes platform, built for an open hybrid cloud strategy. It is available as a fully managed cloud service on leading public clouds or as a self-managed software offering for organizations requiring more customization. In this article, you will learn how to set up OpenShift Cluster using Red Hat CodeReady Containers. Kindly refer to some of my related guides: Openstack Deployment with Devstack, Deploying a load balancer from scratch and adding backend servers, how to monitor services using Zabbix, and how to set-up PowerShell on a Linux server.

OpenShift is the industry-leading hybrid cloud PaaS hosted by RedHat. It allows developers to quickly build, test, deploy and scale container-based applications consistently anywhere across on-premise, public clouds, and edge environments.

Red Hat OpenShift includes an enterprise-grade Linux operating system, container runtime, networking, monitoring, registry, and authentication and authorization solutions. Automate life-cycle management to get increased security, tailored operations solutions, easy-to-manage cluster operations, and application portability.

Installation using CodeReady Container

CodeReady Containers is one of the easiest ways for developers to run a minimal OpenShift cluster on a local laptop or desktop for free at no cost. It is designed to run a single Openshift node as a virtual machine.

Here are some related guides: How to install a Windows server container host. Learn about OpenShift common Commands, how to fix failover Cluster Manager failed while managing one or more clusters, DNS Bad key 9017: The Cluster Name registration failed of one or more associated DNS names, and how to install and uninstall Docker Desktop on Windows.

System Requirements

CodeReady Containers can run on Windows 10, Mac OS 10.14 Mojave or a newer version, and on Linux. It supports RHEL/CentOS 7.5 or a newer version, Ubuntu 18.04 or a newer version etc.

It requires the following minimum hardware and operating system resources:

  • 4 virtual CPUs (vCPUs)
  • 8 GB of memory
  • 35 GB of storage space

Installation of OpenShift 4 Cluster using Red Hat CodeReady Containers

The following steps assume you are running on an RHEL machine and you would require the following packages.
NetworkManager
Libvirt

Step 1: Install the required software packages

$ su -c 'yum install NetworkManager'
image-65
image-66

Step 2: Install the CodeReady container by Downloading the latest binary file for CRC using the URL below. And also copy your image secret with the “Copy Pull Secret” link from the page. it would be needed later

$ wget https://mirror.openshift.com/pub/openshift-v4/clients/crc/latest/crc-linux-amd64.tar.xz
image-67

Extract the downloaded CodeReady Containers archive.

tar xvf crc-linux-amd64.tar.xz
image-68

create the ~/bin directory and copy the crc executable to it

 mkdir -p ~/bin
image-69
cp ~/Downloads/crc-linux-*-amd64/crc ~/bin
image-70

add the ~/bin directory to your PATH:

$ export PATH=$PATH:$HOME/bin
image-71
echo 'export PATH=$PATH:$HOME/bin' >> ~/.bashrc
image-72

Step 3:Deploy CodeReady Containers virtual machine

$ crc setup

Use this command to set up your host operating system for the CodeReady Containers virtual machine.

image-73
image-74

This would initiate a series of checks by the installer. And once its done you can finally start the openshift cluster on your local machine

crc start
image-75

Copy and paste the pull secret after a few moments. You should be given the login credentials and URL for the cluster and a message stating that CodeReady Containers is running.

image-76

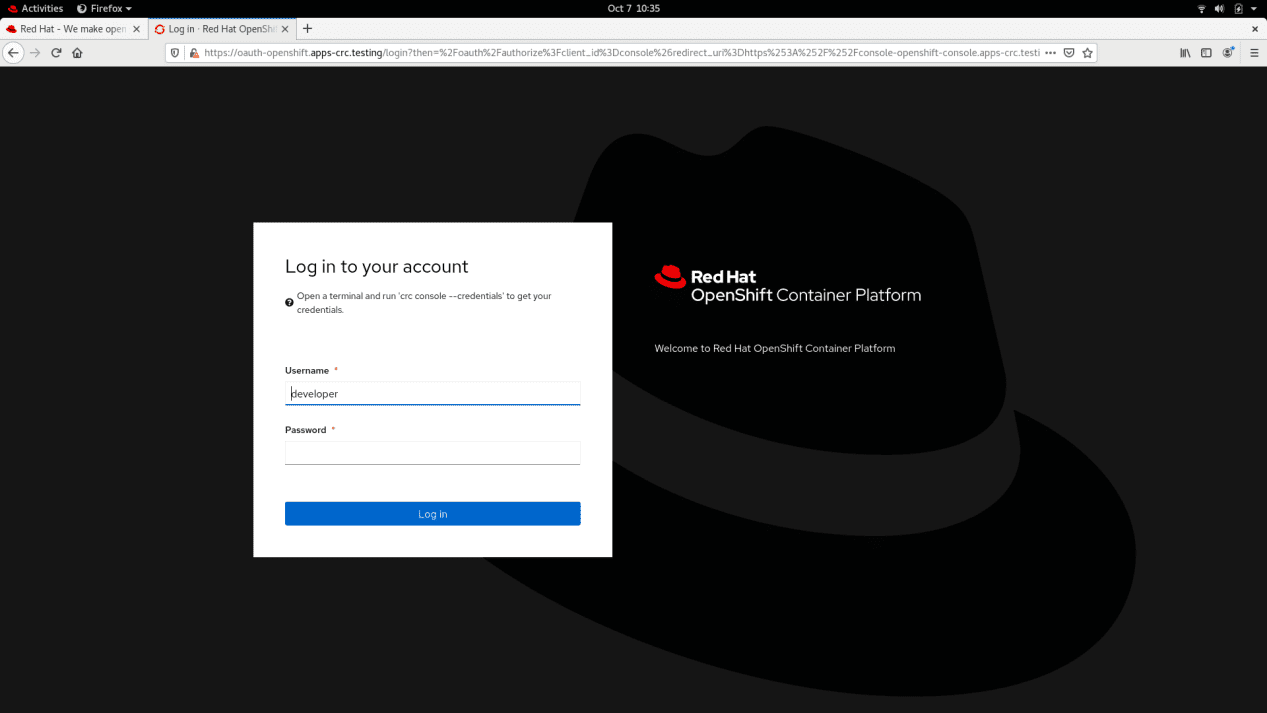
Step 4:Access OpenShift cluster. After deploying your OpenShift cluster locally. You can access it from the CLI or by opening the OpenShift console on your web browser with the URL provided.

openshift

Here are some related guides: How To Deploy Azure VMware Solution Private Cloud, Boot failure: How to fix EFI network timeout on VMware Workstation, and How to solve VMware workstation .lck error.

I hope you found this blog post helpful on how to Set up OpenShift Cluster using Red Hat CodeReady Containers. If you have any questions, please let me know in the comment session.

Thank you for reading this post. Kindly share it with others.

  • Share on X (Opens in new window) X
  • Share on Reddit (Opens in new window) Reddit
  • Share on LinkedIn (Opens in new window) LinkedIn
  • Share on Facebook (Opens in new window) Facebook
  • Share on Pinterest (Opens in new window) Pinterest
  • Share on Tumblr (Opens in new window) Tumblr
  • Share on Telegram (Opens in new window) Telegram
  • Share on WhatsApp (Opens in new window) WhatsApp
  • Share on Mastodon (Opens in new window) Mastodon
  • Share on Bluesky (Opens in new window) Bluesky
Linux

Post navigation

Previous Post: How to Install and Setup WordPress into a cPanel and Configure Your First WordPress Theme
Next Post: Deploy MVC Application to AWS EC2 Using RDP and Web Deploy

Related Posts

  • MV command in Linux
    Rename or Move Files or Directories in Linux with Bash Terminal Linux
  • ysvxdf
    Install and configure BigBlueButton on Ubuntu Linux Linux
  • linuxnethero
    Adding a subnetwork interface to an existing network interface Linux
  • Ubuntu on Windows
    Install Ubuntu 20.04 LTS on Windows via WSL Linux
  • trip wire feature
    How to install and configure Tripwire on Ubuntu Linux
  • etcconf
    How to configure user resource limits and restrictions in Linux Linux

More Related Articles

MV command in Linux Rename or Move Files or Directories in Linux with Bash Terminal Linux
ysvxdf Install and configure BigBlueButton on Ubuntu Linux Linux
linuxnethero Adding a subnetwork interface to an existing network interface Linux
Ubuntu on Windows Install Ubuntu 20.04 LTS on Windows via WSL Linux
trip wire feature How to install and configure Tripwire on Ubuntu Linux
etcconf How to configure user resource limits and restrictions in Linux Linux

Leave a Reply Cancel reply

You must be logged in to post a comment.

Microsoft MVP

vexpert-badge-stars-5

Virtual Background

VEEAMLEGEND

Categories

veeaam100

Veeam Vanguard

  • cimInstance wmi
    How to fix Get-CimInstance Access PermissionDenied Windows
  • create Microsoft 365 Account
    How to create Microsoft 365 Account Network | Monitoring
  • windows 10 s splash 100720578 large
    Open the location of a Program: How to search in Windows 10 to find a files or programs in File Explorer Windows
  • images 4 1
    How to export passwords from KeePass Database to Pleasant Password Server Password Manager
  • showdefenderupdate
    View Microsoft Defender Antivirus Update Details on Windows Image Windows
  • Copy files between host and workstation
    Various ways to copy files from host to VMware Workstation VM Virtualization
  • Microsoft365
    Microsoft 365 Backup: Why is it imperative to protect M365? Backup
  • Proxmox worker reduce concurrent task e1786470446393
    Fix Veeam Proxmox VE Backup Error: Failed to prepare disk for backup Backup

Subscribe to Blog via Email

Enter your email address to subscribe to this blog and receive notifications of new posts by email.

Join 1,757 other subscribers
  • RSS - Posts
  • RSS - Comments
  • About
  • Authors
  • Write for us
  • Contact
  • Advertise with us
  • General Terms and Conditions
  • Privacy policy
  • Feedly
  • Telegram
  • Youtube
  • Facebook
  • Instagram
  • LinkedIn
  • Tumblr
  • Pinterest
  • Twitter
  • mastodon
  • Bsky

Tags

Active Directory Azure Bitlocker Microsoft Windows PowerShell WDS Windows 10 Windows 11 Windows Deployment Services Windows Server 2016

Copyright © 2026 TechDirectArchive

Loading Comments...

You must be logged in to post a comment.