Starting with the Veeam Data Platform v13.1 release cycle, the automated Veeam Updater module was introduced specifically to streamline rolling out cumulative patches and security updates (such as version 13.1.1.18) directly from the management interface (web console) without requiring manual ISO mounting for every minor patch. Pleaase see 500+ VeeamAUX Clones on IBM FlashSystem: What Went Wrong?, and Inside an IBM LTO-6 Tape Drive: Gears, Motors and the Tape Mechanism — Part 2.
Veeam recommends deploying the Veeam Backup & Replication (VBR) server as a virtual machine to take advantage of hypervisor-level high availability features, such as vSphere HA and Fault Tolerance. This approach improves resilience against hardware failures while providing flexibility to scale resources as the infrastructure grows.
However, this article focuses on resolving Veeam Backup & Replication update failures caused by insufficient disk space, particularly when the available space on another partition cannot be used to extend the system drive because a Recovery partition sits between them as shown below.

Also, see Inside an IBM LTO-6 Tape Drive: Exploring Its Hardware and Electronics [Part 1], Hardening Veeam Backup & Replication on Windows 2025: A CIS-Compliant Walkthrough, and Unattended Gold Image & Hardened MSCB & CIS – Windows Server 2025 Image for Veeam Infrastructure.
Release Information: 13.1.2.57
Since I am currently on 13.1.1.18, I will be upgrading to Veeam Backup & Replication 13.1.2.57. This version was released on 27 October 2026, and it is a cumulative patch addressing customer-reported issues, security vulnerabilities, and product improvements. It introduces updated third-party components, VMware vCenter Server 9.1.1 support, and Google Cloud Plug-in 8.1, alongside several enhancements.
The update also resolves numerous issues affecting the backup console, Web UI, Veeam Updater, VMware vSphere, Hyper-V, backup repositories, and restore operations. The release ISO was repacked on 6 November 2026 to address a third-party Linux kernel vulnerability. Veeam recommends using Veeam Updater to receive future patches automatically. For more information, please head over to the following KB article.
Please see Your DR Network Is Probably the Part You Have not Tested, Your Hypervisor Exit Plan Should Be a Recovery Runbook, and Veeam Hyper-V Backup Failing with “Incorrect Function” During Checkpoint Creation.
Veeam Backup & Replication Upgrade Paths
The following table outlines the supported upgrade paths to Veeam Backup & Replication 13.1.2, based on the official Veeam KB2053.
Note: Migration from Windows-based Veeam Backup & Replication 13.1 to Veeam Software Appliance is not supported until the 13.2 migration path becomes available.
– Veeam Updater can be utlized for the uppgrade from 13.1 and 13.1.1 to 13.1.2.
– Versions 12.3 and earlier require intermediate upgrades as indicated in the table below.
– Veeam 11a deployments that do not interact with Nutanix AHV can upgrade directly to 12.3.x, skipping 12.0.
– Veeam 11a P20240304 requires version 12.1.2 or later and cannot upgrade to 12.0.
| Installed Version | Required Upgrade Path |
|---|---|
| 13.1.1 | 13.1.1 → 13.1.2 |
| 13.1 | 13.1 → 13.1.2 |
| 13.0.3 | 13.0.3 → 13.1.2 |
| 13.0.2 | 13.0.2 → 13.1.2 |
| 13.0.1 | 13.0.1 → 13.1.2 |
| 12.3.2 | 12.3.2 → 13.1.2 |
| 12.3.1 | 12.3.1 → 13.1.2 |
| 12.3 | 12.3 → 12.3.2 → 13.1.2 |
| 12.2 | 12.2 → 12.3.2 → 13.1.2 |
| 12.1 | 12.1 → 12.3.2 → 13.1.2 |
| 12.0 | 12.0 → 12.3.2 → 13.1.2 |
Please see Synology Surveillance365: Cloud-Based Camera Management Without an On-Premises Surveillance Server, Strategic breakdown and step by step guide to upgrading to VBR 13.1, and Veeam Oracle RMAN Troubleshooting: Connection Timeout, Broken Pipe and a Stuck RMANPluginManager.
Upgrade VBR to build 13.1.2.57
As shown in the table above, updating from VBR 13.1.1 to 13.1.2 is supported throigh the Updater Package and this help eliminate manaual patching. To learn more about the updater, please take a look at the Help Center on “How Updates Work“.
As you can see from the VBR Web UI Overview, there is a missing update as shown below. Therefore I can click on the “missing update” link or the bell or notification icon as shown below.

Upon clicking on the missing uopdates, new updates are dispayed in the Managed Servers as shown below. Next, I will click on Failed t installed some updates as shown below.

This will open the updates window. Please click on the the checkbox to select the updates you wish to install and click on Install now.

When pompted, click on Confirm.

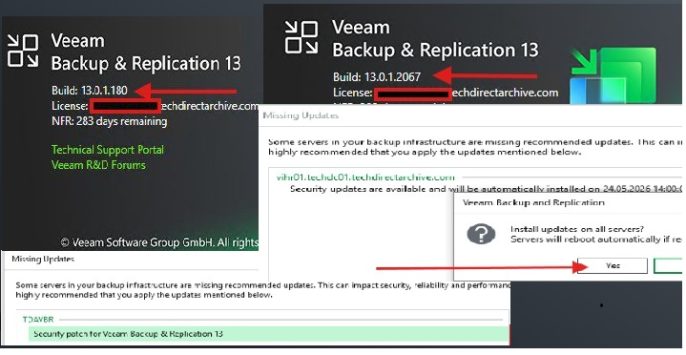
But before proceeding, let me show you the build I am currently running as mentioned above.

As you can see below, the updates are currently under way.

unfortunately, the updates (upgrade) could not be applied due to low disk space!

As you can see below, we are low on Drive C. Therefore, we have to fix this issue before attempting the upgrade again.

Please see SizeTrend: A Fast Windows Disk Space Analyzer for Storage Analysis, Veeam ONE 13.1.0.7034 Upgrade: Complete Pre-flight and Step-by-Step Guide, and Upgrading Veeam Backup Enterprise Manager to v13.1 and Applying System Updates.
Expand Disk Partition
As mentioned above, the low disk space shows the drive hosting the Veeam installation update directory has run out of free space. To fix this, you need to expand the disk partition by clicking on “Edit” the Hard Drive as shown below.
Note: To get to this settings, yu need the Hyper-V Manager since my VBR is running on Hyper-V. The select the VM and lcik on settings.

On the Edit Virtual Hard Drive Window and click on Next as the Expand window is the only available button at this time.

Since I already had a Partion “E” created for a different purpose previously. I will delete its volume and and extend Drive C with it. But let us create a new unallocated disk space first of 20 GB in addition to 160 GB we already have. Please ignore the fact I entered 190 here. I changed this to 180 GB afterwards.

Click on finish to the edit of the Hard Disk as shown below.

As mentioned above, I will extend Drive E and delete the volume at a latter time and extend this with Drive C.

I am now extending the new volume by right clicking on it

On the select disk, click on Next

Click on Finish to complete extending the Drive E.

As you can see, we cannot merge Drive C and E together as we currently have a different partition in between. That is, it doesn’t support merging non-adjacent partitions.

I have discussed this topic extensively in the past as shown here: Aomei Free Partition Manager: Fix unable to Extend Volume on Windows protected by BitLocker, and how to fix System Partition not available or large enough on Microsoft BitLocker Administration and Monitoring [Part 1].
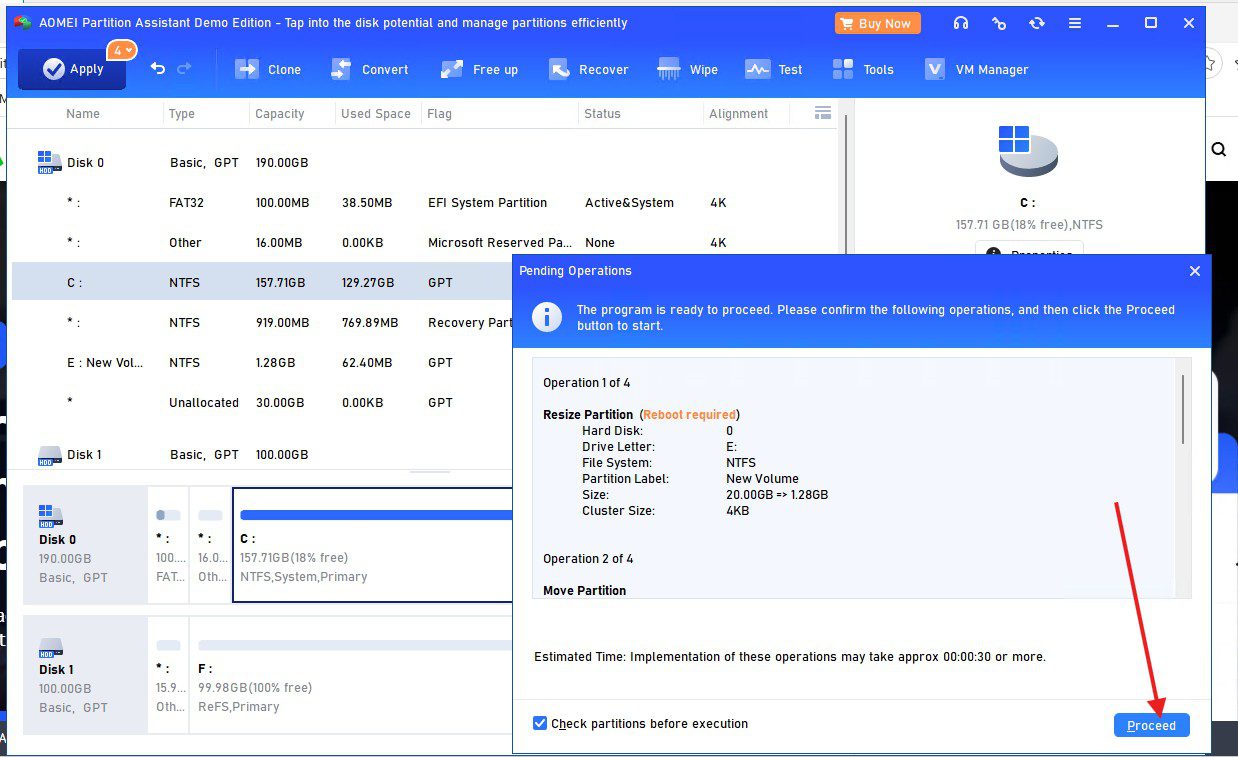
Also, see “A Review of MiniTool Partition Wizard – Disk Utility Tool, but this tool attracts a cost. You could also use “EaseUS Partition Master“

Fixing Non-Adjacent Partitions with a Free Tool
Note: You can manage and extend partitions in Windows using DiskPart (CMD), PowerShell, or third-party partition management tools. However, I have decided to use GParted in this guide because Windows DiskPart and PowerShell cannot move existing partitions to make unallocated space adjacent to the system drive.
Although GParted supports moving partitions, I encountered issues when attempting to move the Recovery partition. I therefore decided to delete the Recovery partition and use the resulting unallocated space to extend the C: drive. This allowed me to extend the system partition without moving the Recovery partition.
To fix this without losing data, we can use a free, reliable partition manager such as using GParted (the industry-standard open-source partition editor). It supports moving and resizing partitions. To proceed, I will hed over to the following website and download the GParted as shown below.

Since the ISO was downloaded from the internet, do not forget to right click on it and select properties to unblock it as shown below. This Windows security feature “called “Attachment Execution Service (AES)” attaches a hidden tag called the Mark-of-the-Web (MotW) to files downloaded from the internet.
You could also use the PowerShell command to unclock it: “Unblock-File -Path “C:\path\to\your\file.iso”.

Next, attach the GParted ISO to the VBR server (VM) via the HyperV Manager as shown below.

Before proceeding, create a snapshot, which is referred to as a checkpoint in HyperV. A checkpoint is not a substitute for a backup.
Please see how to create or delete snapshots on VMware Workstation, how to Create a Snapshot on vSphere Web Client, how to Manage VMware Snapshots: Delete or Edit or Revert a Snapshot, and Virtual Machine Snapshot vs Backup.

Enter the VM firmware settings, and move the DVD drive above the virtual hard disk in the boot order and click on OK.

If GParted does not boot, temporarily disable Secure Boot as shown below.

Next, start and connect to the VM.

Note: I also found out that selecting the default options as shown below gets the GParted Live boot process stuck.

As you can see below, GParted Live boot process is stuck and therefore unable to load its Linux kernel and initial boot environment due to hardware compatibility issues etc.

Please see how to create Synology Snapshot Replication, how to perform In-place upgrade of Veeam Recovery Orchestrator to version 13.1, and How to build and deploy a Docker Image with Kubernetes Cluster.
Fix Hyper-V: GParted Live no longer boots
I read that this problem was not present in earlier version of Windows Server 2022, 2025 Generation 2 VMs. But selecting the below entry from the boot menu resolved it “GParted Live (VGA with large font & to RAM”).
Note: Other modes of GParted Live entry also works with HyperV.

GParted environment is starting and configuring its hardware support before loading the graphical partition editor.

Click on OK in the Package Configuration

On the default “Don’t touch keymap”, click on Ok

I will hit enter for the default language


I will also proceed with the default mode to use GParted automatically.

Since the Move does not work well with GParted on Windows as I have tested, I will proceed and delete this partition. As mentioned, the move did not work correctly for me and therefore will delete the Windows Recovery Partition.
Note: It is safe to delete the 919 MB Recovery Partition (Disk 0 partition 4), but doing so will permanently disable the Windows Recovery Environment (WinRE). This means that the built-in advanced startup tools (like Startup Repair, Safe Mode recovery, or system restore prompts from boot) won’t be accessible unless you recreate it later

Please see Fix INACCESSIBLE_BOOT_DEVICE in Windows and Windows Server, how to fix Windows Boot Error 0xc0000098 (winload.efi), and Fix Veeam Proxmox VE Backup Error: Failed to prepare disk for backup.
Delete Recovery partition
First, let us disable the Windows Recovery Environment by uisng the command below. We can do this by opening an administrative Command Prompt which ensures it cleans up pointers cleanly.
reagentc /disable

Now, delete the recovery environment partition.

When prompted, click on Apply

As you can see, the operation has completed. Click on Cose of re-initite the GPart boot process if it is stuck if you intend to perform other operations.

Now, we have a free unallocated space. Let us extend the C drive this this unallocated space (deleted Windows Recovery Environment). To do this, right click on C and select extend and following the prompts.

Click on next on the select Disks wizard and click on Next

Click on Finish to complete this process.

Delete Volume
Since I no longer need the Drive E as mentioned perviously. I will now delete the volume (partition) as shown below by opening the Disk Management tool and right-click New Volume (E:). Then select Delete Volume.

On the confirmation prompt, click on Yes.

Noow that we have the unallocated space adjacent to C. We can now extend it without issues. To do this, right click on C and select extend

Follow the prompts and on the final wizard as shown below. Click on Finish.

As you can see. We have finally extended ou hard disk space
Re-enable the Windows Recovery Environment
With the command below, we can now recreate the Recovery Environment.
reagentc /enable
You can also check the status of the WinRE by launching command prompt as an Administrator
reagentc /info
As you can see, reagentc /enable successfully hooked into partition 3 (C: drive) and activated WinRE without needing a separate standalone partition.

Now, we can re-initiate the Veeam Backup and replication Update (upgrade).

Please see Google Drive Broken on Windows: Fix and Prevent it from happening again, How to fix Error 202: AMD Software Installer Fails to install Update, and Resolve Veeam ONE “The specified property cannot be found” and License Mismatch Errors During upgrade.
Click on the failed to check for update link once again.
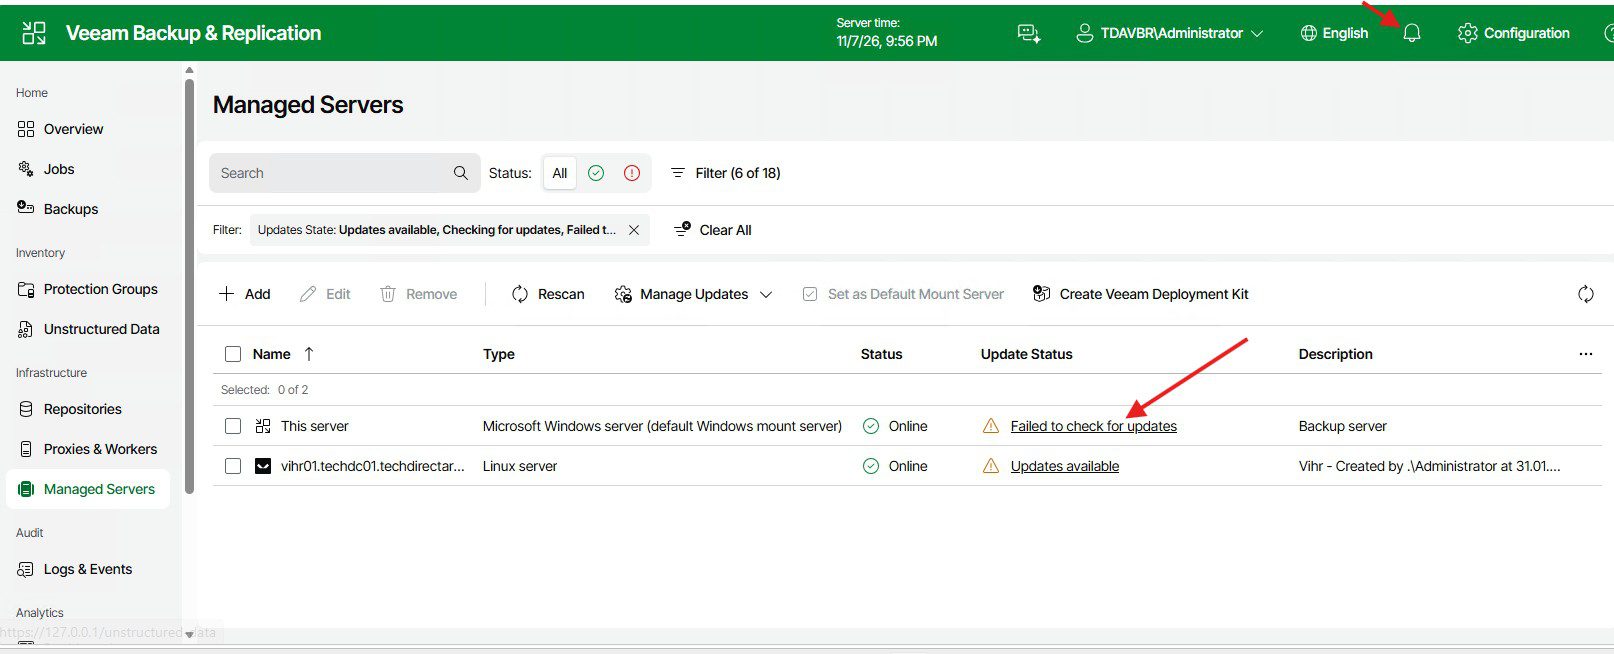
Once redirected, click on the checkbox to select the updates to install and click on install. When prompted, click on Confirm.

Note: Ensure the Jobs are disabled, else you will get the below errors

As you can see below, the updates are underway.
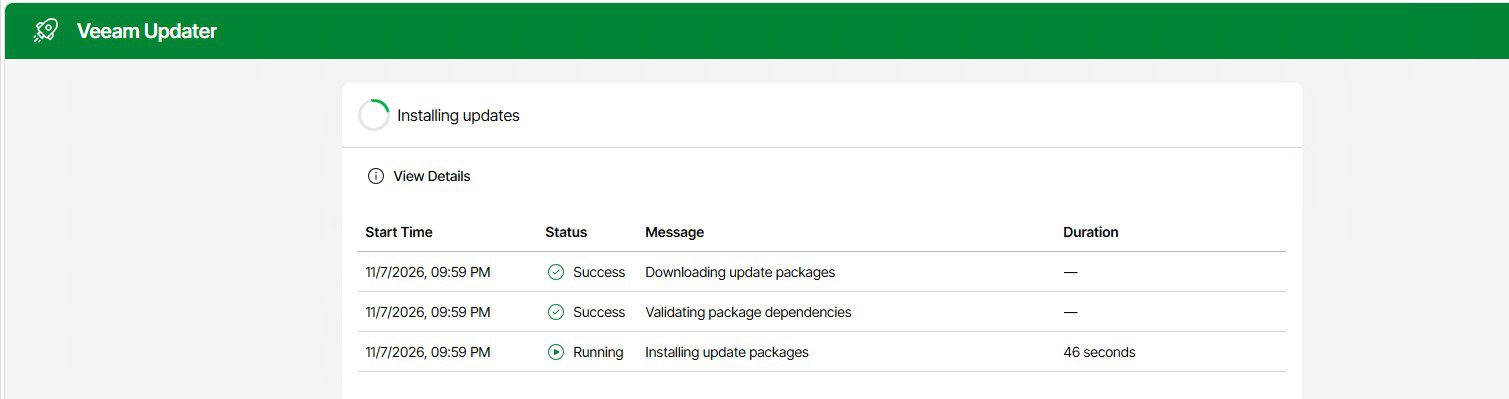

In between, some of the services could not be started. I then manually started the servies after adding more resources (vCPU and Meomory). Here are some similar concerns “[World Backup Day] V13 Upgrade Failure: Veeam Configuration Backup Saved the Day, and how to fix Failed to connect to Deployer Service Error“.

Services successfully started

As you can see from the dashboard, there are no more missing updates.

When you click on the link “failed to check for updates”, you will be redirected and will see that the servies are starting and that you should reload it.

I went to the sevices manager and manually started the updater service.

As you can see, when redirected. The system is up to date!

Let’s verify the current build. Upon the update via the Veeam updater, we are currently running build 13.1.2.57.


Now, proceed to enable the jobs as shown below.

You can also manually start some of the jobs as well if you want.

I hope you flound this article on “Upgrade Veeam Backup & Replication to v13.1.2.57: Fix VBR Update Failures Due to Low Disk Space on Windows Server” very useful. Please feel free to leave a comment below.